Written by
Yuri ZhangDoes removing the BitLocker recovery key mean that BitLocker protection is turned off or unlocked? The answer is No. Removing the BitLocker recovery key does not turn off BitLocker protection. It only deletes the backup of the recovery key from a particular location (like Azure AD, Active Directory, or local storage).
Incidentally, unlocking BitLocker allows you to access your encrypted drive but does not disable BitLocker. Encryption remains in place. To completely remove BitLocker encryption, you must decrypt the drive by turning off BitLocker in the Control Panel or through PowerShell.
After distinguishing the confusing part, let's dive into the specific approaches to remove BitLocker recovery key. If you want to stop BitLocker asking for recovery key every time, please refer to Troubleshooting Automatic BitLocker Recovery Screen
Reasons to remove the BitLocker recovery key
Removing the BitLocker recovery key is primarily a security or management decision, not a requirement for BitLocker itself. It does not disable encryption but simply removes a backup key used for recovery. You might want to remove the recovery key for the following reasons:
- To prevent unauthorized access for security, especially if the key is stored in Azure AD, Active Directory, or other locations.
- To comply with organizational policies or data privacy regulations, especially when a device is decommissioned or reassigned.
- To clean up old or unnecessary keys, especially after hardware changes or system upgrades.
- For compliance with data protection standards (e.g., GDPR, HIPAA).
Warning: You should only remove the key if you have a secure backup elsewhere, as removing it without a backup could prevent recovery in case of system issues.
How to remove the BitLocker recovery key from Azure AD or Active Directory
If you no longer want the BitLocker recovery key to be stored in Azure Active Directory or Active Directory, you can remove it using the respective admin portals.
Removing recovery key from Azure AD:
Removing the BitLocker recovery key from Azure Active Directory (Azure AD) can be a useful step if you no longer need the recovery key stored in the cloud and prefer to manage it locally.
- Go to Azure Portal and sign in with your admin credentials.
- Navigate to Azure AD > Devices.
- Under Azure Active Directory, go to Devices > All devices.
- Find the device whose key you want to remove and click on it.
- In the BitLocker recovery keys section, select the recovery key you wish to delete and click Delete.

Removing recovery key from Active Directory (for domain-joined devices):
A domain-joined device refers to a computer or device that is connected to a network domain managed by a domain controller typically using Microsoft Active Directory. This setup is common in business or enterprise environments, where devices are centrally managed, and users authenticate through a domain server rather than locally on the device.
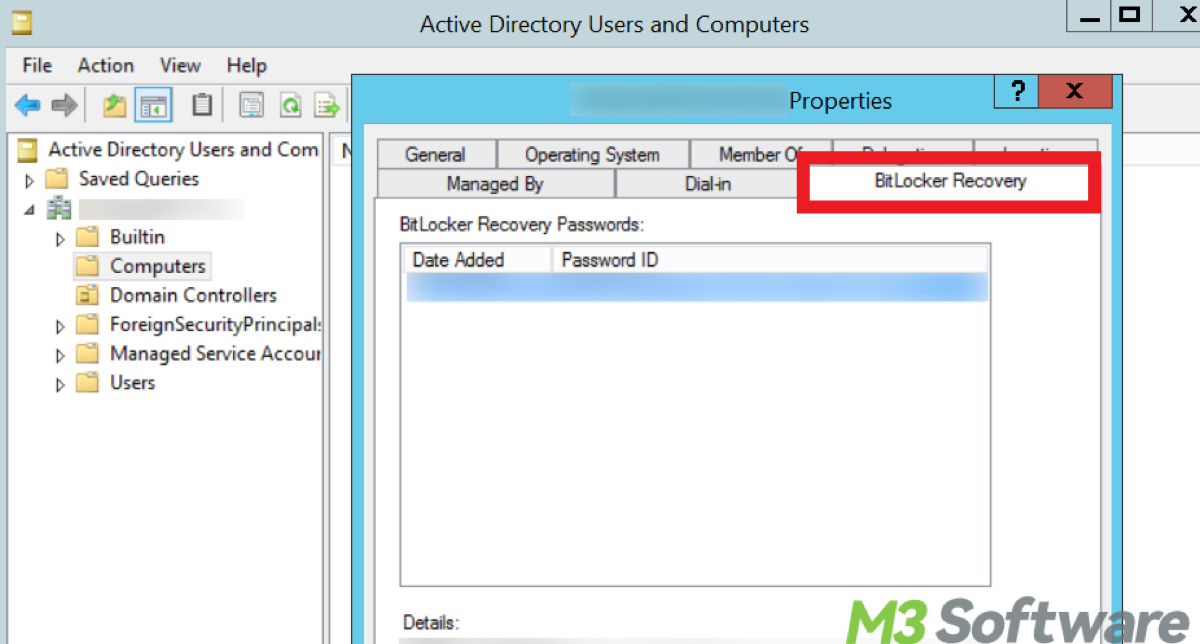
- On a domain-joined system, open Active Directory Users and Computers.
- Locate the computer object in the AD directory.
- Under the BitLocker Recovery tab, you can delete the recovery key stored in Active Directory.

Share this post and see if these guides suffice!
More ways to remove the BitLocker recovery key via Azure AD
If your BitLocker recovery key has been backed up to Azure Active Directory (Azure AD) and you want to remove it, there are a few ways you can do this depending on your level of access and whether you're managing a personal device or an organizational device within Azure AD.
Method 1: Remove BitLocker recovery key from Azure AD Portal (Admin access required)
If you're an Azure AD administrator and you have access to the Azure portal, you can remove the BitLocker recovery key for a specific device.
- Go to Azure Portal and sign in with your Azure AD admin account.
- In the left-hand sidebar, click on Azure Active Directory.
- In the Azure Active Directory pane, scroll down and select Devices.
- Under Devices, click on All devices to see a list of all the devices registered in Azure AD.
- Find the device for which you want to remove the recovery key. You can search for the device by name, and once you locate it, click on it.
- On the device's page, under the Device details, you should see an option for BitLocker keys or Recovery keys.
- Click on the BitLocker recovery keys link to view the recovery keys stored in Azure AD for that device.
- Once you're viewing the recovery keys, you should see a list of BitLocker recovery keys associated with that device.
- Select the recovery key you want to remove and click on the "Delete" button (usually represented by a trash can icon) to remove the selected recovery key from Azure AD.
- Confirm the deletion when prompted. The recovery key will be permanently removed from Azure AD.
Tips: Deleting the recovery key from Azure AD does not affect the encryption on the device itself; it just removes the backup of the key from Azure AD. If you delete the recovery key, you will no longer have the option to recover the device using the key stored in Azure AD. Make sure to have a backup or other recovery options in place before removing it.
Method 2: Remove BitLocker recovery key via PowerShell (Admin access required)
If you prefer using PowerShell and you have admin access to the device, you can manage BitLocker keys and remove them from Azure AD by using PowerShell commands.
- Press Win + X and choose Windows PowerShell (Admin) to open PowerShell with administrative rights.
- To confirm that the BitLocker recovery key is backed up in Azure AD, you can run the following command:Get-BitLockerRecoveryInformation
- This command will list any recovery keys associated with the device. If the recovery key is backed up to Azure AD, you'll see an entry for it.
- If the recovery key is listed and you want to remove it from Azure AD, you can use the Clear-BitLockerKeyProtector cmdlet. For example:Clear-BitLockerKeyProtector -MountPoint "C:" -KeyProtectorId <KeyProtectorId>
- Replace <KeyProtectorId> with the ID of the protector you wish to remove, which you can obtain from the Get-BitLockerRecoveryInformation command output. This will remove the key protector for BitLocker, including any keys backed up to Azure AD.
- After running the above command, you can use the Get-BitLockerRecoveryInformation command again to confirm that the key has been removed from the system.
Method 3: Remove BitLocker recovery key from Azure AD via Microsoft Intune (for managed devices)
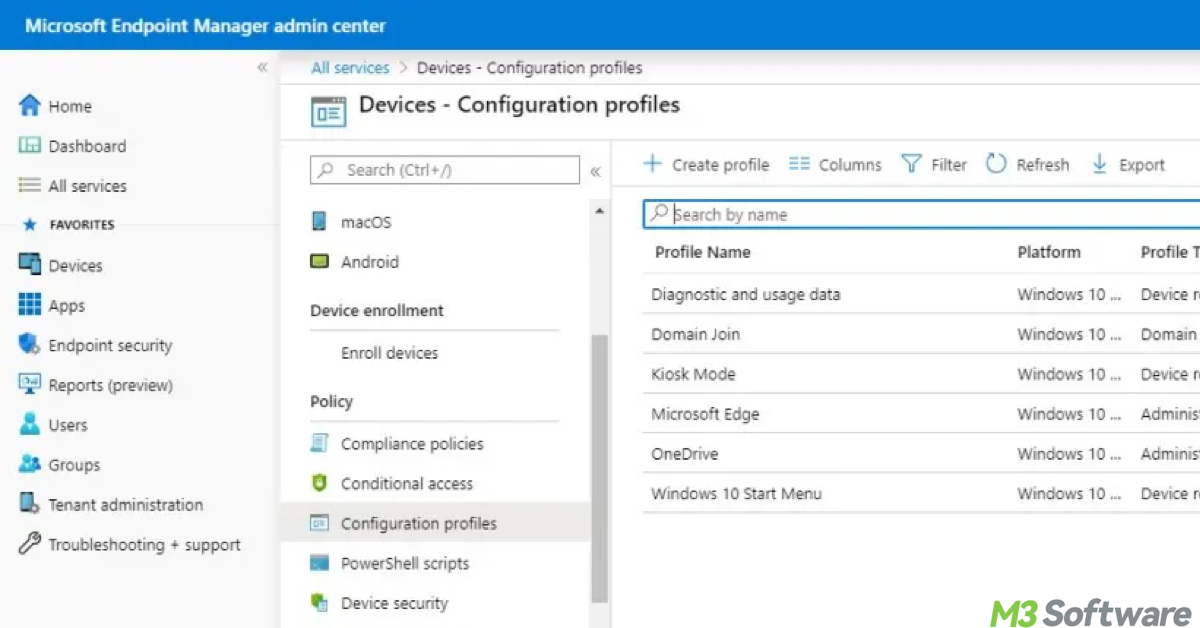
If your organization is using Microsoft Intune to manage devices, the BitLocker recovery key might be stored in Intune as part of device management. If you're an administrator, you can remove the recovery key via the Intune portal.
- Go to Endpoint Manager Admin Center by visiting Intune portal and sign in with your admin account.
- In the left-hand menu, click on Devices.
- Find the device for which you want to remove the BitLocker recovery key. Click on the device to open its details.
- On the device's page, navigate to BitLocker keys (this may be listed under the Encryption or Recovery section).
- Once you see the recovery key associated with the device, click on the option to delete or remove the recovery key.

Final thoughts
It is not recommended to remove or delete the BitLocker recovery key from the original location where it was generated, especially if you are uncertain about where to store it safely. For security, key management, or preventing stale keys, you can choose to remove the BitLocker recovery key.
Deleting the recovery key from Azure AD will not decrypt the drive or disable BitLocker. It only removes the key from the Azure AD backup location. Please make sure you have an alternative recovery option before deleting the key.
The recovery key is crucial for unlocking your drive if you forget your password, or if the system experiences other issues. Without a recovery key, you won't be able to recover the data. Remember always back up your BitLocker recovery key in multiple locations, try to print it, save it to a USB drive, or store it in another secure place before making any modifications.
Share this and involved in the discussion, and we will provide you with more foolproof guides for Windows usage.
