
Written by
Yuri ZhangSummary: This article states four ways to enable Storage Sense via Setting, Group Policy, Registry Editor & PowerShell. Despite Storage Sense can do an automatic cleanup, iBoysoft DiskGeeker comes to front with straightforward display and versatile uses.
Have you heard of Storage Sense? This feature is to help maintain optimal storage by automatically cleaning up unnecessary files. For practitioners who stores myraids of data in their device, it's must known.
Let's immerse into various methods of activating and configuring Storage Sense in Windows, this article may offers the most complete ways among the internet guides.
Overview of Storage Sense
The Storage Sense feature is a built-in tool in Windows 10 and 11. Its primary function is to manage your disk space by deleting unnecessary files such as temporary files, files in the Recycle Bin, and files in the Downloads folder. It can be set to run automatically or manually based on a schedule or when disk space is low.
Tips: If Storage Sense is unavailable in your PC, it usually means your system is running an outdated version of Windows. You can upgrade to the latest version. If you're already on a supported version of Windows, ensure you've installed the latest updates.
How to activate Storage Sense in Windows for all users
There are several ways to enable Storage Sense on Windows, depending on the version and configuration of your system. Here's a breakdown of those methods:
1. Enable Storage Sense through Settings
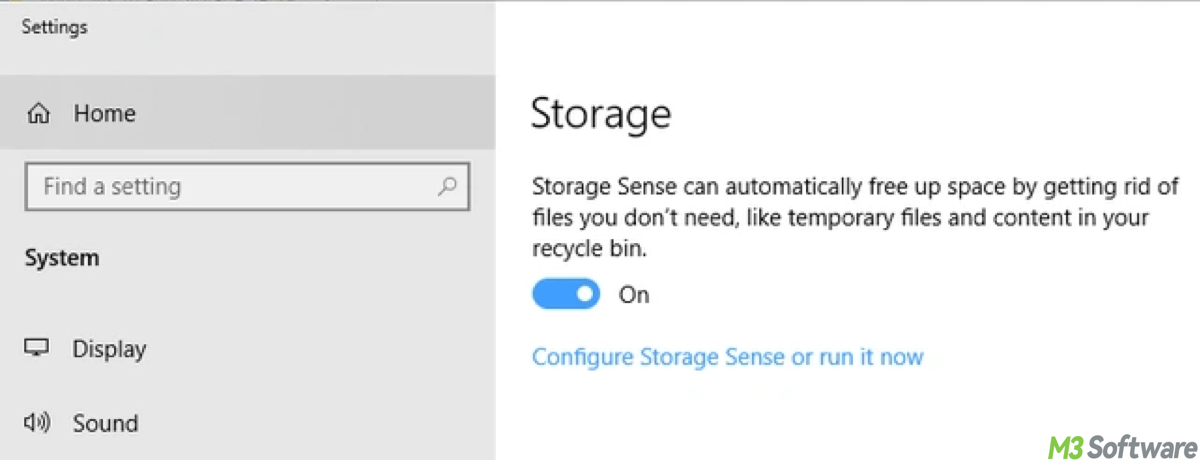
The simplest and most direct method for enabling Storage Sense is through the Settings menu. You can toggle it on from Settings > System > Storage and further configure it based on your preferences.
Note: To customize how Storage Sense works, click on Configure Storage Sense or run it now. Here, you can choose when to run Storage Sense (e.g., every day, week, month, or when disk space is low), and which types of files it should clean (such as temporary files, old files in Downloads, or files in the Recycle Bin). After configuring, click OK or Save to apply the changes.
2. Enable Storage Sense with Group Policy (GPO)
For users running Windows Pro or Enterprise versions, or in enterprise environments, Group Policy allows administrators to enable Storage Sense across multiple devices. This is particularly useful for IT administrators managing large fleets of devices.
- Press Windows + R, type gpedit.msc, and press Enter to open Group Policy Editor.
- In Group Policy Editor, go to Computer Configuration > Administrative Templates > System > Storage Sense.
- Double-click on Enable Storage Sense.
- Select Enabled and click OK.
- Open Command Prompt and run following command to force Group Policy update:gpupdate /force
3. Enable Storage Sense via Registry Editor
For advanced users, modifying the Windows Registry can enable Storage Sense. While this is not as straightforward as using Settings, it provides another way to activate or configure the feature when Settings or Group Policy isn't an option.
- Press Windows + R, type regedit, and press Enter to open Registry Editor.
- Go to the following path:HKEY_CURRENT_USER\Software\Microsoft\Windows\CurrentVersion\StorageSense\Parameters\StoragePolicy
- If the StoragePolicy key doesn't exist, create it by right-click on the right pane and selecting New > DWORD (32-bit) Value.
- Then double-click on StoragePolicy and set its value to 1 to enable Storage Sense.
- Restart your PC for the changes to take effect.
4. Enable Storage Sense using PowerShell
PowerShell offers a quick way to modify system settings programmatically, making it an efficient for automating the process.
- Right-click the Start button and select Windows PowerShell (Admin).
- Run the Command to enable Storage Sense:Set-ItemProperty -Path "HKCU:\Software\Microsoft\Windows\CurrentVersion\StorageSense\Parameters\StoragePolicy" -Name "Value" -Value 1
You can verify that Storage Sense is now enabled by checking Settings > System > Storage.
Storage Sense's pros and cons
Understanding its benefits and limitations is crucial to deciding if it fits your storage management needs. Here are its pros:
- Saves time by running automatically and removing unnecessary files, including temporary files and files in the Recycle Bin.
- Helps free up space, which can lead to better system performance, especially on devices with limited storage.
- You can adjust the frequency and types of files Storage Sense cleans, making it flexible to user needs.
Nevertheless, it has unignorable flaws:
- If not configured properly, it may delete files you want to keep, especially in the Downloads folder.
- Users may find the granular control over specific file deletions lacking, leading to unwanted file removal.
- While it handles many types of files, there may still be residual junk files that need manual cleanup.
To prevent its drawbacks, including accidental deletion, limited control, and not always comprehensive, you can choose to disable Storage Sense or just use iBoysoft DiskGeeker for Windows to do safe batch files deletion while checking each file's deleted-to-be content, it makes amends for what's absent in Storage Sense.
iBoysoft DiskGeeker is a prestigious tool in monitoring and cleaning your computer storage. More surprisingly, it does not necessitate your Windows being Pro/Enterprise or 10/11 version. Embrace this compatible and easy-to-operate tool, instead of just using the built-in Storage Sense feature with restriction!
Share this paramount tool and continue to see how it works.
How to use iBoysoft DiskGeeker for Windows to tidy storage
Step 1: Download and launch iBoysoft DiskGeeker for Windows.
Step 2: Select a space analysis feature from "Space analyzer" module.
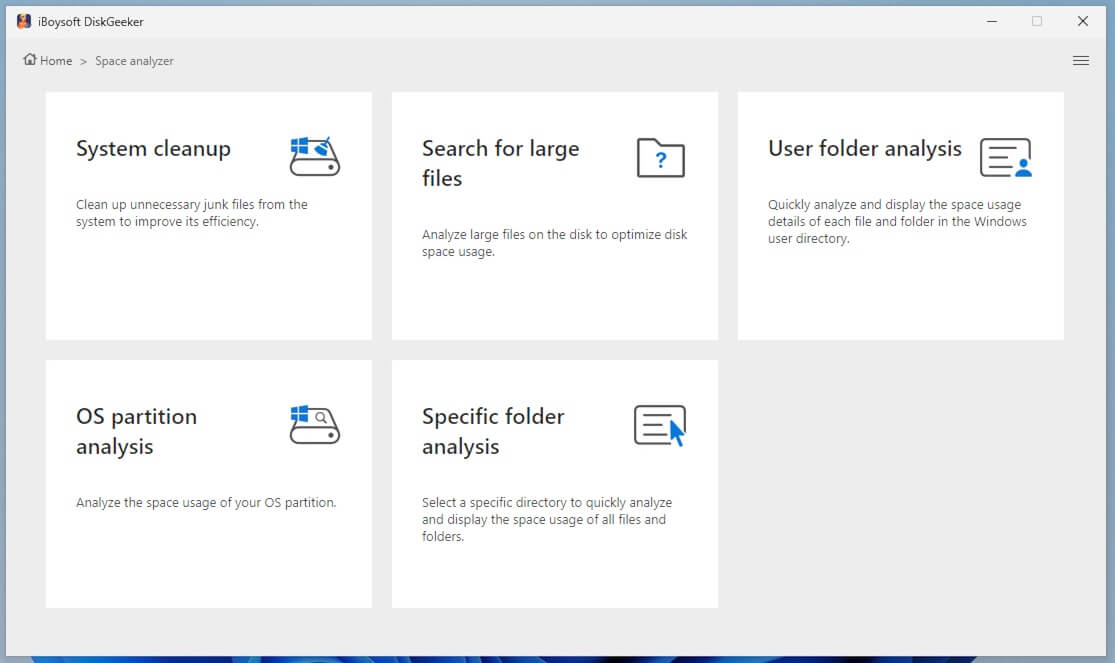
Step 3: iBoysoft DiskGeeker for Windows will analyze the files in the selected location.
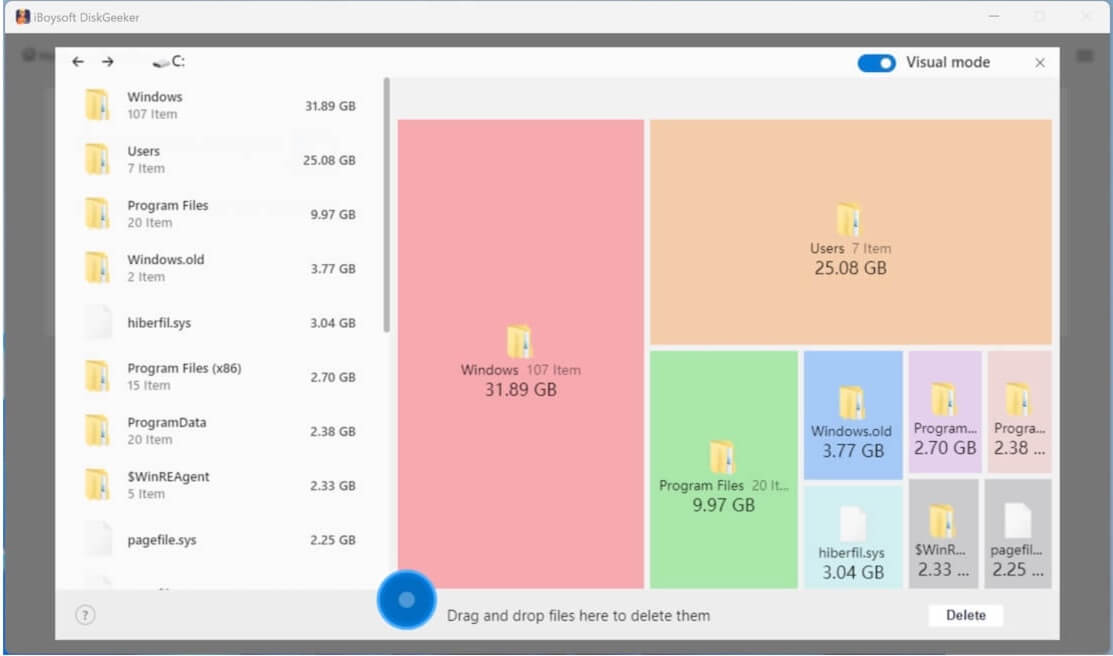
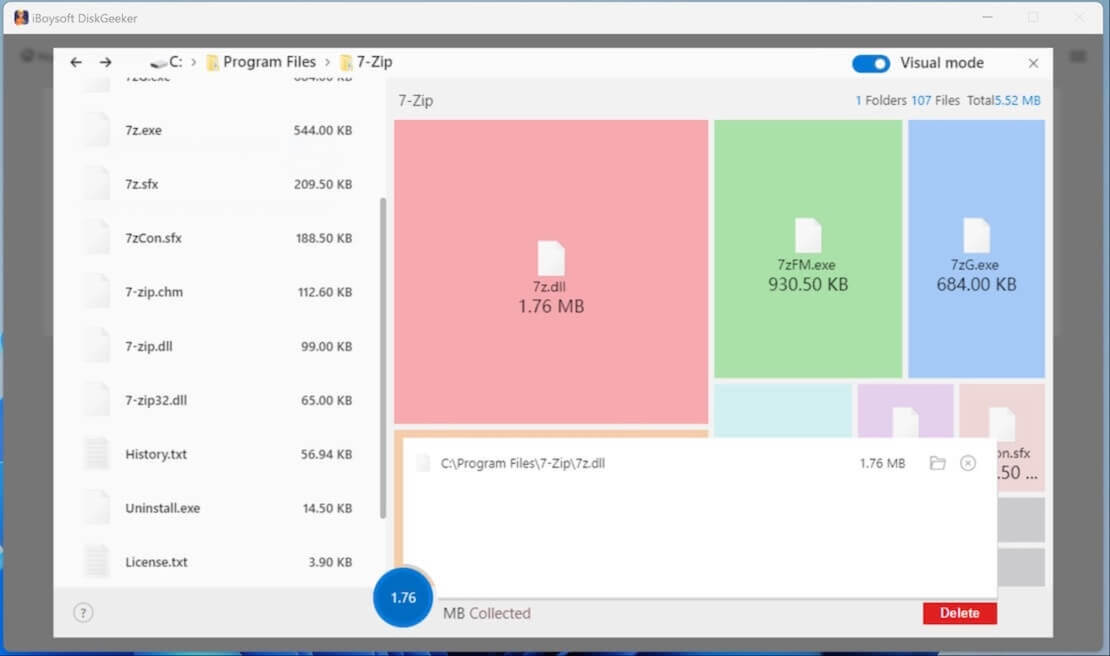
Step 4: Check the scanned results by clicking the listed folders. The scanned results are showed in two modes: Visual mode and Non-visual mode.
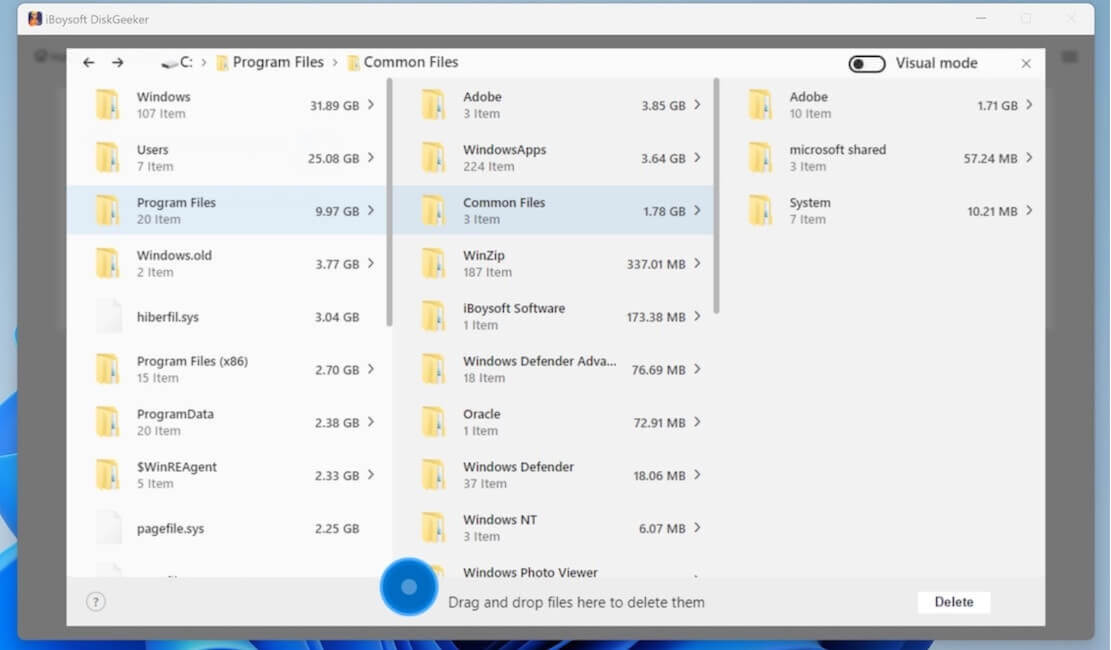
- In visual mode, the left and right views are the same level directories, and the right view is a visual presentation of the files in the left view. Turn off the Visual mode button in the upper right corner, you can only see the text table of contents.
- In non-visual mode, the software displays the preceding and following levels of directories of the current path (a total of three levels of directories). When there are less than three levels of directory structure, it displays all path structures.
Step 5: Select unwanted files, drag and drop them to the Trash Bin at the bottom (a blue circle).
(If you regret moving a certain file to the blue Trash Bin, click on the Trash Bin and then click the remove/Cross button next to the file to move it out.)
Step 6: Click "Delete" to permanently remove the files in the blue Trash Bin.
Related articles:
Cloud storage vs. external SSD or SD storage
How to find downloaded files in Windows
How to check total hard disk space in Windows
Share this if it brings you strength and color to the computer usage.