
Written by
Yuri ZhangWhen we download files on our Windows computer, it might sometimes feel like they're disappearing into thin air. This can happen for several reasons, and the location of downloaded files can seem inconsistent.
Wondered where your downloaded files go, why they seem to change locations every time, and how to find them. Let's walk through these challenges and practice solutions to keep downloads organized.
Where are our downloaded files in Windows?
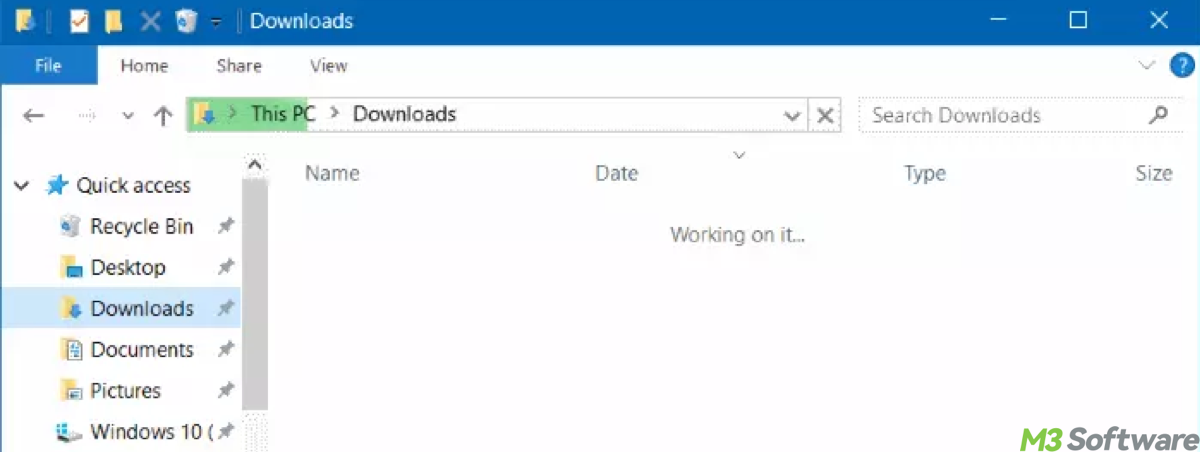
The most common place where downloaded files are stored in Windows is the Downloads folder. By default, browsers and apps save files here, and it's the first place you should check. To access this folder:
- Open File Explorer by pressing Windows + E.
- On the left sidebar, look for the Downloads folder, which is usually listed under This PC or Quick Access.
- Click on it to see your recent downloads.
If you can't find your files here, don't panic, there are other ways to locate them.
Why do our downloaded files appear in different places?
Why are the whereabouts of downloaded files different every time? The reason is often linked to your browser or system settings. Here are a few possible reasons:
- Most browsers (like Chrome, Firefox, Edge) allow you to choose where you want to save downloaded files. If you've set your browser to ask for a location every time you download something, the files may end up in various folders.
- Sometimes, files are automatically saved to custom locations, like your desktop, cloud storage (OneDrive, Google Drive), or other specific folders.
- Some downloaded files might temporarily land in a system folder (like the Temp folder) before being moved to a permanent location.
- If you use cloud services like OneDrive or Google Drive, your downloads might sync across multiple devices, creating some confusion about their whereabouts.
Share these insights to inspire those confused about the location of downloaded files.
How to find downloaded files in Windows
Now that we know why downloaded files can be elusive, let's explore how to locate them effectively.
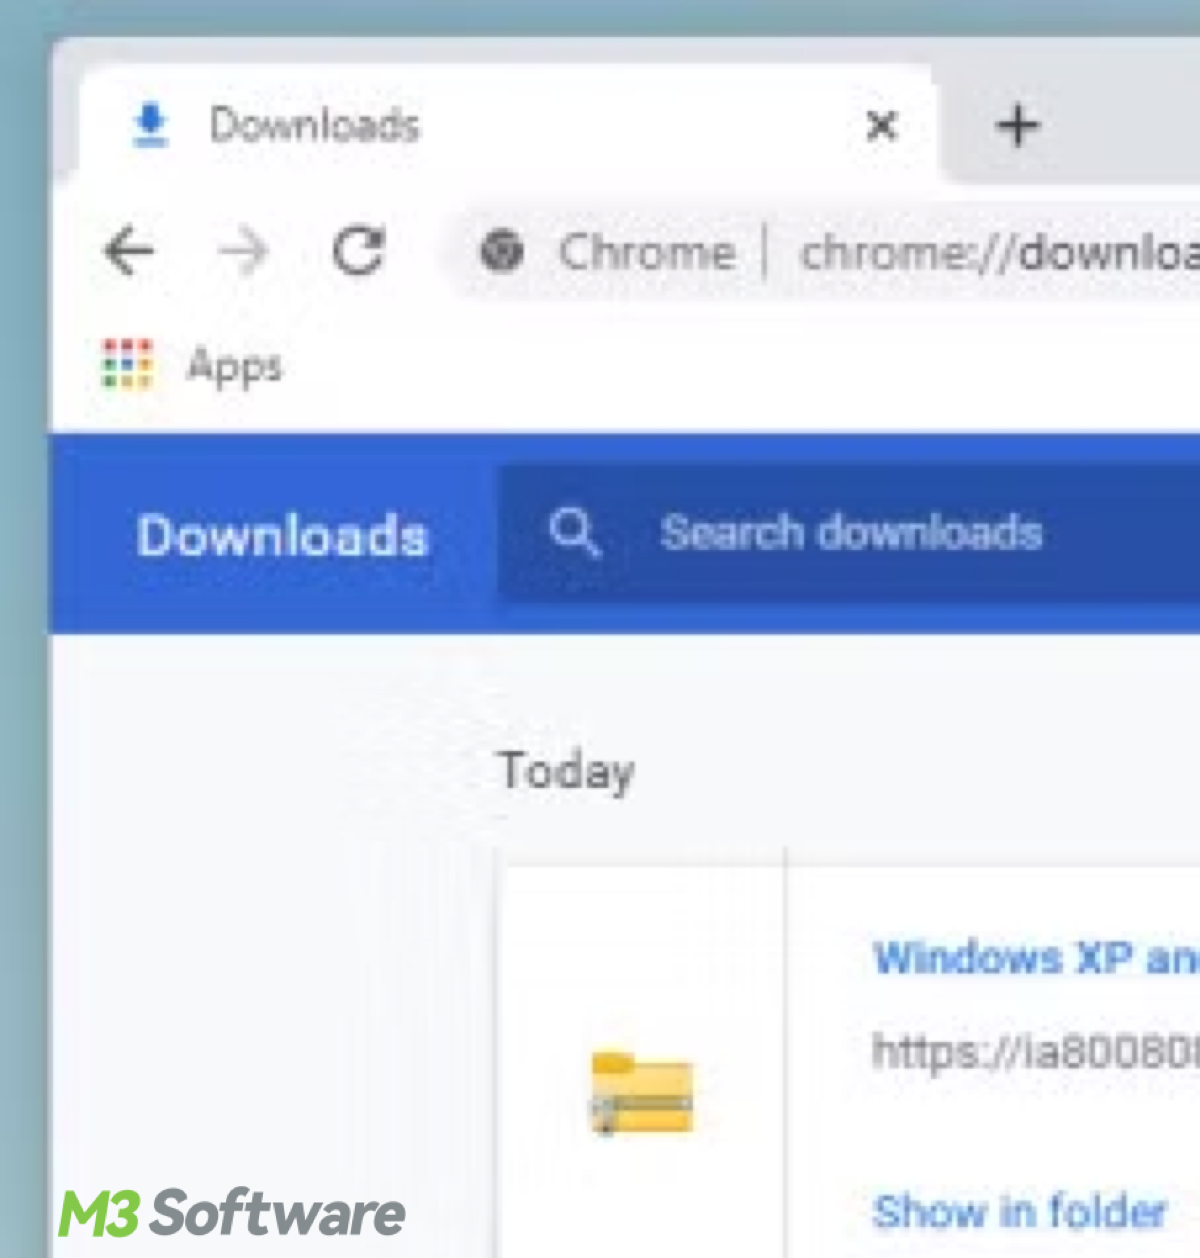
1. Check your browser's download history
Browsers like Chrome, Firefox, and Edge keep a history of all your downloads. You can access this history and find the file by:
- Pressing Ctrl + J to open the download history.
- Clicking Show in folder next to the file you're looking for. This will take you directly to its location.
2. View your browser's default download location
If you've forgotten where your browser is saving files, go to your browser's settings and check the download settings:
- In Chrome, navigate to Settings > Advanced > Downloads.
- In Firefox, go to Settings > General > Files and Applications.
- In Edge, go to Settings > Downloads.
3. Use Windows search
If you remember the name (or even part of the name) of the file, you can use Windows' built-in search feature:
- Press Windows + S and type the file's name in the search bar.
- Results will appear, and you can click to open the folder containing the file.
Tips: If you don't remember the exact file name but know the type (e.g., PDF, JPG, DOCX), you can search for specific file extensions: Type .pdf for PDF files, .jpg for images, .docx for Word documents, and so on, in the search bar.
Tips: how to prevent future download location confusion
To avoid the frustration of losing track of where your downloaded files go, here's how to set up a consistent download location:
- If you don't want to be asked every time, set a default download location in your browser settings. Most browsers allow you to choose a specific folder for all downloads.
- Or stick to the Downloads folder (or a custom folder you've created specifically for downloads) to keep things organized. Make sure your browser settings reflect this preference.
- Avoid confusion with temporary downloads by regularly cleaning out your system's temp folders, or by adjusting your system to always save directly to your Downloads folder.
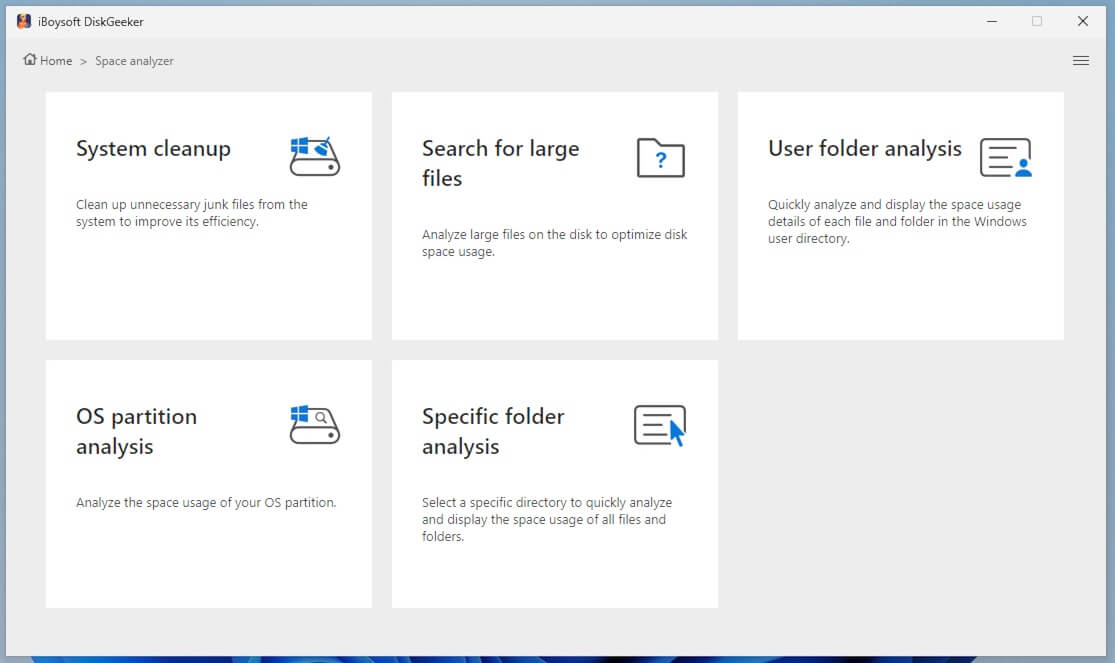
How to search for large files in Windows
If you care for screening out or filtering certain sizes of files for modification or deletion, use iBoysoft DiskGeeker for Windows to find large files on your device. What's better, it also can clean your system's junk files and analyze your disk space, click the green button to have a magic trial, and explore it with ease.
Here's a tutorial to find and clean large files:
Step 1: Download and launch iBoysoft DiskGeeker by clicking the green button above.
Step 2: Click "Search for large files" from the Space analyzer module.
Step 3: Select a Partition to scan for large files.
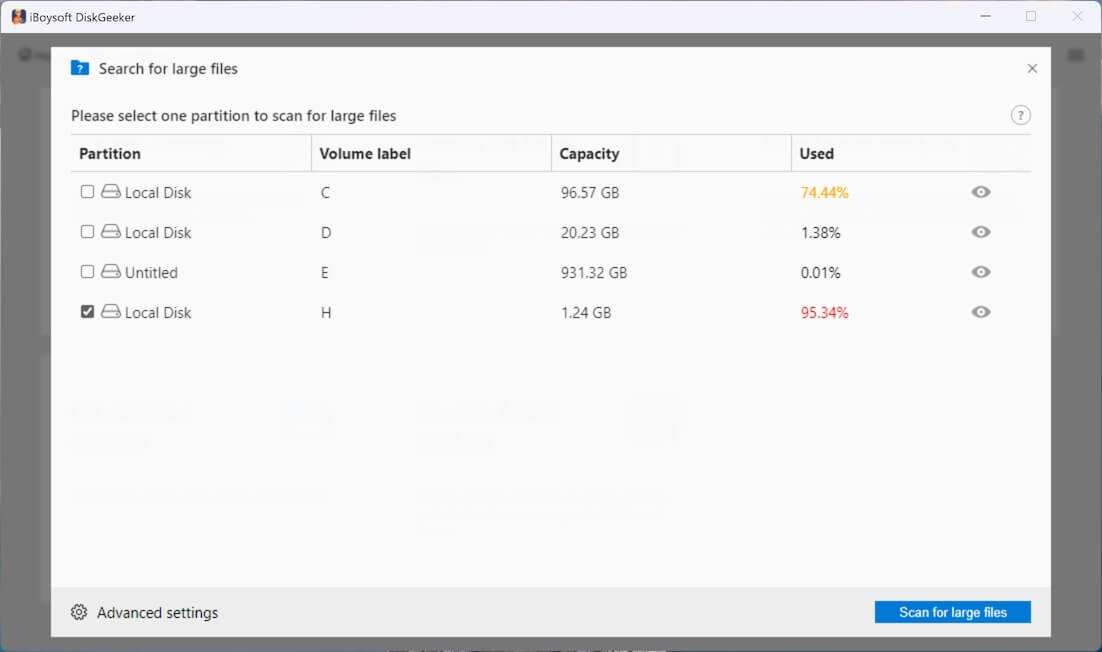
Note: For the initial large file searching, you need to go to "Advanced settings" at the bottom left corner to set the minimum file size for scanning. Here, you can also add the file extension to prevent the tool from searching for certain files.
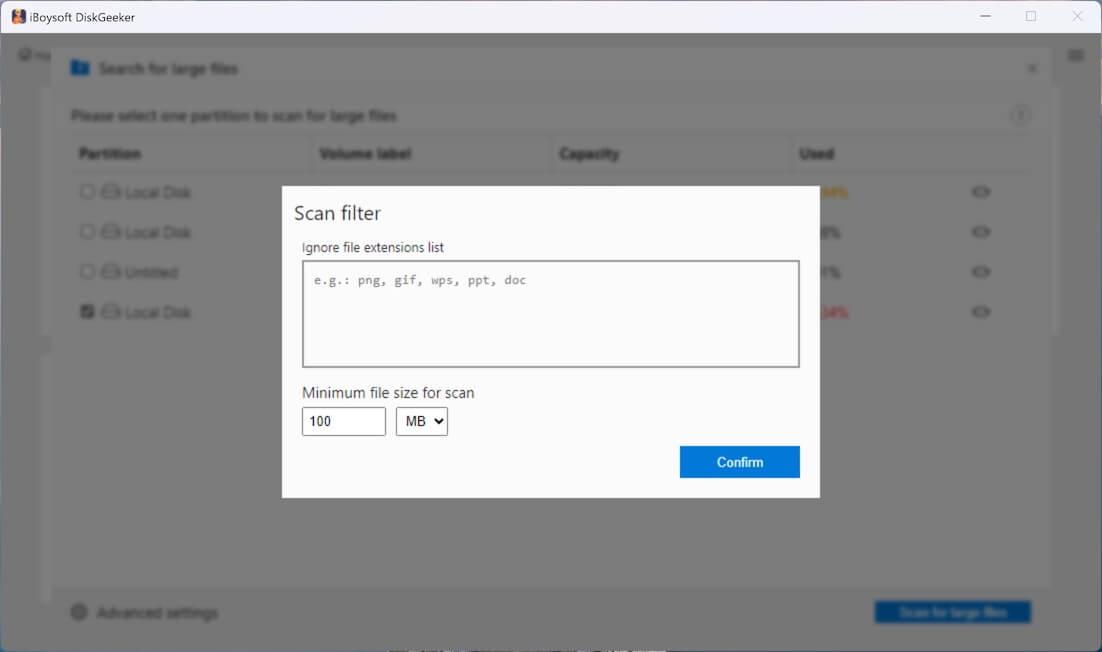
Step 3: Click "Search for large files" to start scanning.
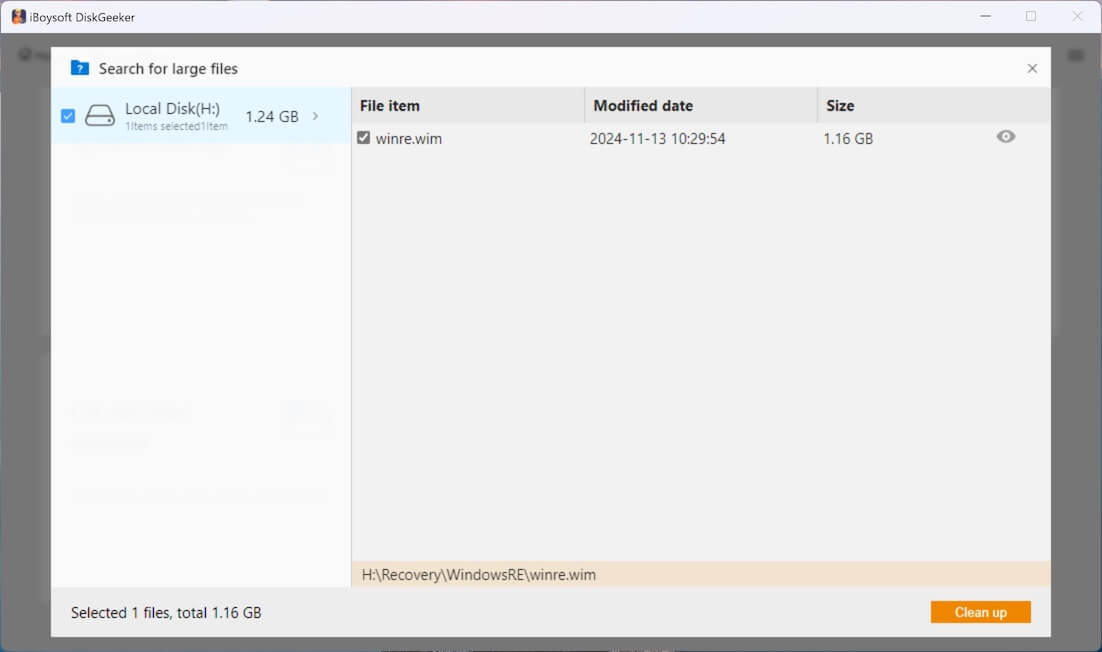
Step 4: Click the view button to check the content of the files, choose those you want to delete and click "Clean up."
Conclusion
In aggregate, the reason your downloaded files appear in different places is due to a mix of browser settings, temporary file storage, and potential syncing services. To find your downloads, check the Downloads folder, use your browser's download history, or search by file type. To maintain a more organized experience, adjust your settings to ensure files are saved in one location and use iBoysoft DiskGeeker for Windows to keep track of your files, avoiding the confusion of misplaced downloads.
Related articles
Cloud Storage vs. External SSD/SD Storage: Which is Better?
How to Check & Manage Disk Space or Storage in Windows
How to Check Hard Drive Health on Windows 10/11 Toillessly
How to Share Large Video Files Without Further Ado
Spread this post if you enjoy reading it.