
Written by
Yuri ZhangSummary: This article provides a step-by-step tutorial to recover data from dead or broken Surface Pro 3/4/5/6/7, Surface Book, and Surface laptops. iBoysoft Data Recovery is the tool we need during recovery.
Surface is a series of touchscreen-based personal computers and interactive whiteboards designed and developed by Microsoft, running the Microsoft Windows operating system.
Microsoft has released Surface, Surface 2, Surface 3, Surface Pro, Surface Pro 2, Surface Pro 3, Surface Pro 4, Surface Pro 6, Surface Pro 7, Surface Book, Surface laptop, etc.
Like Windows PC, Surface users also would encounter data loss problems. For example, how do we get data off broken Surfaces?
Microsoft Surface data recovery software free download
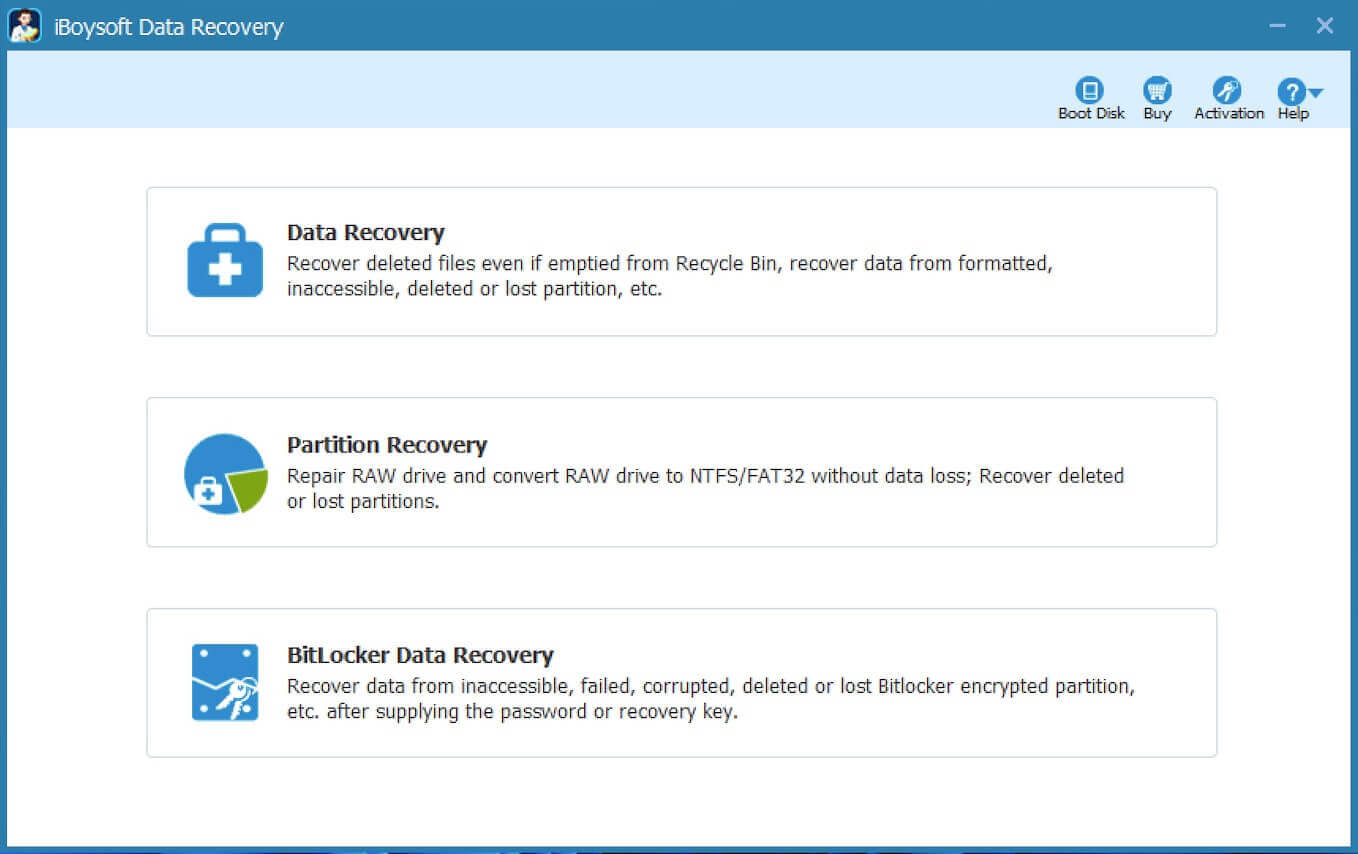
iBoysoft Data Recovery is a professional data recovery software that provides three recovery modules: Data Recovery, RAW Drive Recovery, and BitLocker Recovery to recover lost files from hard drives, external hard drives, USB flash drives, USB sticks, memory sticks, SD cards, etc. in Windows 11/10/8/7/XP.
Share this powerful utility and download it for preparation.
How to get data off a dead or broken Surface Pro, Book, laptop
Here is the detailed tutorial to recover data from dead or broken Surface Pro, Surface Book, and Surface laptop:
Step 1: Download iBoysoft Data Recovery WinPE edition by clicking WinPE boot disk.
On a healthy computer, download iboysoftdatarecovery.zip file as above. (iBoysoft Data Recovery provides a WinPE boot disk that can recover data after Surface Pro Surface Book and Surface laptop crash, fail, die, break, etc.)
After extracting iboysoftdatarecovery.zip file, you will see iboysoftdatarecovery.iso (It is a disc image file) in it.
Step 2: Create a bootable USB drive of iBoysoft Data Recovery WinPE edition.
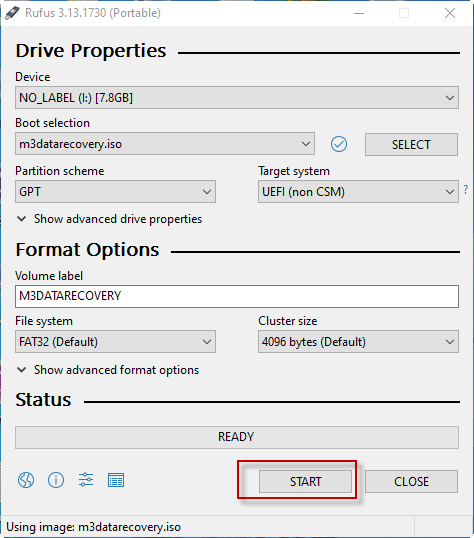
1) Download the portable version of the burning tool: Rufus.
2) Launch Rufus.
3) Insert an empty USB drive into your healthy computer. Otherwise, you will lose all data stored in USB drive when being erased during creating a bootable media.
4) Select USB drive in Rufus.
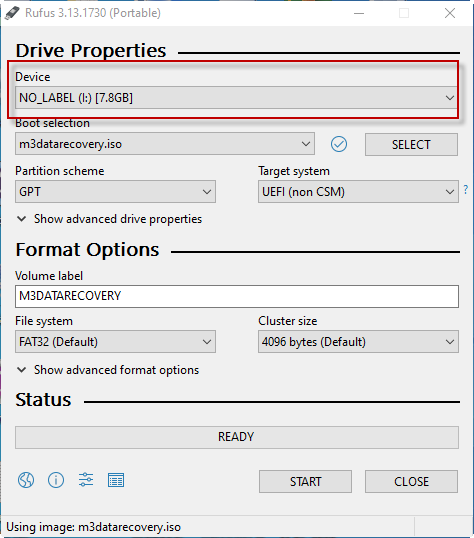
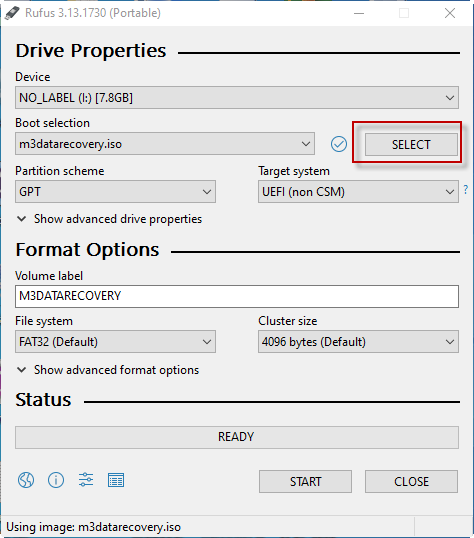
5) Click on Select to choose iboysoftdatarecovery.iso.
6) Select GPT as a partition scheme.

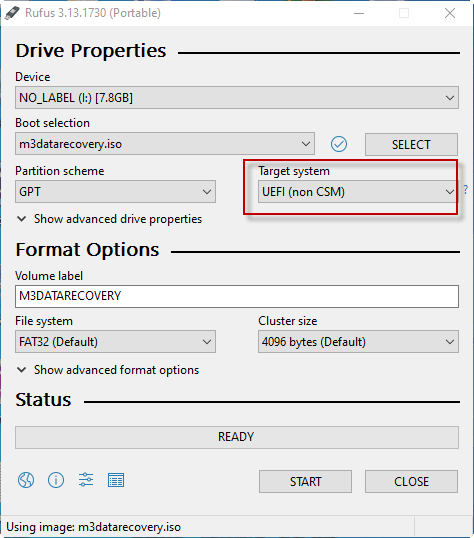
7) Select UEFI as the target system.
8) Click on Start to create a bootable USB drive.
Step 3: Insert the bootable USB drive of iBoysoft Data Recovery into the USB port on your Surface.
Step 4: Set the Surface being booted from the USB drive.
There are two methods to boot Surface Pro from USB drive:
Method 1: Change the boot order in UEFI.
Press and hold the volume-up button on the Surface. While you're doing this, press and release the power button.
Continue holding the volume-up button until the Surface or Windows logo no longer appears on the screen.
You should now see the Surface UEFI, switch to Boot Configuration tab.
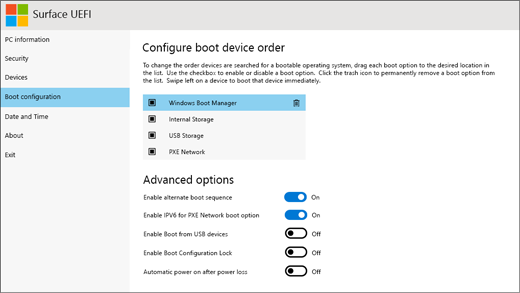
Select USB Storage and drag it to the top of the list. Alternatively, you can swipe left on USB Storage to boot to the device immediately. This will not affect the boot order.
Select Exit and then select Restart Now.
Method 2: Using key combinations.
Press and hold the volume-down button on the Surface. While you're doing this, press and release the power button.
The Microsoft or Surface logo appears on your screen. Continue to hold the volume-down button. Release the button once spinning dots appear beneath the logo.
Follow the on-screen instructions to boot from your USB drive.
Step 5: Scan data from Surface Pro with iBoysoft Data Recovery.
1) After booting Surface Pro from the iBoysoft Data Recovery bootable USB drive and loading iBoysoft Data Recovery successfully, you can remove the iBoysoft Data Recovery bootable USB drive from your Surface Pro.
If you cannot operate iBoysoft Data Recovery by touching the screen, please insert a USB mouse into the USB port on your Surface Pro.
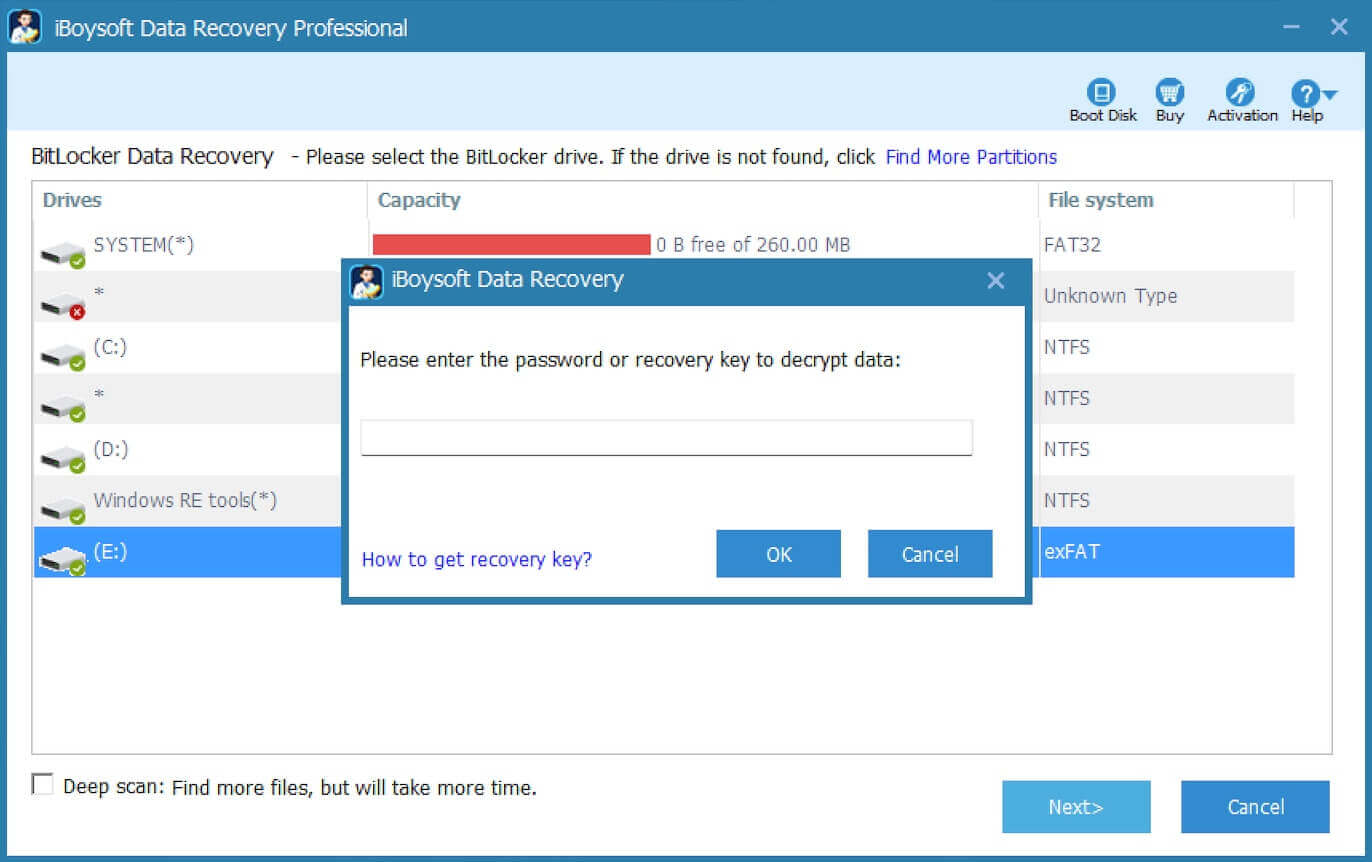
2) Choose the BitLocker Data Recovery module. If your Surface is not encrypted by BitLocker, please choose Data Recovery module at this step.
3) Enter the 48-digit BitLocker recovery key and then click OK to unlock the BitLocker encrypted OS drive.
(You also can refer to How to find 48-digit BitLocker recovery key for Surface Pro? )
4) iBoysoft Data Recovery is scanning lost data from BitLocker encrypted OS drive.
Step 6: Purchase, activate iBoysoft Data Recovery, and recover data.
1) After the scan completes, it is time to purchase iBoysoft Data Recovery.
2) After purchasing, follow the readme.doc in iboysoftdatarecovery.zip to activatethe iBoysoft Data Recovery bootable USB drive.
3) Select the files you want to recover and click Recover.
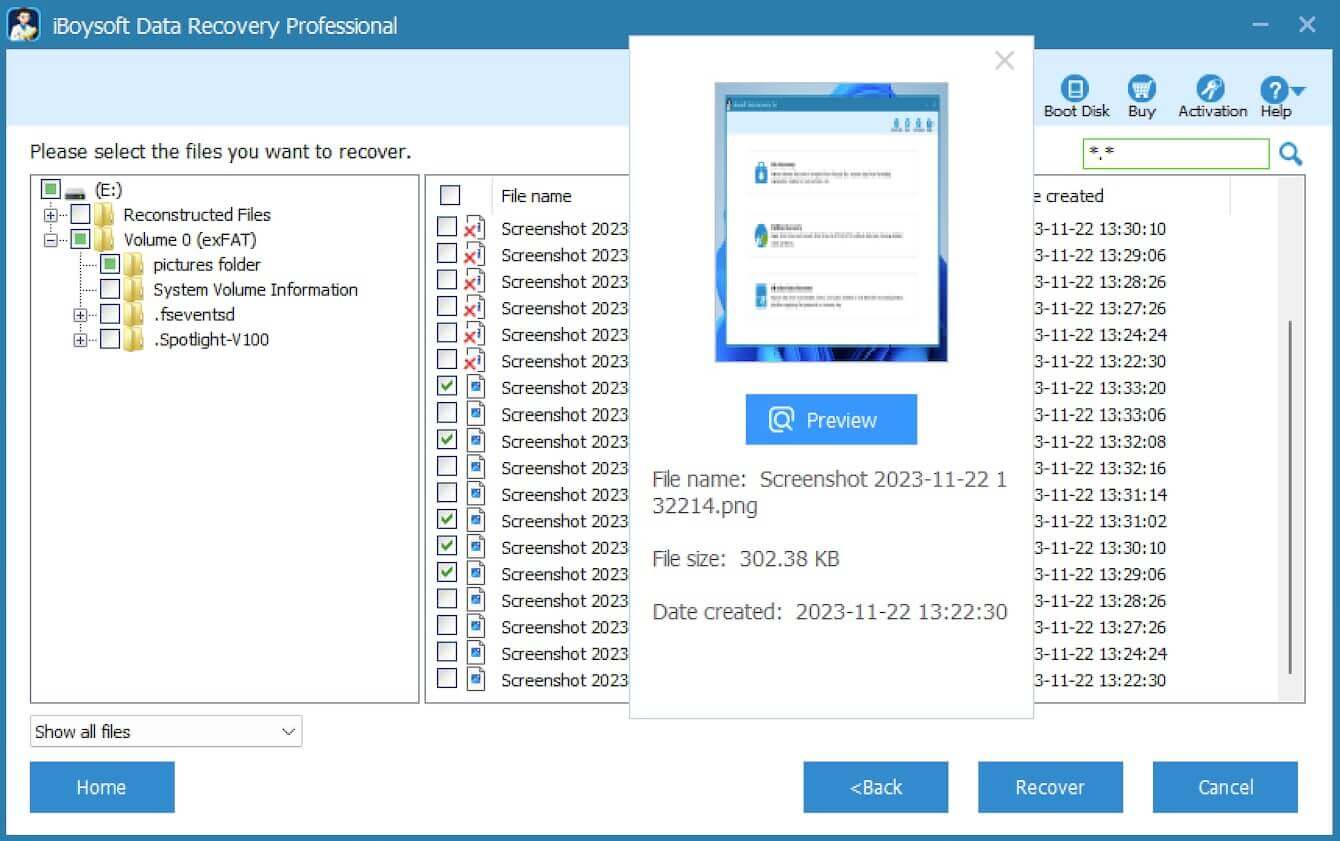
4) Select an external drive to save the recovered files.
5) Select one folder in this external drive and then click Ok to start the recovery process.
After data recovery, it is time to reset the Surface Pro and make it work again.
Related articles
Surface Bitlocker recovery, retrieve recovery key
How to recover data from Surface Pro that won't turn on
How to input BitLocker Recovery Key for instant access
How to delete files from an SD card on Windows without limit
Share these guides to help those who are using Surface devices.