Written by
Yuri ZhangSummary: This post delves into the detailed steps on how to enter the BitLocker recovery key and its cautions plus recommendations during this process. What's more directly, entering the BitLocker recovery key with cmd is presented.

BitLocker is a disk encryption feature built into Windows that protects your data by encrypting your drives. In some cases, however, Windows may prompt you to enter your BitLocker recovery key to access your system or encrypted data.
This often happens after significant system changes, hardware updates, or when Windows detects a security issue. Let's walk into how to find and enter your BitLocker recovery key, ensuring you can regain access to your encrypted data.
How to enter and manage your BitLocker recovery key
BitLocker encryption ensures the security of your data, but there are times when you will be required to enter a 48-digit recovery key to access your system. These detailed steps will walk you through entering the key and guide you on how to back up and store your recovery key properly.
Step 1: Understand why you're being asked for the BitLocker recovery key
BitLocker typically asks for the recovery key in the following situations: /Common reasons why BitLocker asks for a recovery key:
- System hardware changes (e.g., new motherboard, hard drive, etc.).
- Firmware updates or alterations to your BIOS/UEFI settings.
- Moving a protected drive to another computer.
- Failed TPM validation (due to a TPM chip malfunction or tampered security settings).
Step 2: Locate your BitLocker recovery key
Before proceeding, you need your 48-digit BitLocker recovery key. Here's how to find it based on your backup method:
Option 1: Log into your Microsoft Account using another device. Then visit the Microsoft BitLocker Recovery Key page, locate your device, and retrieve the corresponding recovery key.
Note: Always back up your BitLocker key to your Microsoft account for easy access in case of emergencies.
Option 2: Insert the USB drive where you saved your recovery key. Then open the USB drive on another computer and locate the recovery key file.
Note: Save the file with a name like: BitLocker_Recovery_Key_[DeviceName]_YYYY-MM-DD.txt. This recommended file naming convention ensures you can easily identify the device and when the key was saved.
Option 3: Locate the printed copy of your recovery key.
Best practices for printing: Print a hard copy of your BitLocker recovery key and label it clearly. Include the device name and date for better organization, such as:
Device: HP Laptop - Date: August 2024
Key: 48-digit recovery key.
Tips: Store the printed copy in a secure place, such as a fireproof safe or a designated file folder labeled "Data Recovery" or "Encryption Keys", and avoid leaving the printed key in common areas like drawers or desks where it might be misplaced or accessed by unauthorized people.
Option 4: Contact your IT administrator to retrieve the recovery key if your computer is part of a corporate network since the key can be saved to Active Directory or Azure AD.
Step 3: Enter the BitLocker recovery key based on the scenario
Once you have your recovery key, enter it depending on the situation you're facing.
Scenario 1: Entering the recovery key during startup (Pre-boot environment)
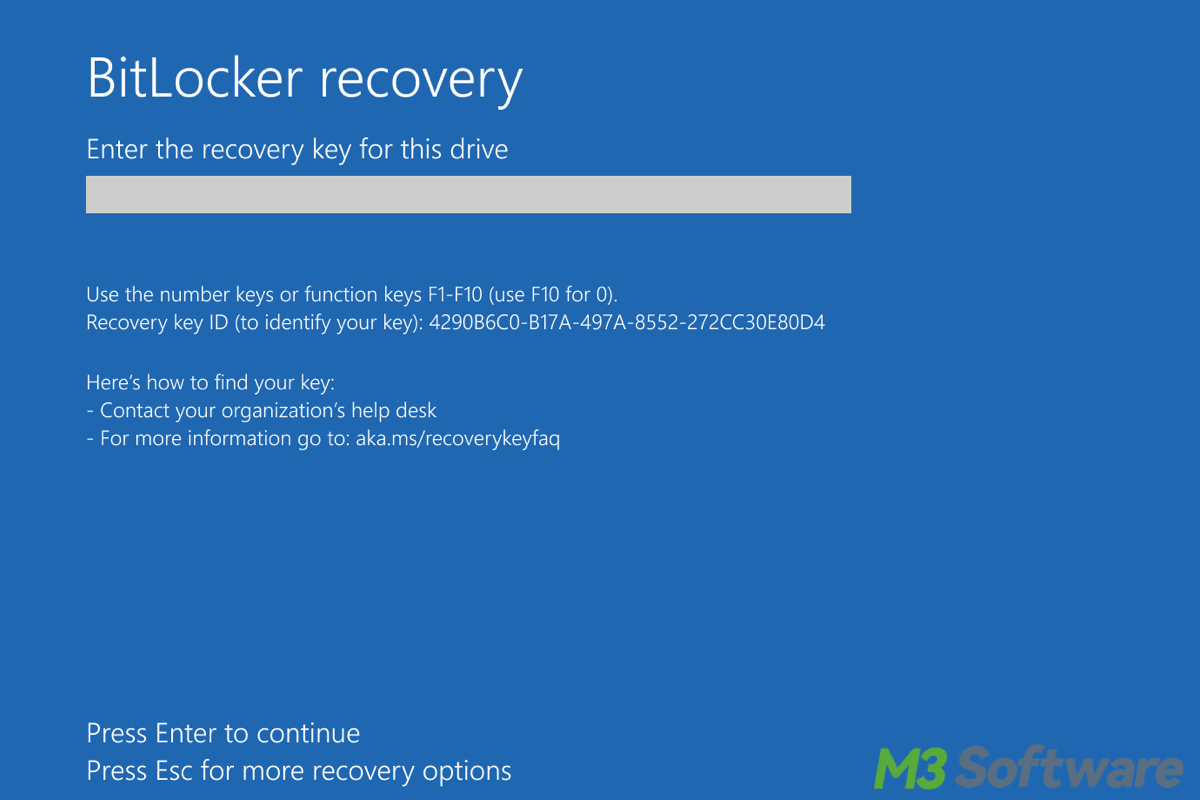
- Power on your computer. If BitLocker is protecting your operating system drive, the system will halt during boot and ask for the recovery key.
- The screen will prompt, "Enter the recovery key for this drive," with a text box below.
- Input the 48-digit key, the full recovery key as displayed.
- Double-check every digit to ensure accuracy. (If you're using another device to retrieve the key (from Microsoft Account or USB), make sure it's handy for easy input).
- Once the key is correctly entered, press Enter to verify.
- Upon validation, Windows will continue booting as usual.

Scenario 2: Entering the recovery key in Windows (for data drives)
- If you're unlocking an encrypted data drive, open File Explorer.
- Locate the encrypted drive: You'll see a small lock icon on the drive.
- Right-click and choose 'Unlock Drive'.
- A prompt will appear asking for the 48-digit BitLocker recovery key. Enter the key.
- Click 'Unlock'. Once verified, the drive will unlock, and you'll have access to your files.
![]()
Scenario 3: Entering the recovery key after TPM or system changes
- Turn on the computer. If BitLocker detects an issue (like a failed TPM check or hardware change), you'll be asked for the recovery key during boot.
- The system will halt and prompt for the recovery key.
- Input the 48-digit BitLocker recovery key.
- After entering the key, the system will validate it and resume normal operation. If unlocking from within Windows, the drive will become accessible. If you encounter errors during key entry, double-check that you're using the correct key for the specific drive.
Step 4: Backup and securely store your recovery Key
To avoid future difficulties, follow these best practices:
1. It is suggested to have multiple backups at the same time including a Microsoft account, an easily accessible USB drive, and a printed copy in a secure location.
2. For digital copies, use a consistent file name that includes the device name and the date.
Tips: Example: BitLocker_Recovery_Key_Laptop_2024-09-13.txt
3. Review and update backups
Whenever you make major system changes (e.g., upgrading hardware), revisit your recovery key storage to ensure it's up-to-date.
Share this crystal clear guide to help others who have the same request.
How to enter BitLocker recovery key in Command Prompt
If you need to unlock a BitLocker-encrypted drive using Command Prompt (CMD), you can do so by following detailed steps based on the scenario. These instructions will guide you through unlocking drives using the manage-bde command, which is the command-line tool for managing BitLocker.
Scenario 1, entering the BitLocker recovery key during startup in the pre-boot environment) and scenario 2, entering the recovery key after TPM or system changes, essentially share the same steps when it comes to using Command Prompt (CMD) in the Windows Recovery Environment (WinRE).
- Turn off your computer and press the power button while holding Shift to bring up the recovery options to boot into WinRE.
- Select Troubleshoot > Advanced Options > Command Prompt.
- In Command Prompt, type the following command to unlock the drive and press Enter:(Replace C: with the correct drive letter if your system drive uses another letter, and replace YOUR_RECOVERY_KEY with your 48-digit recovery key.)manage-bde -unlock C: -RecoveryPassword YOUR_RECOVERY_KEY
- Once the drive is unlocked, you can use the following command to disable BitLocker temporarily if needed:(This can be helpful if you're performing hardware or firmware updates and want to avoid being prompted for the recovery key after each restart.)manage-bde -protectors -disable C:
Scenario 3: Entering the BitLocker recovery key in Windows for data drives. If you want to unlock a BitLocker-encrypted data drive while logged into Windows using Command Prompt, here's how:
- Search for cmd in the Start menu.
- Right-click on Command Prompt and select Run as administrator.
- Use the manage-bde command to unlock the encrypted drive. Suppose the drive letter is D: The command will be:(Replace D: with the actual drive letter of the encrypted drive, and replace YOUR_RECOVERY_KEY with your 48-digit recovery key.)manage-bde -unlock D: -RecoveryPassword YOUR_RECOVERY_KEY
- Press Enter, the drive will be unlocked if the correct recovery key is entered.
- You can now open File Explorer and access the unlocked drive.
Step-by-step breakdown of commands
Unlock a drive using the recovery key:manage-bde -unlock DRIVE_LETTER: -RecoveryPassword YOUR_RECOVERY_KEYTemporarily disable BitLocker protection (useful if you're performing updates):manage-bde -protectors -disable DRIVE_LETTER:Re-enable BitLocker protection after updates:manage-bde -protectors -enable DRIVE_LETTER:
Share this and build a more solid foundation in using cmd.
How to avoid future BitLocker recovery issues
To minimize the chances of getting locked out due to BitLocker, follow these best practices:
If possible, make all hardware updates in one session and always keep a copy of the recovery key available before making significant system changes to minimize hardware and firmware switches.
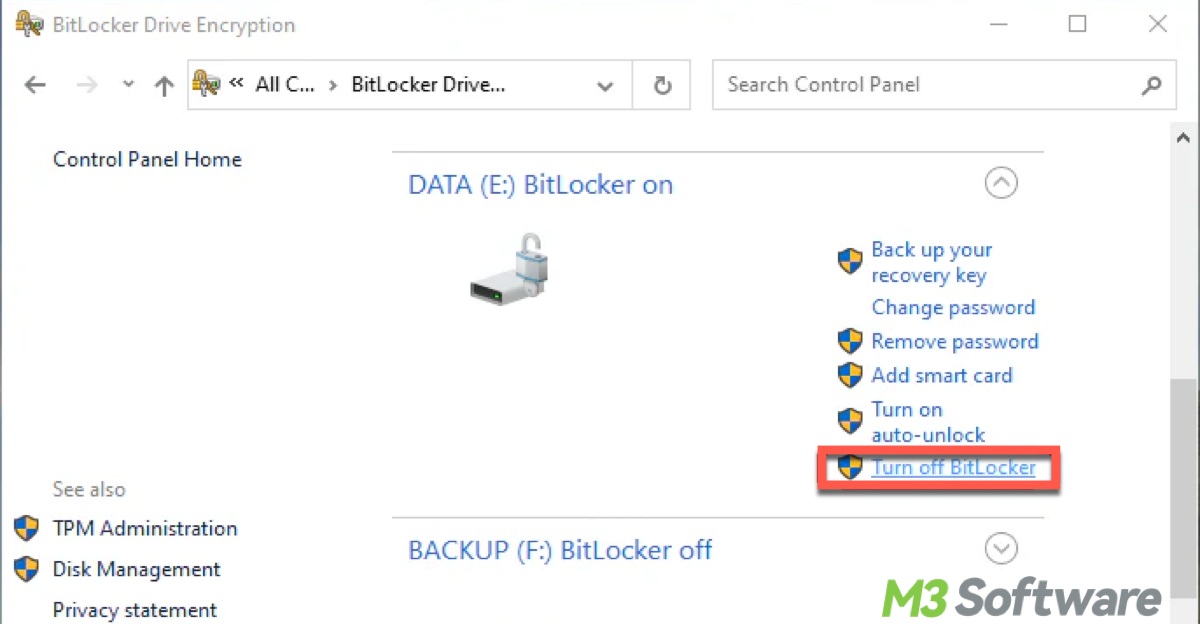
And temporarily suspend BitLocker encryption before installing major system updates or upgrading your hardware. You can suspend it by going to Control Pane > BitLocker Drive Encryption > Turn off BitLocker.

Conclusion
Entering your BitLocker recovery key is an essential step to regaining access to your encrypted data in case of system changes or security checks. While BitLocker provides a strong layer of protection, it's crucial to store the recovery key in a safe and accessible location.
BitLocker is a powerful tool for data protection, and understanding how to use the recovery key effectively will keep your data safe while giving you peace of mind. Incidentally, aim for the fear of missing BitLocker encrypted data, iBoysoft Data Recovery for Windows can help retrieve your lost data. Click the following button to try it out.
Also read
How to Get BitLocker For Windows 7/8/10/11
Full Guide to Solve No BitLocker Key Found for this Device
How to Recover the BitLocker Key: A Comprehensive Guide
Spread these insights and contribute to technical cyber-space.
