Written by
Yuri ZhangSummary: This article maps out how to retrieve the BitLocker key through various feasible ways such as your cloud storage account or Command Prompt. Plus, iBoysoft Data Recovery can recover your BitLocker-related files.
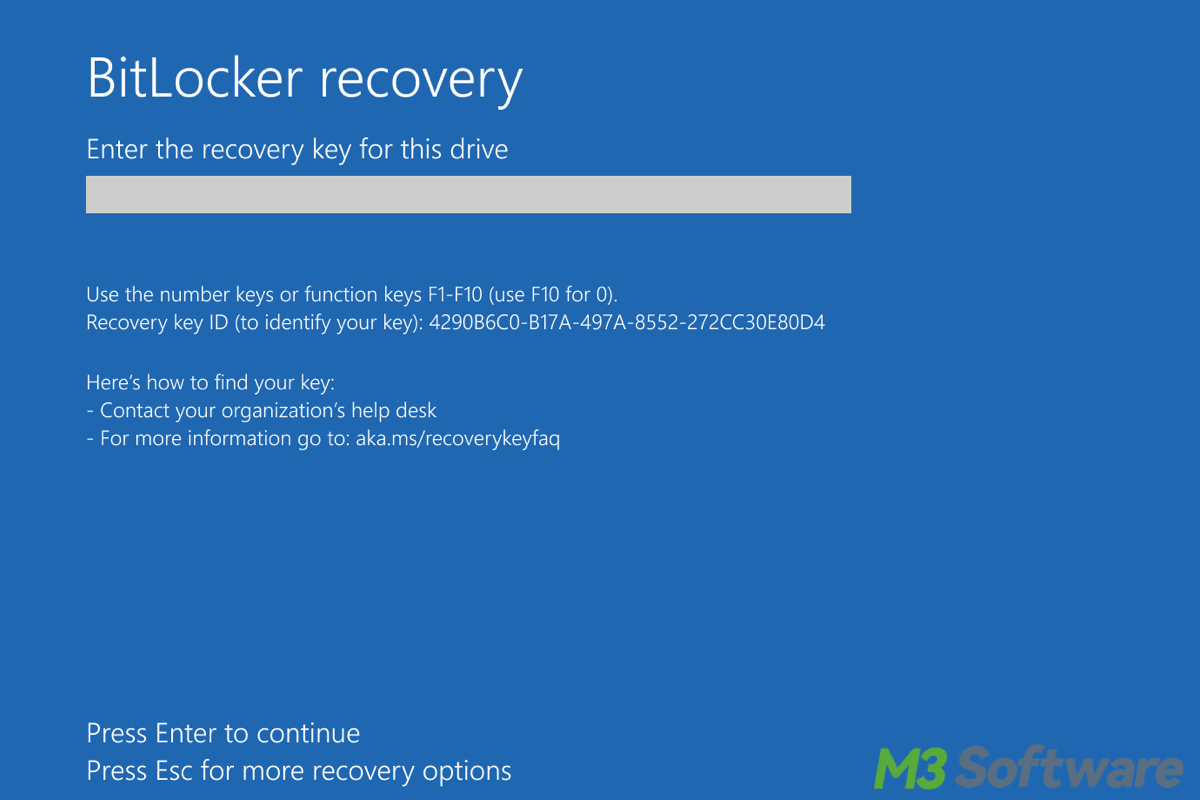
In general, when people refer to the "BitLocker key," they usually mean the BitLocker recovery key. This recovery key is a 48-digit numeric password generated during the BitLocker encryption and used to unlock the encrypted drive if you can't access it using the standard BitLocker password.
However, if you've lost access to your BitLocker-protected drive, recovering the BitLocker key becomes essential. In this guide, we'll explore various methods to retrieve BitLocker key such as Active Directory, and introduce you to powerful tools like iBoysoft Data Recovery for Windows that can assist you in safeguarding your data.
Is it possible to unlock Bitlocker without a key?
We should know the importance of the BitLocker key beforehand. Unlocking BitLocker-encrypted data without the recovery key or password is generally not feasible, without the BitLocker key, the BitLocker password will do.
Unfortunately, if the recovery key or password is lost, it is typically not possible to access the encrypted data due to the strength of BitLocker's encryption even if you recover all your BitLocker-encrypted data.
Methods to recover your BitLocker key
If you lost BitLocker recovery key, let's see the BitLocker key recovery channels:
1. Look for a backup
If you've backed up your Windows system to an external drive or network location, the recovery key might be included in the backup. Connect to the backup location and browse through the backup files, particularly in folders named after your device or related to security. Besides, during the setup of BitLocker, you might have been prompted to save or print the recovery key.
2. Check your Microsoft account
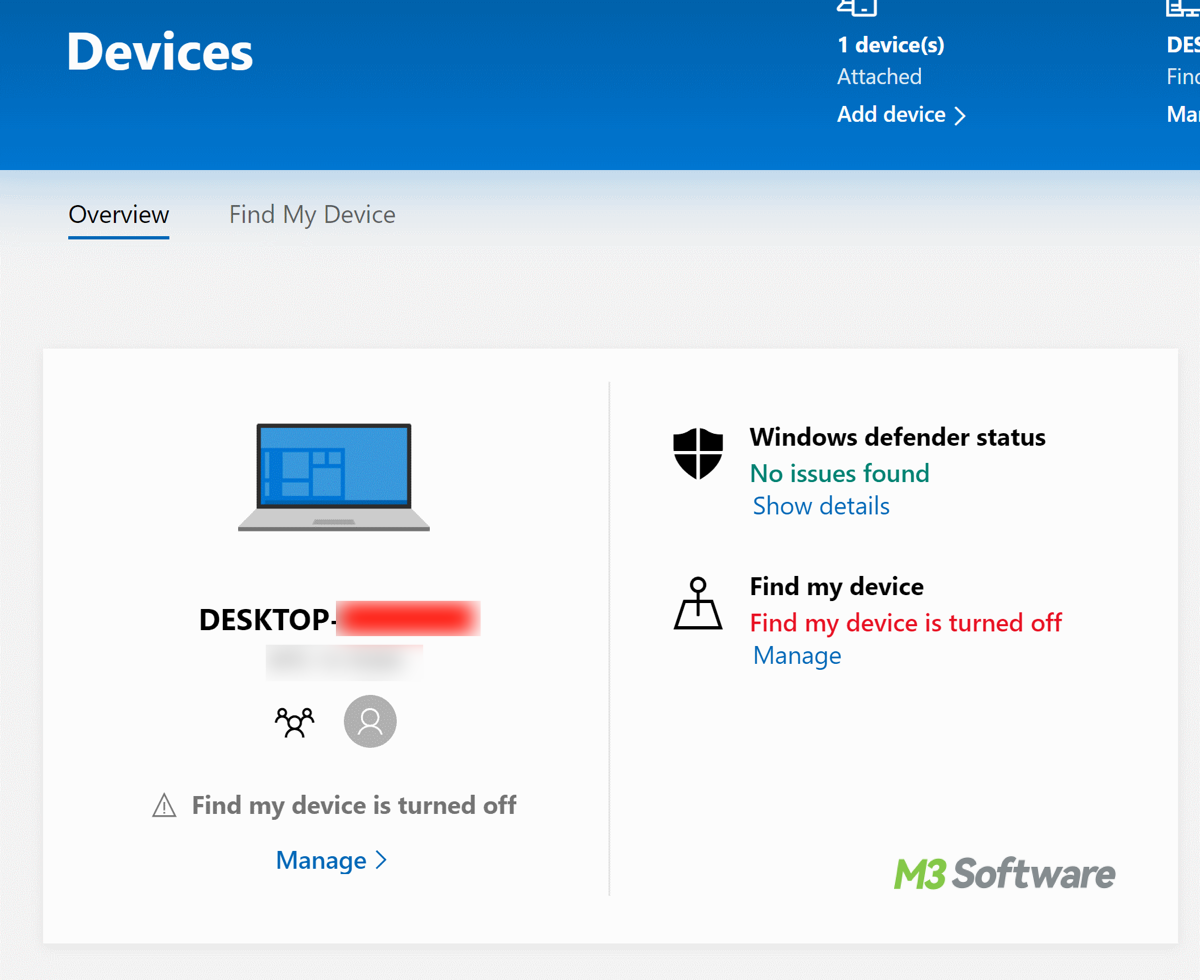
If you enabled BitLocker and linked it to your Microsoft account, your recovery key might be stored there. Firstly log into your Microsoft account on another device or use another accessible drive. Then navigate to the Devices page, and find the device linked to your BitLocker key, and select "View details" to retrieve the key.
3. Check Azure Active Directory (AAD)
If your device is connected to Azure AD, the recovery key might be saved there. Go to https://portal.azure.com and sign in with your Azure AD credentials. Go to Azure Active Directory > Devices > All Devices. Find and select the device you're interested in. In the device details, select BitLocker keys to view and retrieve the recovery key.

4. Check with Intune
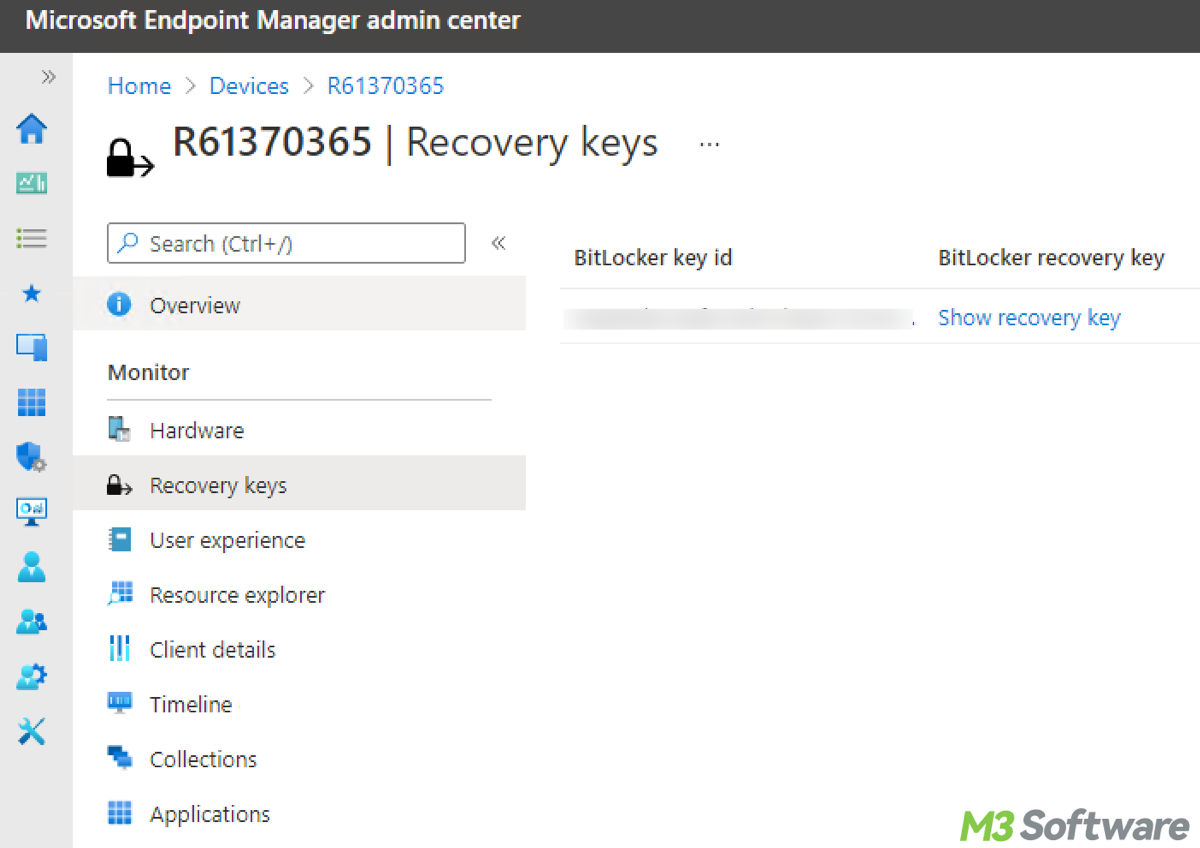
To access Intune, go to https://endpoint.microsoft.com and sign in with your Azure AD credentials. Select Devices > All devices. Find and select the specific device you need. In the device details, click on Recovery keys to view and retrieve the BitLocker recovery key.
Share this and acquire the mastery of retrieving the BitLocker key.
5. Check other cloud storage accounts
If you opted to save your recovery key to a different cloud service, such as Google Drive, Dropbox, or OneDrive, you should search your files there.
Tips: Search using keywords like “BitLocker” or “Recovery Key” to locate the file quickly
6. Ask your system administrator
If you're using a work or school device, your organization's IT department may have a copy of the recovery key. Contact your system administrator to request access. Provide them with the Recovery Key ID (displayed when BitLocker requests the key). They should be able to look it up in their management system.
7. Check Active Directory on the Domain Controller
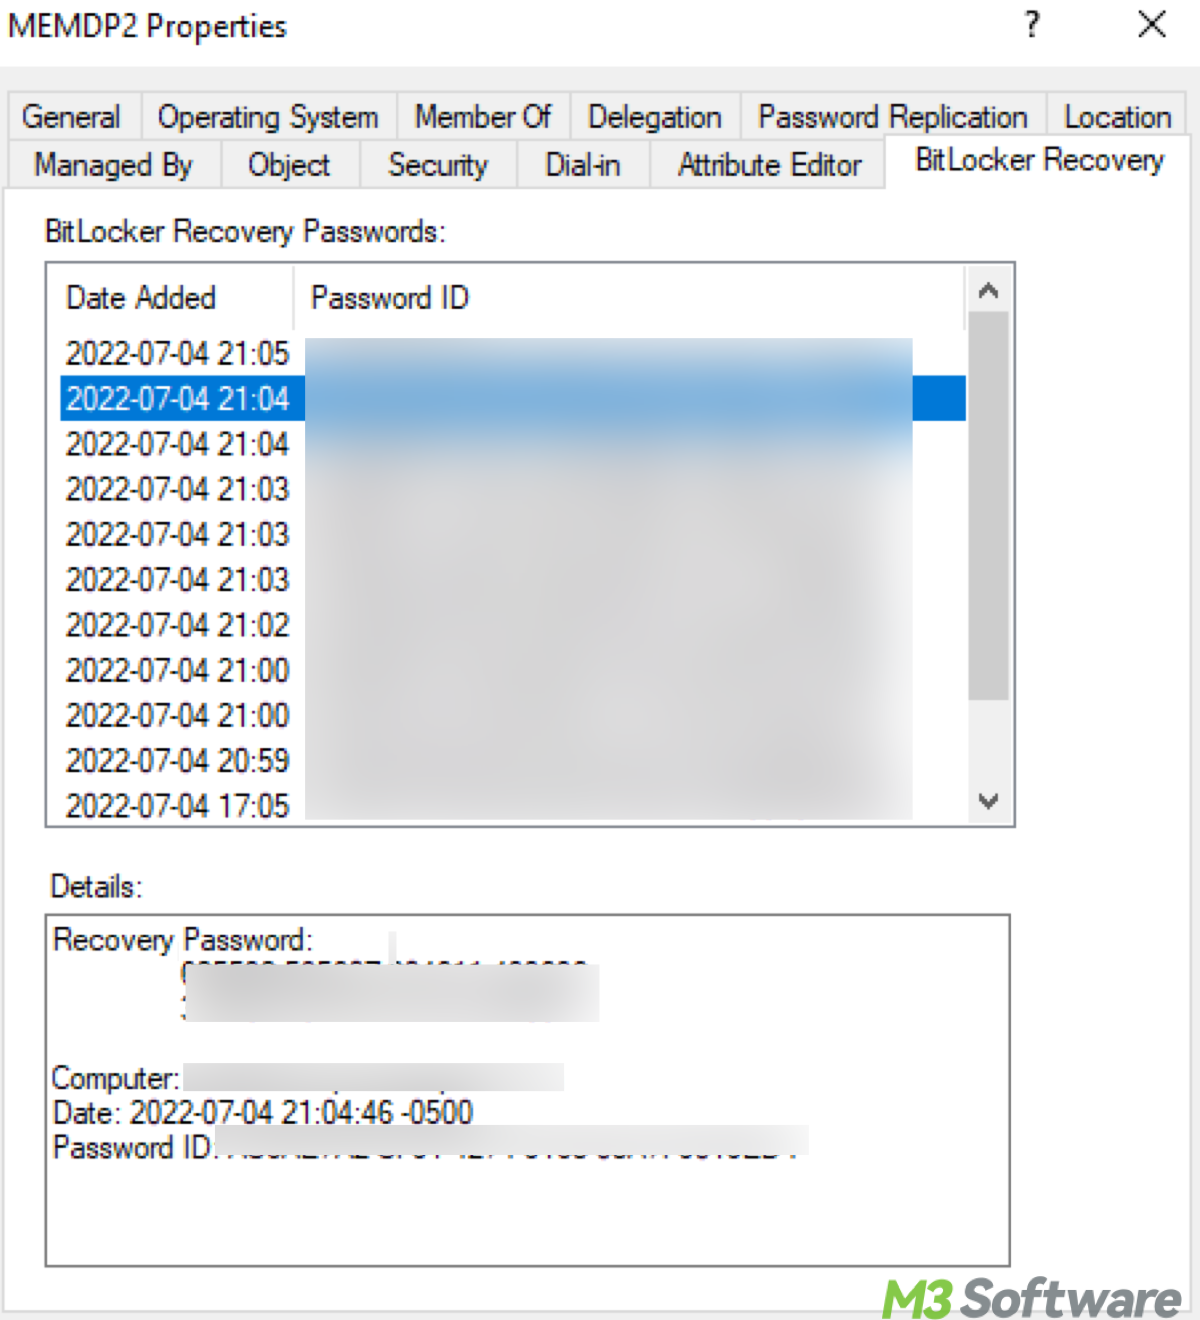
- On a domain controller or a system with the necessary tools installed, open Active Directory Users and Computers (ADUC).
- Navigate to the Computers Organizational Unit (OU) or the specific OU where the device is located, then right-click on the computer object.
- Select Properties > BitLocker Recovery tab. You'll find the recovery key listed here.
8. Recover BitLocker key from TPM
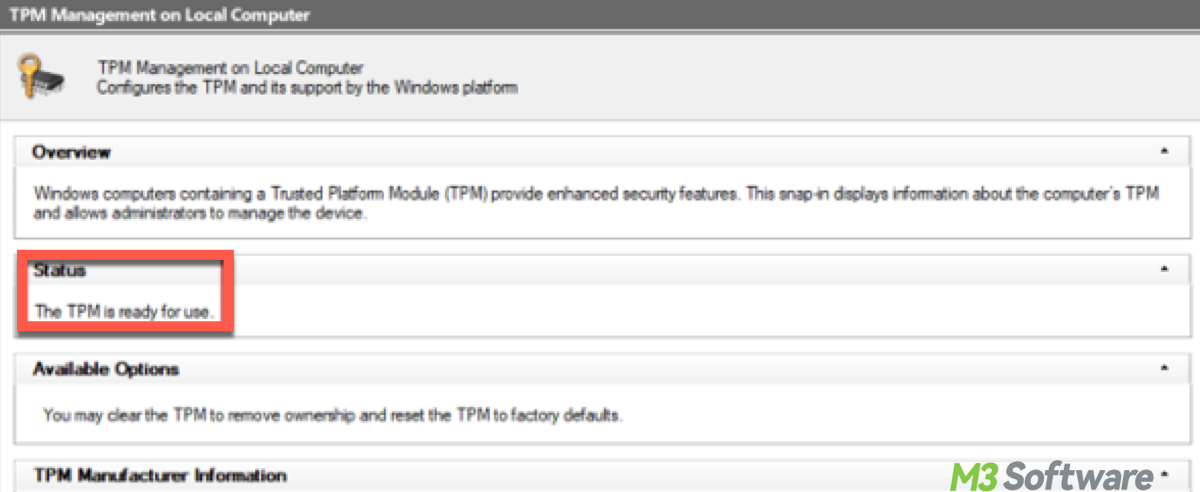
To retrieve a BitLocker recovery key using TPM (Trusted Platform Module) directly is not possible. The TPM doesn't store the recovery key in a retrievable form, instead, it's used to unlock the drive. However, you can manage and troubleshoot TPM settings related to BitLocker in the following steps:
- Press Win + R, type tpm.msc, and press Enter to open the TPM Management Console.
- In the TPM Management Console, view the Status to ensure that the TPM is ready for use and is not in reduced functionality mode.
- If necessary, clear or reset the TPM from the Actions pane. This will prompt you to restart the computer and go through the TPM initialization process again, which is related to BitLocker operations.
9. Recover BitLocker key via BitLocker management tool
If you have access to another device or system with administrative rights, you might be able to use the BitLocker management tool to check for any saved recovery information.
- Press Win + S, type "Manage BitLocker," and select the Manage BitLocker option from the search results.
- In the BitLocker Drive Encryption window, find the encrypted drive you need the recovery key for and click on "Backup your recovery key" or "Manage your recovery key" under the drive options.
- Choose to view the recovery key or save it to a file, print it, or save it to your Microsoft account.
10. Recover BitLocker key from Command Prompt/PowerShell
If you have partial access to your system, you can use the Command Prompt to identify the BitLocker recovery key. The command might display the recovery key or a Recovery Key ID that you can use to locate the key elsewhere.
- Press Win + X and choose Command Prompt (Admin) or Windows PowerShell (Admin).
- Type the following command and press Enter:manage-bde -protectors -get C:
- Replace C: with the letter of the BitLocker-encrypted drive.
- The recovery key will be displayed under the "Numerical Password" section in the output.
Share this article if you find it utilitarian.
Use iBoysoft Data Recovery to recover the BitLocker key
iBoysoft Data Recovery for Windows can help you recover deleted or lost files, including the file that might contain your BitLocker recovery key, if that file was previously saved on a drive that is not encrypted by BitLocker. However, it cannot recover the BitLocker recovery key directly from a BitLocker-encrypted drive if you have lost access to it.
After knowing the whereabouts of the BitLocker key, you can easily retrieve the BitLocker-encrypted drives or related files with iBoysoft Data Recovery. You can have a trial by clicking the following green button and observing the instructions provided by the software, which is concise and simple to use.
The BitLocker recovery key is automatically generated when BitLocker is enabled on a Windows device. The recovery key can be stored in several places depending on your settings and choices during the encryption process. If you opted to save the key to a USB drive, it will be stored there in a .txt file named something like BitLocker Recovery Key [Key ID].txt.
If you saved the key as a local file on your computer, it would be in the location you chose, often in the "Documents" folder or another user-specified directory. The file would be named similarly to the USB option, like BitLocker Recovery Key [Key ID].txt.
Note: The automatically stored file, if saved locally, would typically be in a common directory like "Documents" unless you specified another location.
How do I permanently unlock Bitlocker with recovery key
In case you lose your BitLocker and rack your mind to find the recovery key again, some may want to unlock BitLocker permanently. To permanently unlock a BitLocker-encrypted drive using the recovery key and then remove BitLocker encryption, follow these steps:
- Open the Control Panel.
- Go to System and Security > BitLocker Drive Encryption.
- Find the drive you want to unlock and select Unlock drive. Enter the recovery key when prompted. Once the drive is unlocked, you can proceed to decrypt it, which will remove BitLocker encryption and permanently unlock the drive.
- Go to Control Panel > System and Security > BitLocker Drive Encryption again.
- Then Find the drive you want to decrypt and select Turn off BitLocker. Once decryption is complete, you should be able to access the drive without needing the recovery key.
Tips: Make sure to back up any important data before decrypting the drive and ensure that your device is plugged into a power source to avoid interruptions during the decryption process.
Preventing future loss of your BitLocker key
To avoid the stress of losing your BitLocker key in the future, consider the following precautions, save the recovery key in at least two different secure locations, such as cloud storage, a USB drive, and a physical printout, and ensure that you regularly back up your important files and system settings, including the BitLocker recovery key.
For this, consider using iBoysoft Data Recovery for Windows, a reliable tool that can help you recover lost or inaccessible data due to various causes, including encryption issues. Incidentally, you can use a Password Manager that you trust to store the recovery key, providing easy access when needed.
Final thought
Losing access to a BitLocker-encrypted drive can be a daunting experience, but with these steps, you can increase your chances of recovering the BitLocker key. By checking your Microsoft account, searching physical backups, or consulting with your IT department, you can regain access to your valuable data. Remember to store the recovery key securely in multiple locations to prevent future issues. Additionally, safeguard your data with iBoysoft Data Recovery for Windows, ensuring that even if the unexpected happens, your important files are never truly lost.
Share this to other social media to gain more vibrations.
