Written by
Yuri ZhangSummary: This article elaborates on how to get BitLocker for Windows 7/8/10/11 by accessing it in a specified version of Windows including upgrading to the BitLocker-supported versions, and how to use iBoysoft DiskGeeker when there is no BitLocker in your computer.

We notice that an abundance of Windows users are asking how to download BitLocker for Windows 7/8/10/11. Here comes a question: can you install or download BitLocker for your Windows, or have BitLocker drive encryption downloaded?
The answer is negative. There is a misunderstanding that must be clarified foremost. BitLocker does not need to be downloaded separately as it is a built-in feature and can be directly gained or accessed in certain editions of Windows.
Note: BitLocker is a built-in feature for Windows 7 Ultimate and Enterprise, Windows 8 and 8.1 Pro and Enterprise, Windows 10 Pro, Enterprise, and Education, and Windows 11 Pro, Enterprise, and Education. You can update your Windows to BitLocker-supported edition.
Let's dive into how to get BitLocker and how to use iBoysoft DiskGeeker for Windows as an alternative when there's no BitLocker or you are not interested in using BitLocker with extra cost to upgrade.
Prerequisites for getting BitLocker
Firstly, ensure your Windows version supports BitLocker, here's a table for your checking:
| Windows Version | Editions Supporting BitLocker |
| Windows 7 | Ultimate, Enterprise |
| Windows 8/8.1 | Pro, Enterprise |
| Windows 10 | Pro, Enterprise, Education |
| Windows 11 | Pro, Enterprise, Education |
For Windows 10 and 11, open Settings > System > About. And look for your Windows edition under "Windows specifications". For Windows 7 and 8/8.1, open Control Panel > System and Security > System. And look for your Windows edition under "Windows edition".
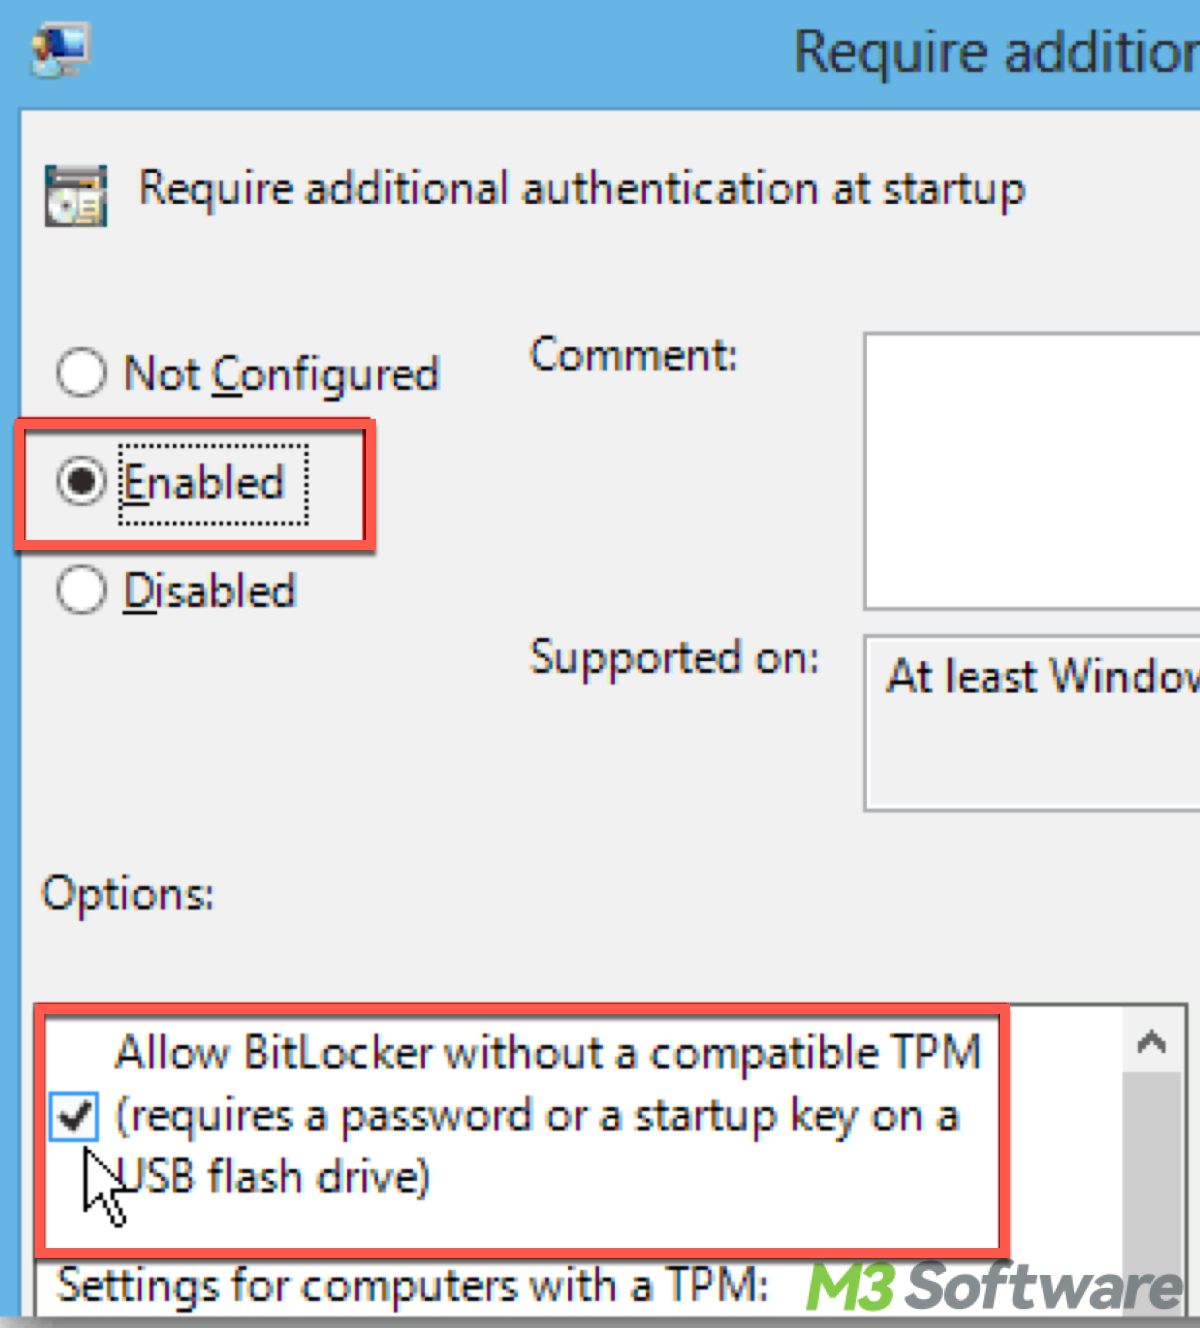
Secondly, BitLocker typically requires a TPM version 1.2 or later. To check for TPM, open the Run dialog (Win + R), type tpm.msc, and press Enter. If your system does not have a TPM, you need to enable BitLocker without TPM by changing the Group Policy settings:
- Open the Run dialog (Win + R), type gpedit.msc, and press Enter.
- Navigate to Computer Configuration > Administrative Templates > Windows Components > BitLocker Drive Encryption > Operating System Drives.
- Double-click Require additional authentication at startup.
- Enable the policy and check the box for "Allow BitLocker without a compatible TPM".

Thirdly, ensure your system meets the necessary hardware requirements, such as sufficient disk space for the encryption process, and ensure that your hardware and firmware support BitLocker. Some older systems might not be compatible, and you may need to update your BIOS/UEFI firmware.
Found this useful? Spread the word!
How to get BitLocker for Windows 7/8/10
As long as your computer version is Windows 7 (Ultimate and Enterprise), Windows 8/8.1 (Pro and Enterprise), and Windows 10 (Pro, Enterprise, and Education), you can get BitLocker from the following steps:
- Open the Control Panel by typing Control Panel in the search bar and clicking it.
- Go to System and Security > BitLocker Drive Encryption.
- Click Turn on BitLocker next to the drive you want to encrypt.
- Follow the on-screen instructions to complete the setup.
How to get BitLocker for Windows 11 (Pro, Enterprise, and Education)
If your PC is just a Home version, then you can not use BitLocker on your device. In Pro, Enterprise, and Education editions, you can get BitLocker with these moves:
- Open the Start menu and go to Settings.
- Navigate to Privacy & security > Device encryption.
- If Device encryption is not available, go to Settings > System > About, and check for the BitLocker settings link.
- Click Turn on BitLocker and follow the prompts to set up your preferred unlocking method and save your recovery key.
By following these steps, you can install and enable BitLocker on compatible versions of Windows.
Is the BitLocker free?
As we mentioned earlier, if you already have one of the supported editions listed above, you can enable BitLocker without any additional cost. BitLocker is not available for free as a standalone product, but it is included at no extra cost with certain editions of Windows. Here's how you can access BitLocker through various Windows editions without additional cost (Windows Editions with BitLocker):
- Windows 7: Included with Ultimate and Enterprise editions. Not available in Professional, Home Premium, Home Basic, and Starter editions.
- Windows 8/8.1: Included with Pro and Enterprise editions. Not available in Core (Home) edition.
- Windows 10: Included with Pro, Enterprise, and Education editions. Not available in Home edition.
- Windows 11: Included with Pro, Enterprise, and Education editions. Not available in Home edition.
Note: BitLocker is included for free with certain editions of Windows. To access it, you need to ensure you are using one of the supported editions or upgrade your Windows version. Alternatively, you can use free third-party encryption software such as iBoysoft DiskGeeker for WIindows if upgrading is not an option.
Upgrading to a supported edition to get BitLocker
If your current edition of Windows does not support BitLocker, you can upgrade to a version that does:
To upgrade Windows 7 to get BitLocker, open the Start menu, type Windows Anytime Upgrade, and press Enter. Follow the prompts to upgrade to Windows 7 Ultimate. You will need to purchase an upgrade key.
To upgrade Windows 8/8.1 to get BitLocker, click on Settings. Go to Update and recovery > Add features to Windows 8.1. You'll need to purchase a Windows 8/8.1 Pro product key. Follow the prompts to complete the upgrade.
To upgrade Windows 10/11 to get BitLocker, go to Settings > Update & Security > Activation. Click Go to the Store. Purchase an upgrade to Windows 10 Pro or Windows 11 Pro. Follow the on-screen instructions to complete the upgrade.
If you found this information helpful, don't keep it to yourself—share it!
How to use the BitLocker function in iBoysoft DiskGeeker for Windows
In Windows 11/10/8.1/8/7 Home Edition and Windows 7 Professional Edition, to spare troubles in updating or accessing BitLocker, iBoysoft Diskgeeker for Windows offers you an equivalence or counterpart when there's no BitLocker in your Windows version. Here's how to use iBoysoft DiskGeeker exactly:
Step 1: Download and launch the iBoysoft DiskGeeker for Windows by clicking the following green button.
Step 2: Click the "Click to encrypt" button next to the partition from the BitLocker module.

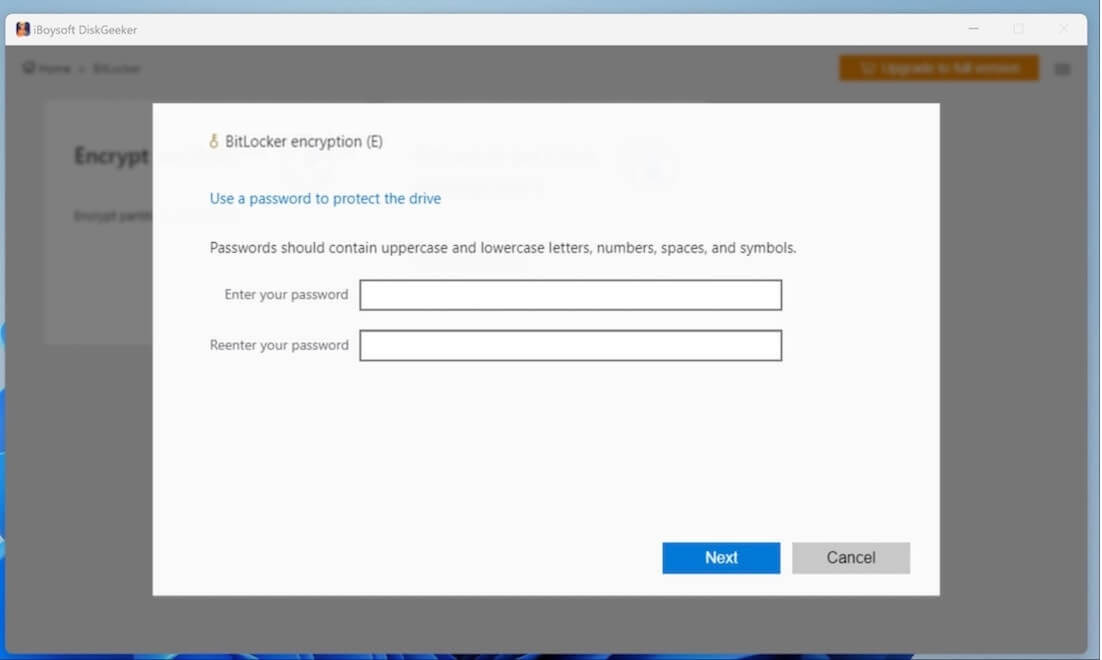
Step 3: Enter a password, re-enter it, and click "Next" to proceed.

Warning: Remember to backup and keep well of your recovery key, because if you lose the password and the recovery key, you then cannot open the BitLocker-encrypted partition.
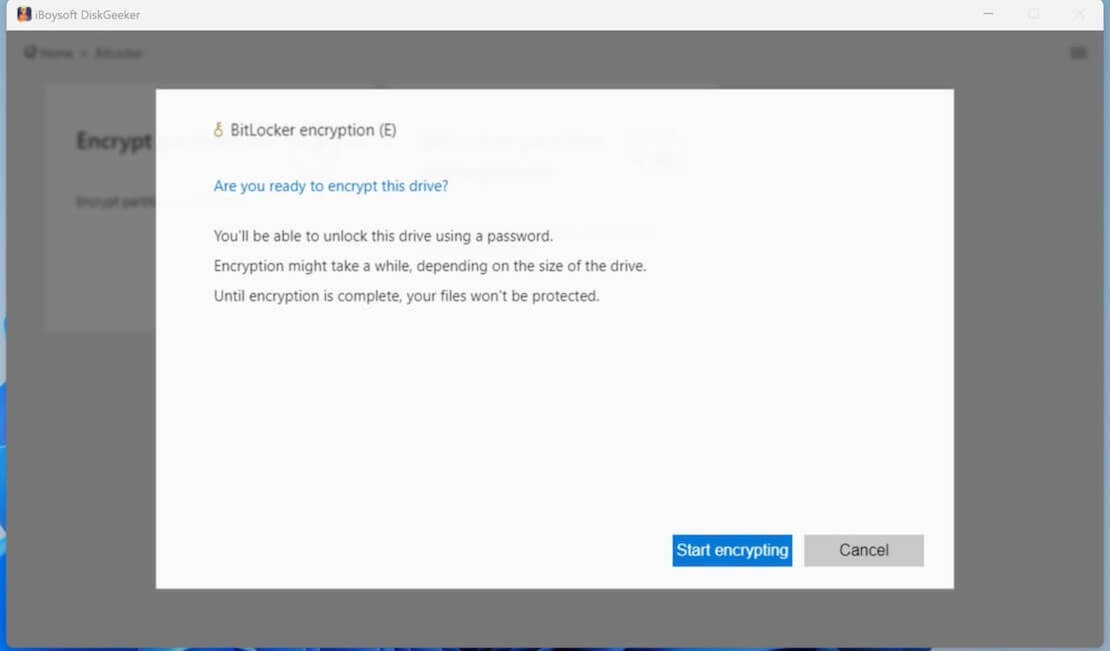
Step 4: Click "Start encrypting" to confirm your encryption action.

Note: You can only encrypt NTFS, exFAT, and FAT32 partitions. If you encrypt a partition that is not formatted as the NTFS, exFAT, or FAT32 file system, you'll be popped out with an error message saying "Partition type not supported."
Final thought
If you find getting BitLocker is too hard when your device is not in the available edition, iBoysoft DiskGeeker for Windows is an easy-to-operate software for your encryption needs. It is reputable for its user-friendly interface and powerful BitLocker function. Have a trial on it.
It's worth mentioning that even after enabling BitLocker, maintain regular backups of your data. BitLocker protects against unauthorized access but does not prevent data loss from hardware failures or other issues. During the setup and encryption process, ensure that there are no interruptions (such as power loss or system shutdowns) to prevent data corruption or loss.
Related articles:
How to Retrieve BitLocker Recovery Key Using PowerShell
Full Guide to Solve No BitLocker Key Found for this Device
How to Exit BitLocker Recovery Loop
Help others by sharing this article if you find it useful.
