Written by
Yuri ZhangSummary: This article illustrates how to remove BitLocker encryption from a USB drive on Windows 7, 10, and 11 whether you want to decrypt a drive to make it accessible again, or you're looking to completely disable BitLocker.

BitLocker is an encryption tool built into Windows that secures your data by encrypting entire drives, including USB drives/flash drives/USB sticks.
While BitLocker provides great protection, there are times when you may need to remove or disable BitLocker encryption from a USB drive—perhaps to format the drive, free up space, or simply stop using encryption.
It's widely disputed in the Microsoft community and Quora forum, and the methods differ, for clarity and precision, we devise this article to guide you to remove BitLocker from a USB Drive in Windows 7/10/11.
Why and when to remove BitLocker from a USB drive?
There are several situations where users might need to remove BitLocker encryption from their USB drives:
- You might want to decrypt the drive to make it accessible without the need for the BitLocker password or recovery key.
- To remove passwords, you may prefer not to use BitLocker encryption anymore, especially if you don't need that level of security for the USB drive.
- You might be formatting the drive for use with systems that do not support BitLocker or for a fresh start without encryption.
- If BitLocker is causing problems (such as the drive being stuck in a recovery mode or showing as "read-only"), you may need to remove it.
Share this and we will provide more expertise for newcomers.
Methods to remove BitLocker from a USB drive
There isn't a dedicated "BitLocker removal tool" per se, but BitLocker can be disabled or removed (i.e., decrypted) using built-in tools and commands in Windows. If your goal is to remove BitLocker encryption from a drive, the process involves decrypting the drive, which will turn off BitLocker. Here are several methods to achieve that:
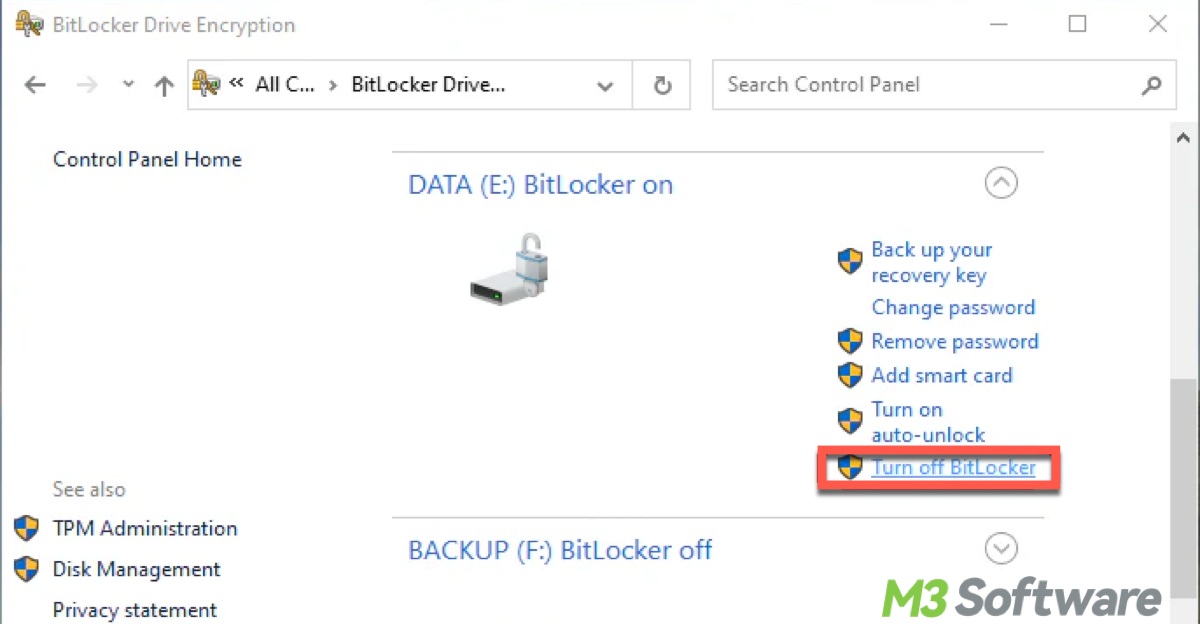
1. Removing BitLocker encryption via Control Panel
The easiest way to remove BitLocker encryption from a USB drive is through the Control Panel. Here's how to do it:
- On Windows 7: Go to Control Panel > System and Security > BitLocker Drive Encryption.
- On Windows 10/11: Go to Control Panel > System and Security > BitLocker Drive Encryption (or search for "BitLocker" in the Start Menu).
- In the BitLocker settings, find and select the USB drive that is encrypted.
- Click on Turn off BitLocker. You will be prompted to decrypt the drive.
- Confirm your choice and the decryption process will begin.
- Wait for decryption to complete, the decryption process may take some time depending on the size of the drive.

2. Using Command Prompt (Manage-BDE) to remove BitLocker from a USB
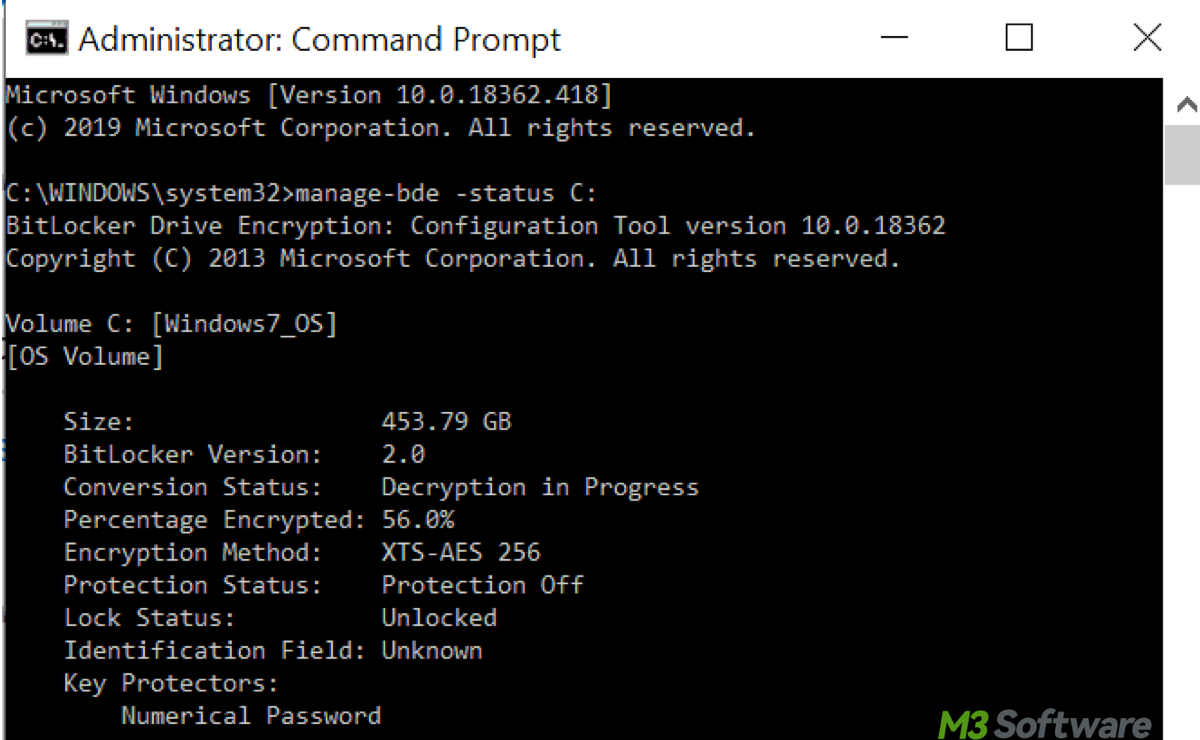
For users who prefer the command line or need more control, Manage-BDE is a powerful tool that allows you to disable BitLocker encryption on any drive.
- Press Win + X and select Command Prompt (Admin).
- Type the following command to see the BitLocker status of all drives:manage-bde -status
- To remove (disable) BitLocker encryption from a USB drive, type the following (replace C: with the drive letter of the encrypted USB) and press Enter:manage-bde -off C:
- The system will start decrypting the drive, and you'll need to wait for it to finish.

3. Utilizing PowerShell to remove BitLocker from a USB
PowerShell is another advanced option to manage BitLocker encryption.
- Right-click the Start menu and select Windows PowerShell (Admin).
- Type the following command to view the BitLocker status of all drives:Get-BitLockerVolume
- To remove BitLocker encryption from a specific drive, type the following cmdlet and press Enter(replace X: with the drive letter of the encrypted USB)Disable-BitLocker -MountPoint "X:"
- Just like the Command Prompt method, decryption will take time depending on the size of the drive.

Tips: If you are locked out and cannot access the USB drive due to a forgotten password or other issues, the BitLocker recovery key is your backup option. When prompted for the recovery key, locate your recovery key (you can refer to How to Input BitLocker Recovery Key for Instant Access). Once you've unlocked the drive using the key, you can proceed with turning off BitLocker using any of the methods described above.
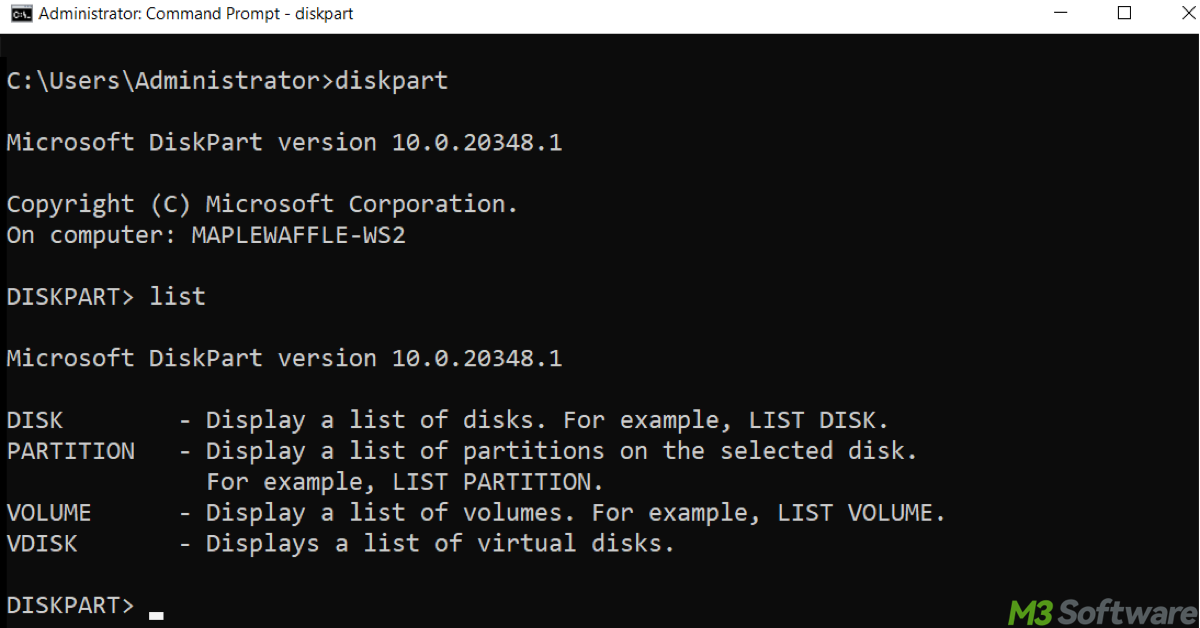
4. Using DiskPart (for stubborn issues) to remove BitLocker from a USB
In certain cases, such as a problematic BitLocker drive that you can't unlock or decrypt, you might consider using DiskPart to erase the drive entirely.
Warning: This method will wipe all data on the drive, so make sure to back up your data first.
- Press Win + X and select Command Prompt (Admin).
- To launch DiskPart, type diskpart and press Enter.
- Type list disk to see all connected disks.
- Find the disk number of the USB drive and type select disk X (replace X with the correct disk number).
- Type clean to wipe all data from the disk and remove BitLocker encryption.
- Type exit to exit DiskPart.
- You can now reformat the drive and use it again.

Fact: We have been asked "Can “BitLocker be uninstalled?" To clear the air, here's the answer, BitLocker can be disabled or uninstalled (in a sense), though technically it's not "uninstalled" in the same way as software. Instead, you decrypt the drive and turn off the BitLocker encryption feature, which effectively removes BitLocker protection from the drive.
Share these and keep reading to upgrade your USB sleek usage.
Bonus tip: How to remove write protection from a BitLocker USB drive
Aiming at common Bitlocker USB drive issues, this how-to helps you to use your BitLocker USB drive smoothly. Write protection prevents any changes to a storage device, such as a USB drive. When enabled, the drive becomes read-only, blocking modifications, deletions, or file additions.
On a BitLocker-encrypted USB drive, write protection can be caused by BitLocker settings (e.g., recovery mode or corruption), hardware write protection (physical switch on the USB), or system-level security settings (like group policies or registry settings). Here's how to remove it:
- Look for a physical switch on the USB drive and set it to unlocked.
- Insert the USB drive, then enter the BitLocker password or recovery key to unlock it. Once unlocked, you should be able to write to the drive.
- You can check Group Policy Settings (Windows 10/11): open Local Group Policy Editor (press Win + R, type gpedit.msc), then navigate to Computer Configuration > Administrative Templates > Windows Components > BitLocker.
- Disable any policies that enforce read-only access.
- You also can check the Registry: open Registry Editor (press Win + R, type regedit), Go to HKEY_LOCAL_MACHINE\SYSTEM\CurrentControlSet\Control\StorageDevicePolicies.
- If the WriteProtect value is set to 1, change it to 0.
- Another method is to check for disk errors: open Command Prompt (Admin) and run: chkdsk X: /f (replace X: with your USB drive letter).
If none of these work, corruption or BitLocker recovery mode might be preventing write access. Malware or security policies could also be enforcing write protection. In such cases, you can try reformatting the drive (if data isn't crucial), using third-party tools like Diskpart or GParted, or seeking data recovery services if the data is important.
Interesting misunderstanding on how to disable BitLocker in BIOS
Actually, you cannot directly disable BitLocker from the BIOS (Basic Input/Output System), including for USB drives, but you can adjust TPM or Secure Boot settings in BIOS/UEFI to influence how BitLocker operates. you can refer to How to Exit BitLocker Recovery Loop to comprehend its function.
BitLocker encryption is managed by Windows, and the BIOS/UEFI settings only play a part in certain security features related to BitLocker, such as TPM (Trusted Platform Module).
Final thoughts
Removing BitLocker from a USB drive is a simple process, whether you use the Control Panel, Manage-BDE in the command line or PowerShell. The method you choose depends on your preferences and comfort with using graphical or command-line interfaces.
Furthermore, iBoysoft Data Recovery for Windows is a popular data recovery software that can recover lost or deleted files from various types of storage devices, including USB drives, hard drives, memory cards, and more. It is advised to have a trial by clicking the green button below.
Share this if you find it satisfying!
Also read Securing Your USB Drive with BitLocker: A Practical Guide and How to Remove BitLocker Without Recovery Key and Password
