Written by
Yuri ZhangSummary: This article addresses the "Getting Windows Ready" stuck error including disconnection from the internet, System File Checker, etc. For data recovery before a fresh install, tools like iBoysoft Data Recovery can help retrieve files from a PC that won't boot.

Windows 10 has been available since July 2015 and since then, Microsoft updated it quite a few times. Each time it updates, it goes through the installation process and can potentially run into problems.
One of the more common problems when installing Windows is the message "Getting Windows ready. Don't turn off your computer" stuck on the screen. Let's look at what you can do to solve this problem if it happens to you.
What is the "Getting Windows Ready" stuck problem?
When you install Windows 10 or apply the latest updates, part of the setup process is a screen that says "Getting Windows ready. Don't turn off your computer."
That message displays with an animated icon meant to indicate Windows is working on the update. The trouble is, there's no indication of how far through the process it is.
Behind the scenes, Windows is copying files to your computer, updating system files to new versions, configuring the Windows Registry, and various other steps in the update cycle. You just can't tell where it is in the process.
In some cases, the computer can get stuck on this screen. When that happens, there's no way to know if it is stuck or if it's just taking some time to finish the update or installation.
Share this insight and help more understand this stuck issue.
How to Fix "Getting Windows Ready" Stuck Error?
The following steps offer several possible solutions to get past this message and finish the update process.
Fix 1: Disconnect your PC from the internet
Sometimes Windows can run into trouble communicating with the Microsoft servers over the internet. If this happens, the update process can't finalize the installation and it waits to get a response — sometimes indefinitely.
Disconnecting your PC from the internet can force the update process to move on since it sees that there's no connection at all. When that happens, it stops trying to connect to the server.
If your computer is connected to the internet through an ethernet cable, just unplug it from your PC. If it's connected over WiFi, you'll have to unplug your wireless router to break the connection unless your PC has an on/off switch for the wireless connection.
If this is the problem, your PC should move past the Getting Windows Ready screen shortly after disconnecting from the internet.
Fix 2: Wait it out
If disconnecting from the internet doesn't help, the solution might be as simple as waiting longer. In some cases, this part of the update process can take as long as 2-3 hours.
With no visible indication of how far through the process it is, you won't know just how long to give it. If you let it run for several hours, it might eventually finish the installation.
Fix 3: Restart your PC
If you wait for several hours and still see the same message, it's safe to say that your PC is stuck on that screen. If that's the case, restarting it may get the update process flowing again.
Yes, the screen does say not to turn off your computer. But if you've waited that long and nothing changed, it's unlikely to cause any problems.
Press the power button on your PC and hold it for several seconds until the computer turns itself off. Wait for another few seconds and press it again to turn the PC back on.
The update process should recognize where it got stuck and continue from that point, moving past the Getting Windows ready screen before long.
Fix 4: Use the WinRE tools to troubleshoot the problem
If none of the previous steps worked, you'll need to move on to some slightly more technical solutions. Windows 10 comes with a Windows Recovery Environment (WinRE) that lets you run several scanning and repair utilities when you run into problems.
If you're updating your PC to a new version of Windows and already have files saved on it, make sure you have a backup copy of that data before moving onto these solutions. If you didn't back it up before starting the update, you're in a tight spot. You can't boot your PC to back up the files if it's stuck at the getting ready screen.
If that's the case, iBoysoft Data Recovery for Windows will let you recover your valuable files from the PC even if Windows is stuck at the installation screen. That way, you can save your data to an external drive or USB stick before moving on to the next steps.
How to save your files from a PC that won't boot?
To start in WinRE when Windows 10 won't boot, you can either restart it twice at the Windows logo during startup to trigger it automatically or you can boot from a Windows 10 installation disk and choose Repair your computer > Troubleshoot.
Fix 5: Check system files
The Window System File Checker (SFC) can scan all the system files that are part of Windows and fix problems it finds. A corrupted system file could cause the setup process to stall so this may fix the issue.
To run the System File Checker, follow these steps:
1. Select Command Prompt in the WinRE menu.
2. Type the following command when the command prompt opens and press Enter: sfc /scannow /offbootdir=C: /offwindir=C:WindowsNote: If your computer boots from a different drive than C, replace the "C" in the command with the correct drive letter. And keep in mind that Windows could be installed on a different drive than your PC boots from so you may need two different drive letters in the above command.
If you're not sure what drive letters your computer uses, type diskpart and press enter to run the Diskpart utility. Then type list volume to see a list of the drives in your computer.
If the SFC finds any problems, you'll see a message with the details. Once it's finished, you can exit the WinRE tool and try restarting your PC to see if that solved the problem.
Fix 6: Windows startup repair
If the SFC didn't find any errors or it didn't solve the getting ready problem, you can try running the Startup Repair tool.
Once again, boot into WinRE and select the Startup Repair option this time. This tool runs a scan for issues that could be preventing the PC from starting up properly and can fix many of them automatically.
Once the scan is done, restart your PC and see if it continues past the Getting Windows ready screen this time.
Fix 7: Roll back recently installed updates
If the startup repair process doesn't help, the next step is to uninstall any recent updates. Sometimes a problem with a previous update can stop newer updates from installing properly. Rolling back to an earlier point may let the new update work.
Boot into WinRE and select Uninstall Updates from the options. Next, choose Uninstall the latest quality update to remove the last minor Windows update or Uninstall the latest feature update to remove the lastest major Windows update.
Once the rollback process is done, try rebooting and start the new update again. If a previous update was holding up the process, it should move past the getting Windows ready screen fairly quickly now.
Fix 8: Do system image recovery or system restore
If none of the previous solutions work, you can try running the System Restore or System Image Recovery tools in WinRE. These work similarly but they're slightly different in what they do.
System Restore lets you fall back to an older restore point if you have the System Restore feature turned on in Windows. This feature saves "snapshots" of your system regularly so you can roll back to a point when your PC was working properly.
System Image Recovery lets you restore Windows 10 using a system image file. This overwrites Windows with a fresh copy of all system files so it can fix various problems.
If you have the System Restore feature turned on in Windows, try that tool first. If you don't have it enabled or it doesn't solve the problem, try System Image Recovery instead.
Fix 9: Fresh Windows installation
If none of the steps above solve the getting Windows ready stuck error, the final solution is to reinstall Windows 10. This is the most extreme solution because it erases everything on your Windows 10 partition. It's also the most reliable since it installs a completely fresh version of Windows.
Share these guides if you find them practical and useful.
How to save your files from a PC that won't boot
Before installing a fresh copy of Windows 10, you'll need to make sure you've got a backup copy of all your files and important data. Reinstalling Windows formats the drive and could overwrite your data so it's important to do this before starting the installation.
iBoysoft Data Recovery for Windows lets you recover any important files that you haven't already backed up. It's a simple process to scan your PC for important files and save them to another disk for safekeeping.
Tutorial to recover data when the computer won't turn on:
1. Create a bootable drive of iBoysoft Data Recovery.
Create a bootable drive of iBoysoft Data Recovery and start your unbootable computer from iBoysoft Data Recovery bootable drive.
2. Scan the data with iBoysoft Data Recovery.
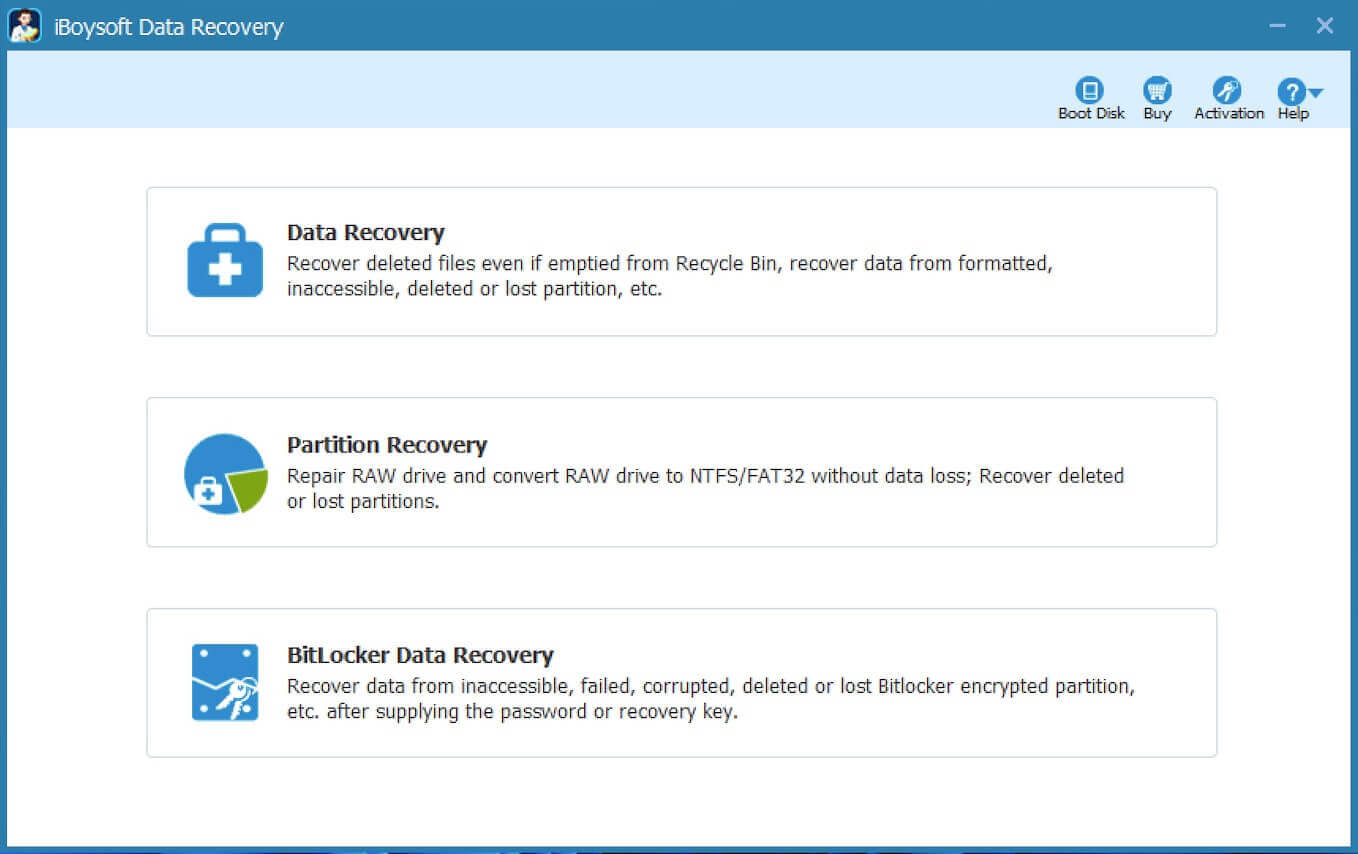
After running iBoysoft Data Recovery, choose Data Recovery module. If the operating system is encrypted by BitLocker, choose BitLocker Recovery module instead.

Select the operating system drive and click Next to start scanning the drive for your missing files.
3. Preview and recover your files
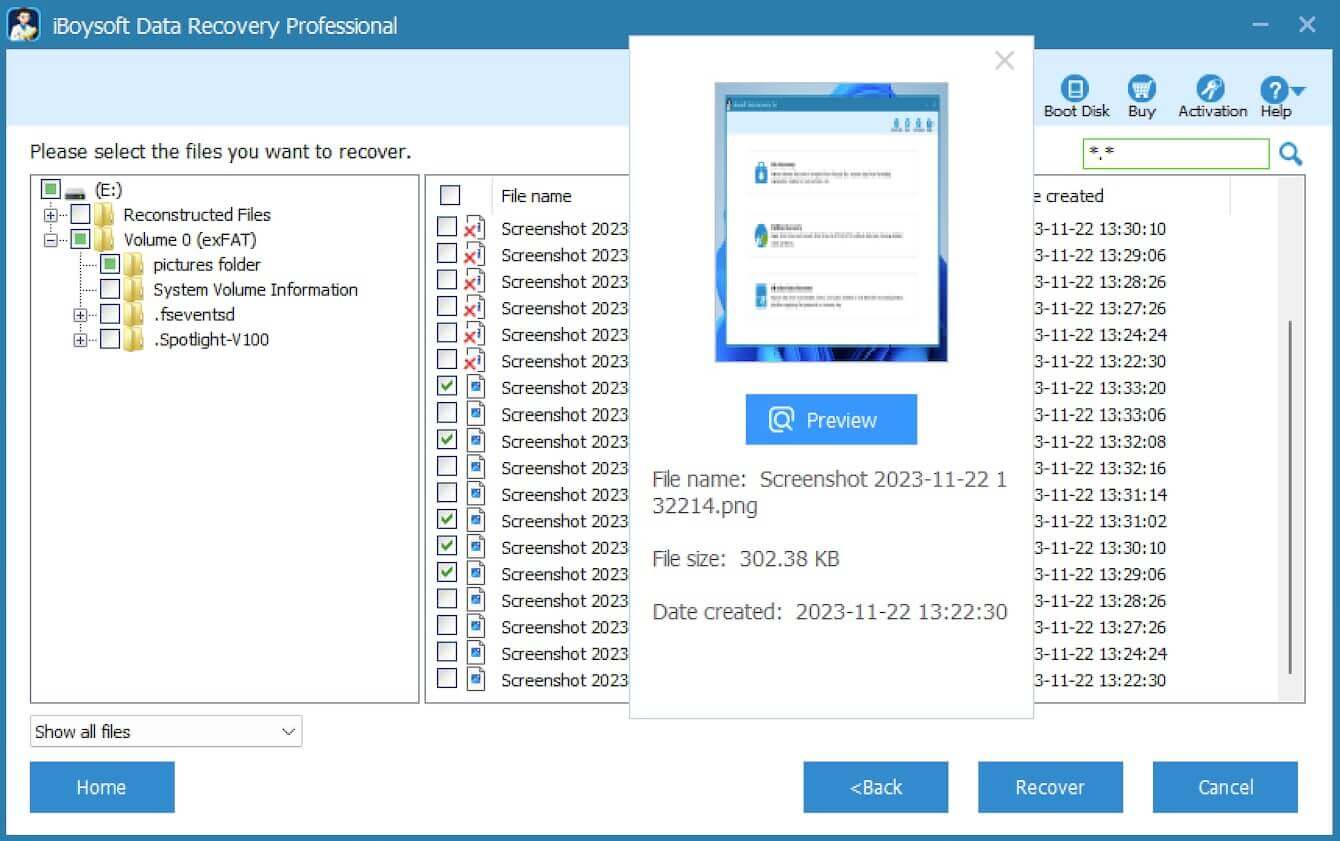
Once the scan is complete, you'll see a list of all the files found on the drive. Select the files you want to recover and click Recover to get them back.

Don't let Windows errors get the best of you
When the message "Getting Windows ready" is stuck on your screen for what seems like forever, it can be a little nerve-wracking, especially if you have important data on your PC that you haven't saved.
But don't worry - with the steps we've outlined in this article, there's a good chance you'll be able to sort it out without too much trouble. And if it's more serious, you can use iBoysoft Data Recovery for Windows to find your valuable data back before taking more extreme steps to solve the problem.
Related articles
Deleted File Recovery: How to Recover Deleted Files in Windows 10?
How to Recover Lost Data After Upgrading to Windows 11?
How to Check & Manage Disk Space or Storage in Windows?
How to Check Hard Drive Health on Windows 10/11 Toillessly?
How to Share Large Video Files Without Further Ado
Spread this article and believe the Getting Windows Ready problem will be resolved quickly.
