Written by
Wilsey YoungSummary: This post discusses what causes BitLocker could not be enabled error and offers several solutions. With the help of iBoysoft DiskGeeker for Windows, you can encrypt the disk partitions with BitLocker on Windows Home editions.
BitLocker can protect your data by encrypting the entire disk drive, making it more difficult for data theft and unauthorized users to access the data, especially when your PC is stolen, lost, or improperly computer decommissioned.
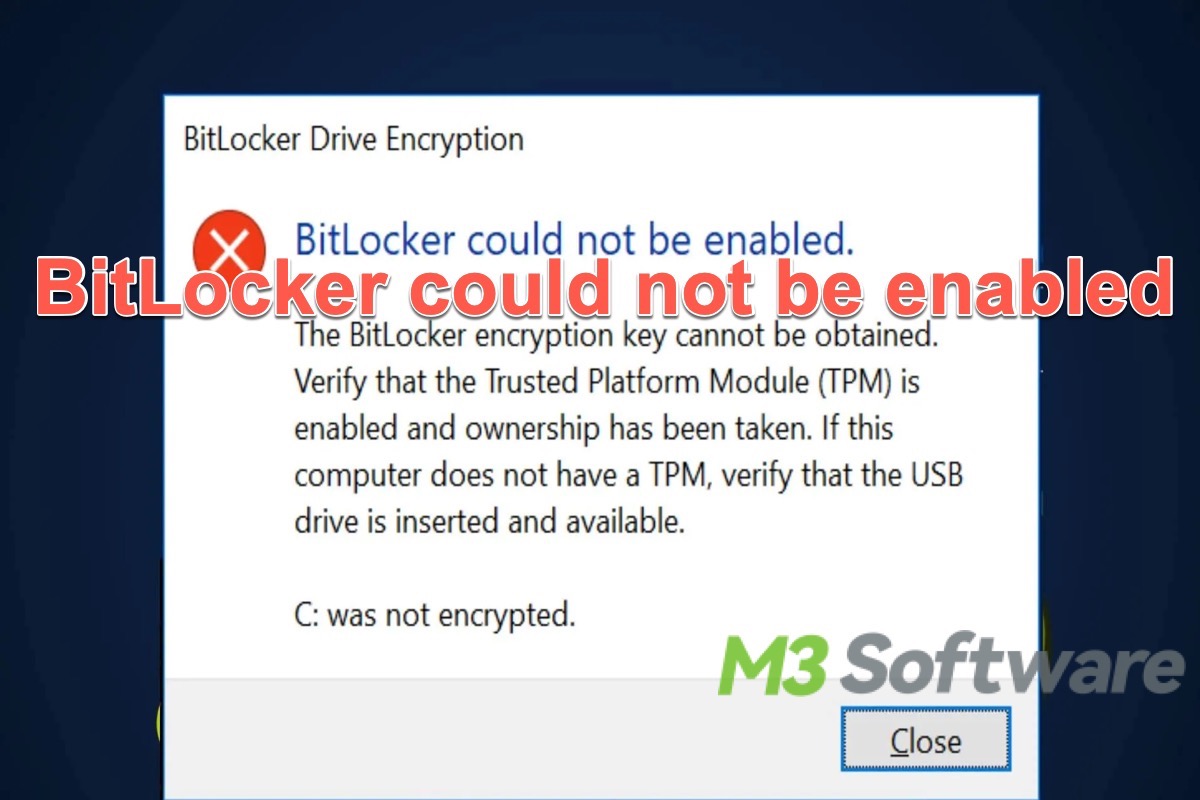
Some Windows users reported the "BitLocker could not be enabled" error when they attempted to encrypt their data stored on the disk with BitLocker. This post will dive into the possible causes of the "BitLocker could not be enabled" error and offer corresponding solutions.
You can share this post with friends and tell them how to fix the “BitLocker could not be enabled” error.
Reddit discussion on “BitLocker could not be enabled” error
The “BitLocker could not be enabled” error seems rampant on the internet and many Windows users have complained about the frequent popping-up of this error.
We can see the heated discussions in the post on Reddit about the “BitLocker could not be enabled” error, users wondered why and how to stop the error from showing up. Different solutions and analyses are being talked about based on this nuisance.
Unable to disable "Bitlocker could not be enabled" error on startup
by u/Intel_Xeon_E5 in WindowsHelp
What causes the "BitLocker could not be enabled" error?
We list some possible factors that will cause the "BitLocker could not be enabled" error to pop up:
- TPM (Trusted Platform Module) chip is not enabled in BIOS.
- BitLocker fails to communicate with the TPM chip.
- A TPM chip that is not version 1.2 or later
- Physical problems with the computer hardware
- Outdated BIOS version
- Partition is not converted to GPT
You can easily share this post if you want to!
How to fix the "BitLocker could not be enabled" error?
Each of the following solutions to the "BitLocker could not be enabled" error is marked with its applicable error message type, so you can choose the appropriate fix according to the error message you came across.
Recommended solution: Easily use BitLocker via iBoysoft DiskGeeker for Windows!
Before using specific solutions based on different error message types, you can first try iBoysoft DiskGeeker for Windows, the best disk management tool, you can encrypt your disk or partition with BitLocker more easily than the original BitLocker encryption wizard requires! Most importantly, bypassing the “BitLocker could not be enabled” error is possible!
If you are using a computer installed with Windows Home Edition, you may feel disappointed about not being allowed to use the BitLocker feature. iBoysoft DiskGeeker for Windows helps break the limit! This incredible disk management tool can give you the green light to use BitLocker encryption on Windows 11/10/8/7 Home Editions.
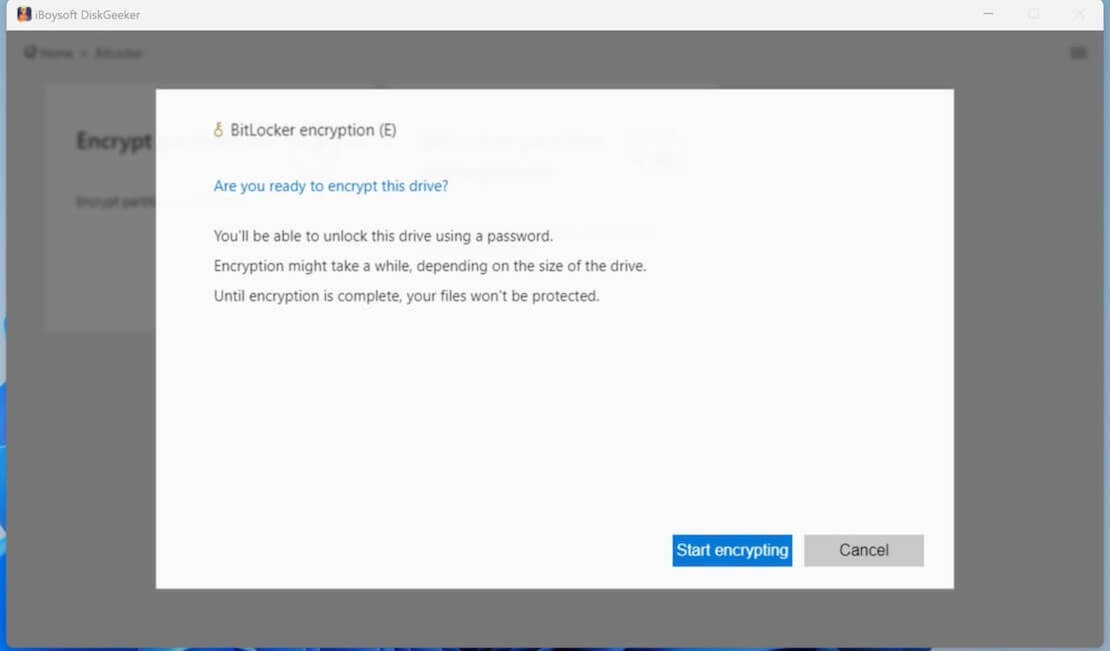
- Download, install, and open iBoysoft DiskGeeker for Windows.
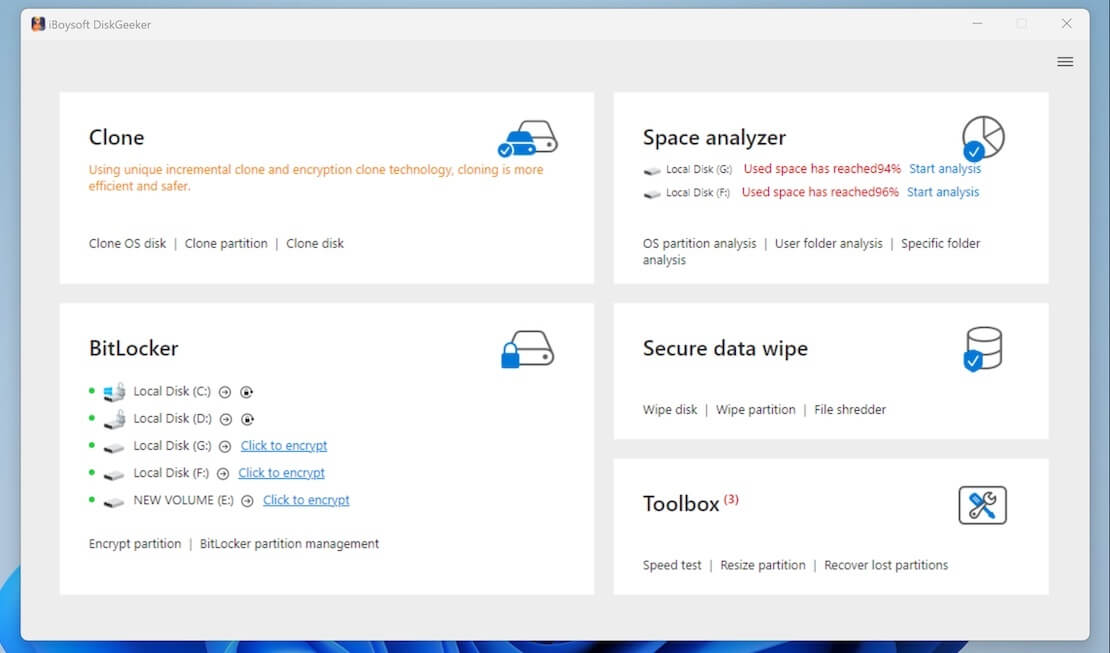
- Click the “Click to encrypt” button next to the partition from the BitLocker module.
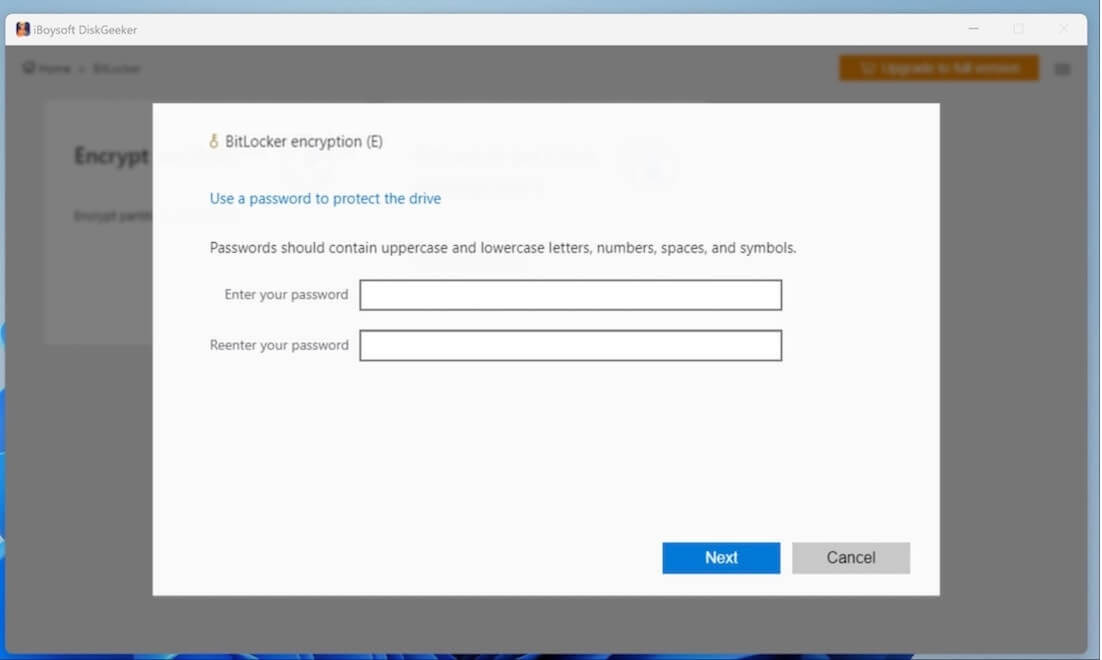
- Enter the password and click “Next.”
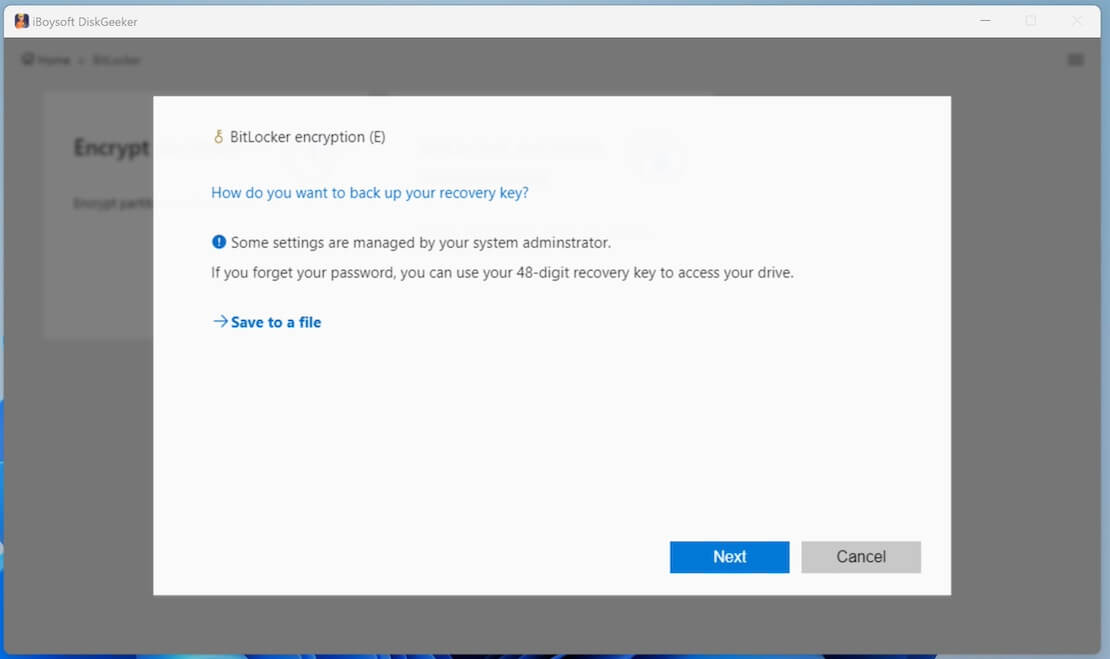
- Save the generated BitLocker recovery key and click “Next.”
- Click “Start encrypting” to let the encryption begin.
Error message type 1:
BitLocker could not be enabled. The BitLocker encryption key cannot be obtained from the Trusted Platform Module(TPM).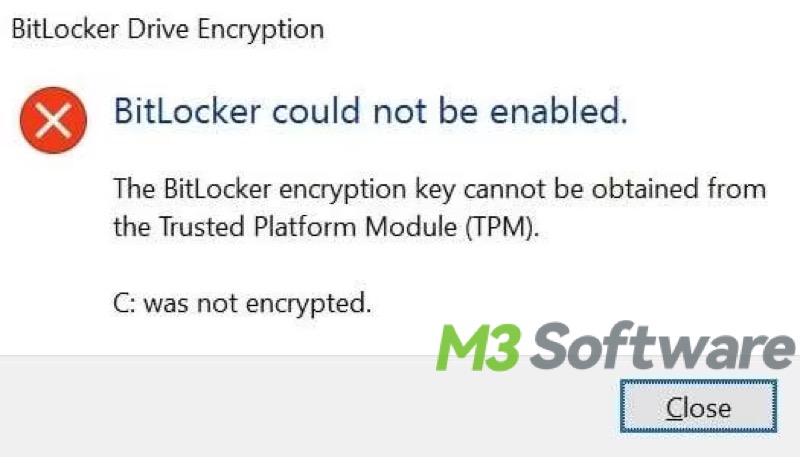
Solution to error message type 1: Turn off BitLocker and re-enable it
According to the feedback from some BitLocker users, turning off and re-enabling BitLocker may serve as a quick fix for the built-in tools bug or communication failure between the TPM chip and BitLocker.
- Type "Manage BitLocker" in the Windows search bar and click the result to open.
- Locate the BitLocker encrypted drive and click the "Turn off BitLocker" option.
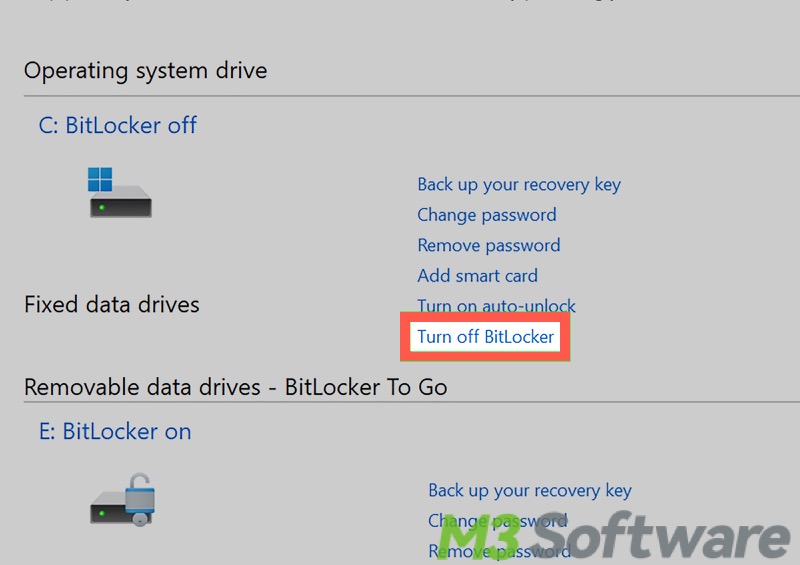
- Follow the wizard to disable the BitLocker completely and restart your PC
- Repeat step 1 and click "Turn on BitLocker."
Solution to error message type 1: Enable BitLocker Drive Encryption service
If the Windows OS delays running the BitLocker Drive Encryption service, you will not be able to enable BitLocker successfully and will receive the BitLocker could not be enabled error message. You can follow the steps below to enable the service:
- Press the “Windows+R” keys to launch the run dialog box, type “services.msc” in it, and hit the "Enter" key on your Keyboard.
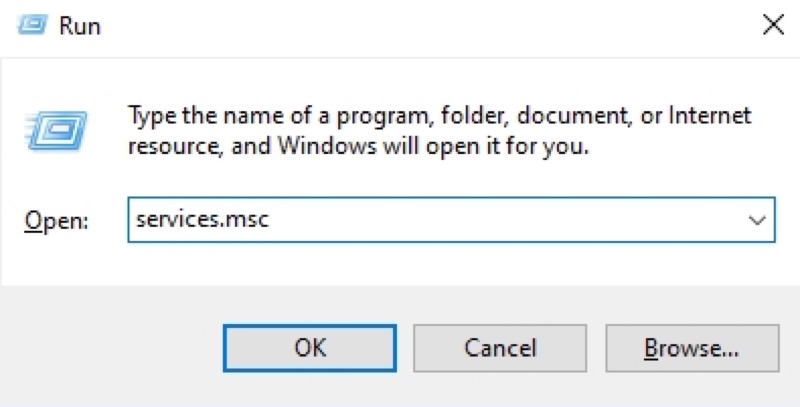
- Find BitLocker Drive Encryption from the list, right-click on it, and select “Properties.”
- Click the "Startup type" option and choose "Automatic" from the dropdown box.
- Click the "Start" button below the "Service status."
- Click "Apply" and "OK."
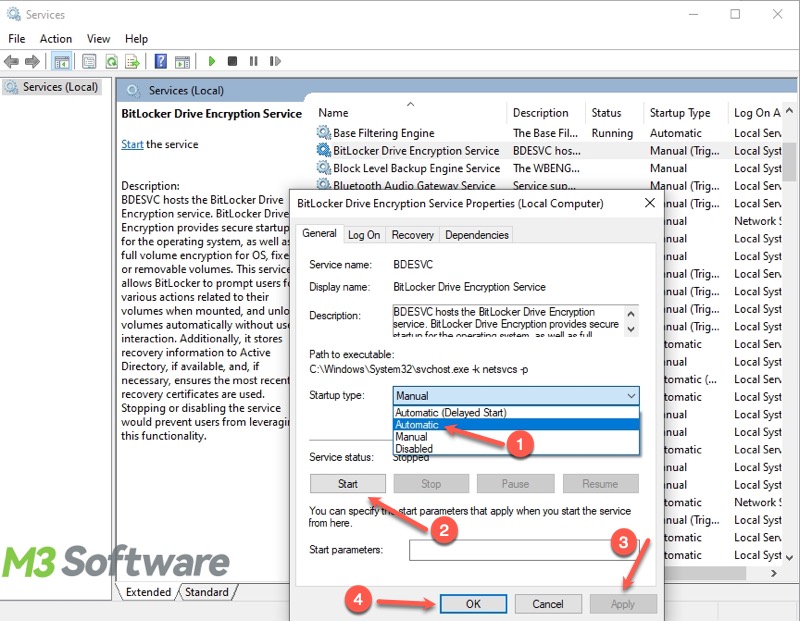
- Restart your PC.
Solution to error message type 1: Uninstall TPM driver in Device Manager
An outdated TPM driver may result in the “BitLocker could not be enabled” error, so you can manually uninstall the TPM driver in “Device Manager” and let the system reinstall it automatically.
- Type “Device Manager” in the Windows search bar and click it to open.
- Find "Security devices" in the list and click it to expand.
- Right-click on Trusted Platform Module and select "Uninstall device."
- Click the "Uninstall" button to let it begin.
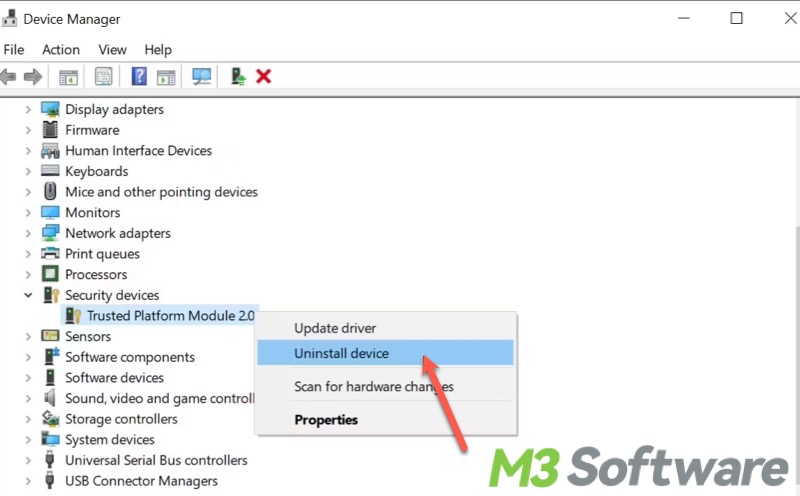
- Restart your PC and Windows will reinstall the driver by itself.
Solution to error message type 1: Convert MBR partition to GPT partition in Disk Management
You won't be able to enable BitLocker with TPM if your disk is using the MBR partition scheme, so you need to convert your disk to GPT in Disk Management, and the “BitLocker could not be enabled” error is possible to be solved.
Note: Converting an MBR disk into a GPT disk will wipe out everything on the drive, so it's recommended to back up your important files before taking action.
- Right-click on the “Start” button left bottom and select “Disk Management.”
- Right-click each partition on the MBR disk and select “Delete Volume.”
- Right-click the MBR disk and choose “Convert to GPT Disk.”
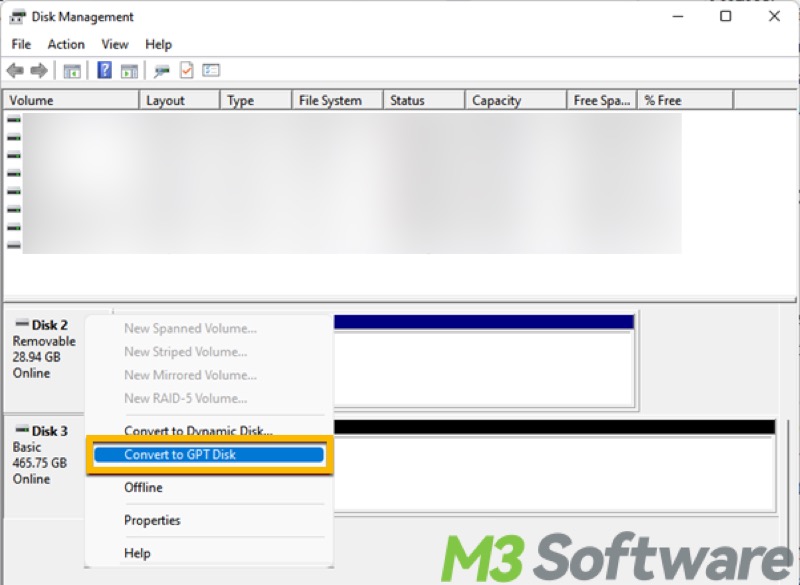
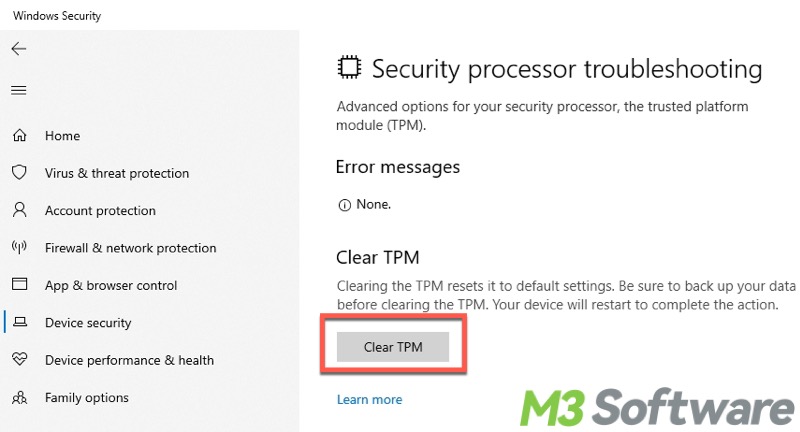
Solution to error message type 1: Clear TPM via Windows Settings
Clearing TPM is to reset it to the default setting, and it's been proved that clearing TPM can remove the BitLocker could not be enabled error.
Note: Be sure to back up your important data before clearing TPM!
- Press the “Windows+i” keys to open Settings. You can also click the “Start” button left bottom and click the gear icon to open “Settings.”
- Go to Update & Security > Windows Security > Device Security.
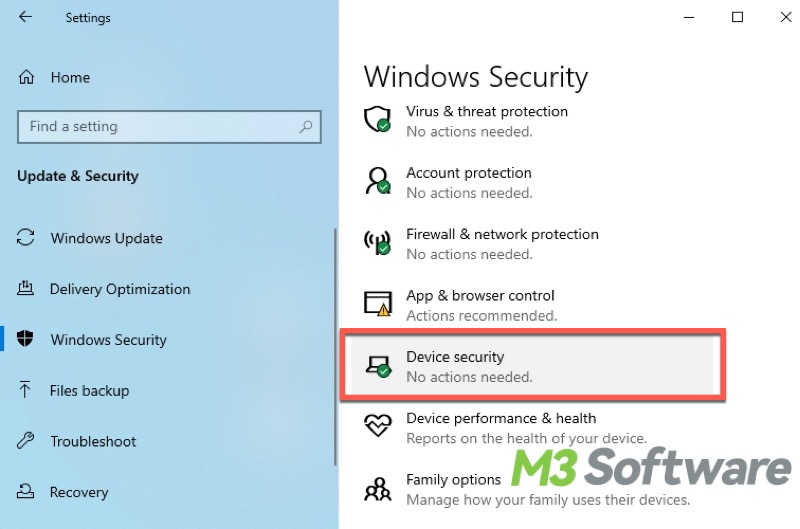
- Click the "Security processor details" under "Security processor."
- Choose "Security processor troubleshooting."
- Click "Clean TPM."
Error message type 2:
BitLocker could not be enabled. The BitLocker encryption key cannot be obtained. Verify that the Trusted Platform Module (TPM) is enabled and ownership has been taken. If this computer does not have a TPM, verify that the USB drive is inserted and available.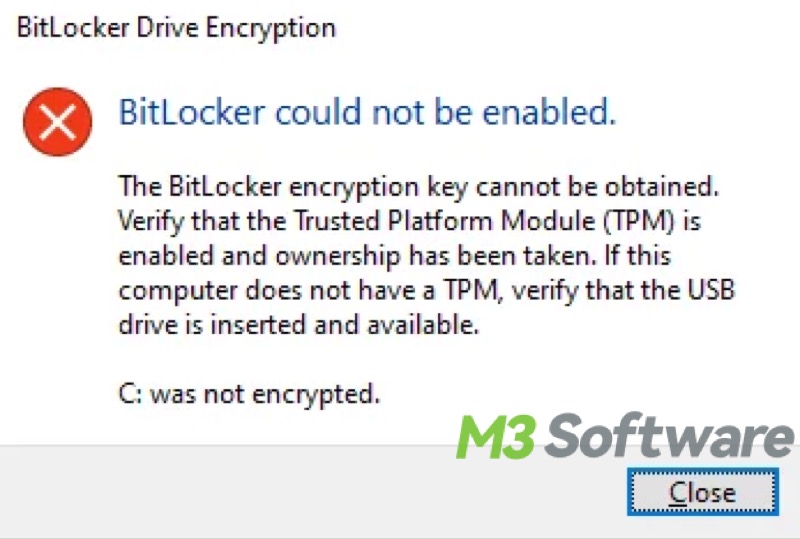
Solution to error message type 2: Check the USB drive or USB port
You may run into a "BitLocker could not be enabled" error when you try to encrypt your USB flash drive with BitLocker To Go. In this case, checking the USB drive or USB port is the first priority.
- Insert the USB flash drive into another USB port, including the USB port on the motherboard.
- Use another USB flash drive.
- Make sure the USB device can be loaded during boot time.
Solution to error message type 2: Update the BIOS
Updating the BIOS to the latest version may help fix the "BitLocker could not be enabled" error, and here's how:
- Insert an empty USB flash drive into the USB port on the motherboard instead of the front USB panel. Note: The USB flash drive must be formatted as a FAT32 file system.
- Go to the motherboard manufacturer's website, look for your motherboard model, download the BIOS update file, and choose USB flash drive as the location.
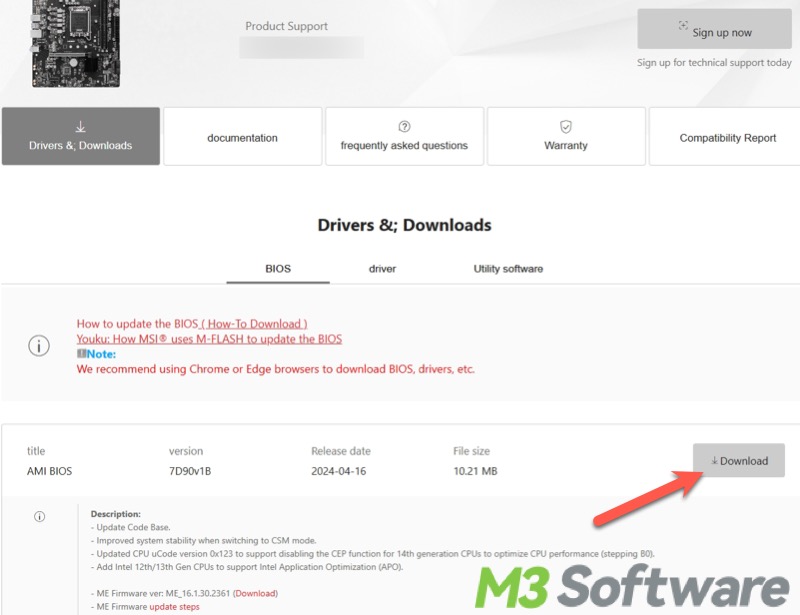
- Unzip the file to get the folder for the update, and delete the downloaded zip file.
- Restart your PC and keep pressing the “Del” key (the key to enter BIOS may vary based on the manufacturer) to enter the BIOS.
- Switch to the advanced mode, and click M-Flash. Find the inserted USB flash drive and the BIOS update folder.
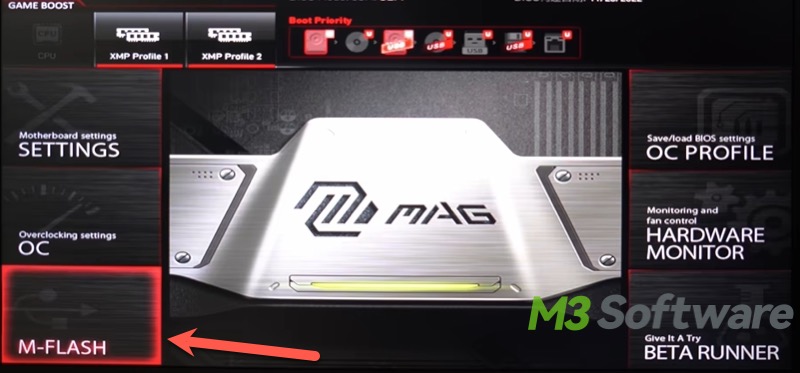
- Use the “Enter” key to open the folder and select the BIOS update file.
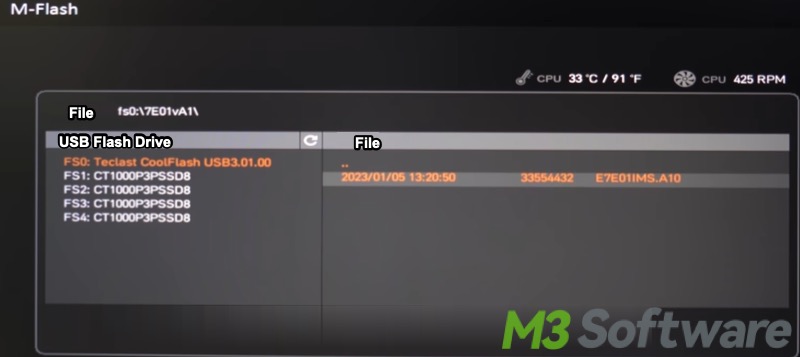
- Click “Yes” to start the BIOS update.
- Once the update is complete and the system will restart at once, keep pressing the “Del” key to enter BIOS again.
- You can exit the BIOS and let the system start.
Error message type 3:
BitLocker could not be enabled. The data drive specified is not set to automatically unlock on the current computer and cannot be unlocked automatically.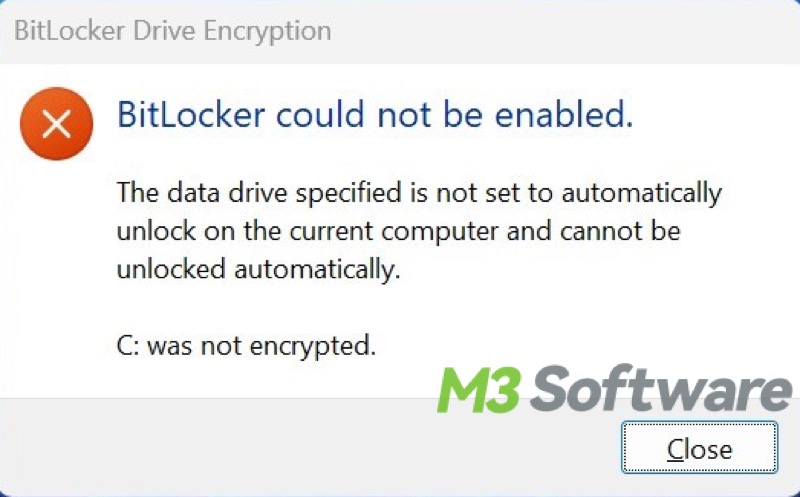
Solution to error message type 3: Reboot your computer system and try again
Rebooting your PC system and encrypting the drive again is the most straightforward way for you to have a try at first.
Solution to error message type 3: Update the TPM driver via Device Manager
The outdated TPM driver may also lead to the "BitLocker could not be enabled" error followed by the prompt of "The data drive specified is not set to automatically unlock..." You can fix this type of error by following the steps of updating the TPM driver mentioned above.
Solution to error message type 3: Prevent BitLocker system check
The BitLocker Drive Encryption wizard may prompt you to tick the "Run BitLocker system check" option(picture shown below), which is possibly to blame for the "BitLocker could not be enabled" error. Therefore, unchecking the option may do you a favor in handling this error. 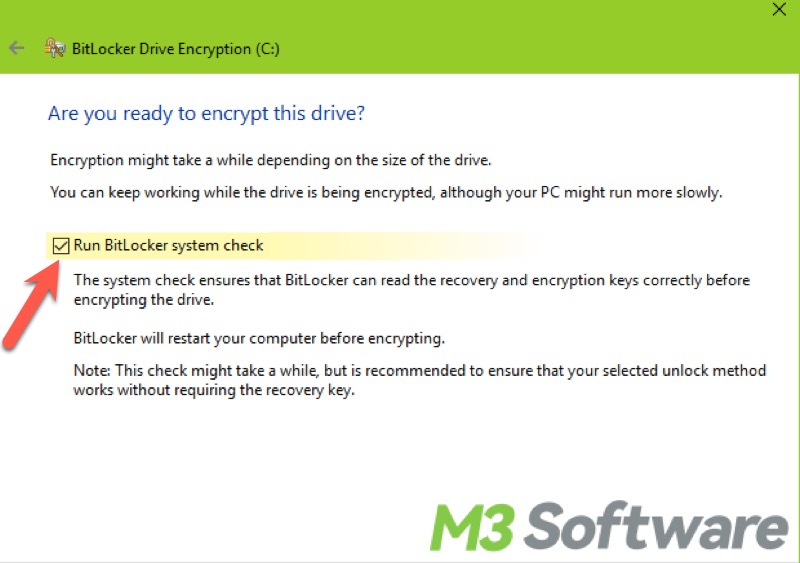
Do you find this post helpful? You can click the buttons below to share!
