
Written by
Wilsey YoungSummary: This post shows how to enable BitLocker via Control Panel and File Explorer. You will also learn how to check BitLocker status via Command Prompt. If your PC is installed with Windows Home editions, we recommend using iBoysoft DiskGeeker for Windows to make the BitLocker feature available.

In this guide, we are about to tell you how to turn on BitLocker through File Explorer and Control Panel on Windows 10. The tips on checking BitLocker status and managing BitLocker are also included in this post.
BitLocker, by default, is not available on Windows Home editions. iBoysoft DiskGeeker for Windows can help break through the wall and allows you to use BitLocker on a computer installed with Windows Home editions. You can download this professional disk management tool and follow the tutorial in this post to enable BitLocker.
You can share this post immediately by clicking the buttons below:
BitLocker requirements for your PC
Here are some requirements that your PC must meet before using the BitLocker encryption feature.
- Windows edition requirements: Windows Pro, Windows Enterprise, Windows Pro Education/SE, and Windows Education.
- TPM requirements: The device must have TPM (Trusted Platform Module) 1.2 or later versions.
The TPM (Trusted Platform Module) chip is a common hardware component installed on Windows devices. It works perfectly with the BitLocker to provide maximum protection, ensuring that a device will not be tampered with while the system is offline.
How to make BitLocker available on Windows Home editions?
BitLocker, for unknown reasons, is not available on Windows 10 Home edition. You need to have one of the higher editions, such as Windows Pro, Windows Enterprise, or Windows Education, to use BitLocker encryption.
With the help of iBoysoft DiskGeeker for Windows, you will be allowed to use BitLocker on Windows 10 Home, Windows 11 Home, Windows 7 Home, Windows 8 Home, and Windows 7 Professional editions. You can free download this safe and reliable disk management tool and follow the tutorial below to encrypt your disk partitions with BitLocker.
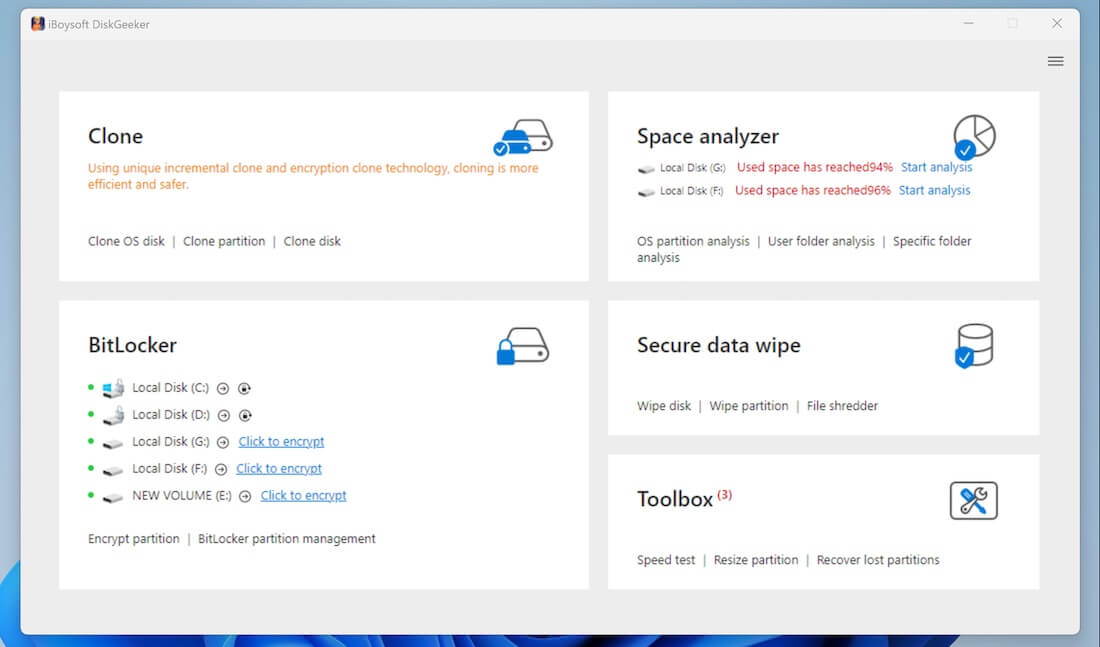
- Download, install, and launch iBoysoft DiskGeeker for Windows.
- Click the “Click to encrypt” button right beside the partition in the BitLocker module. Your partition must be formatted as the FAT32, exFAT, or NTFS file system before BitLocker encryption.
- According to the requirements of BitLocker, you are only allowed to encrypt a partition formatted as NTFS, FAT32, and exFAT file system.
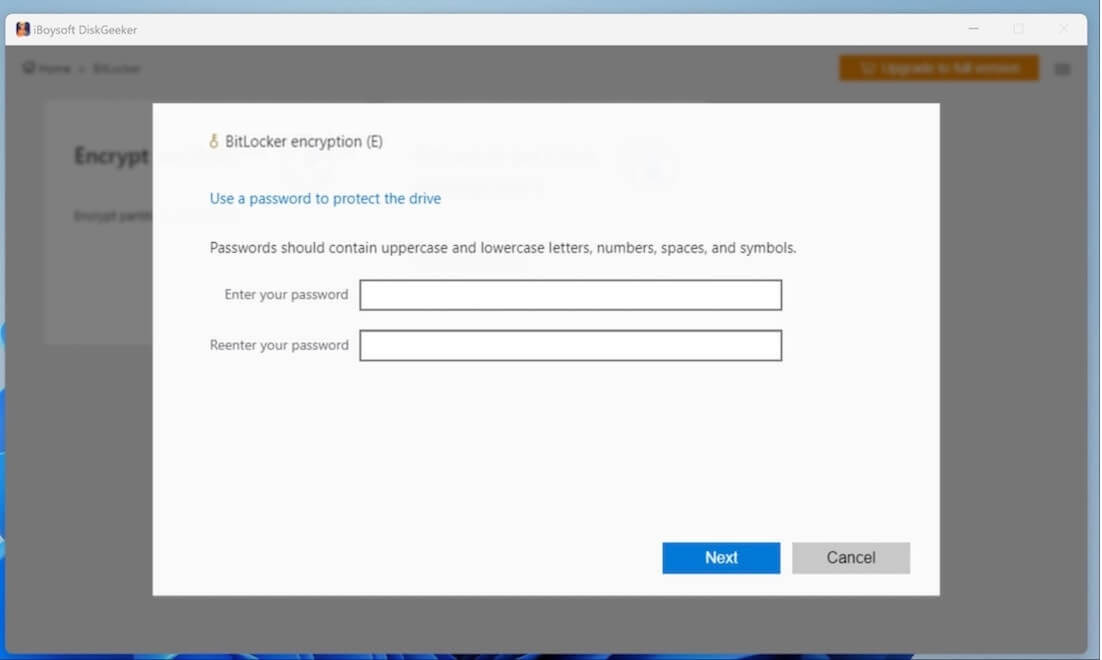
- Set the password and click “Next.” The password you set should contain 6 to 47 characters, and letters and numbers should be involved.
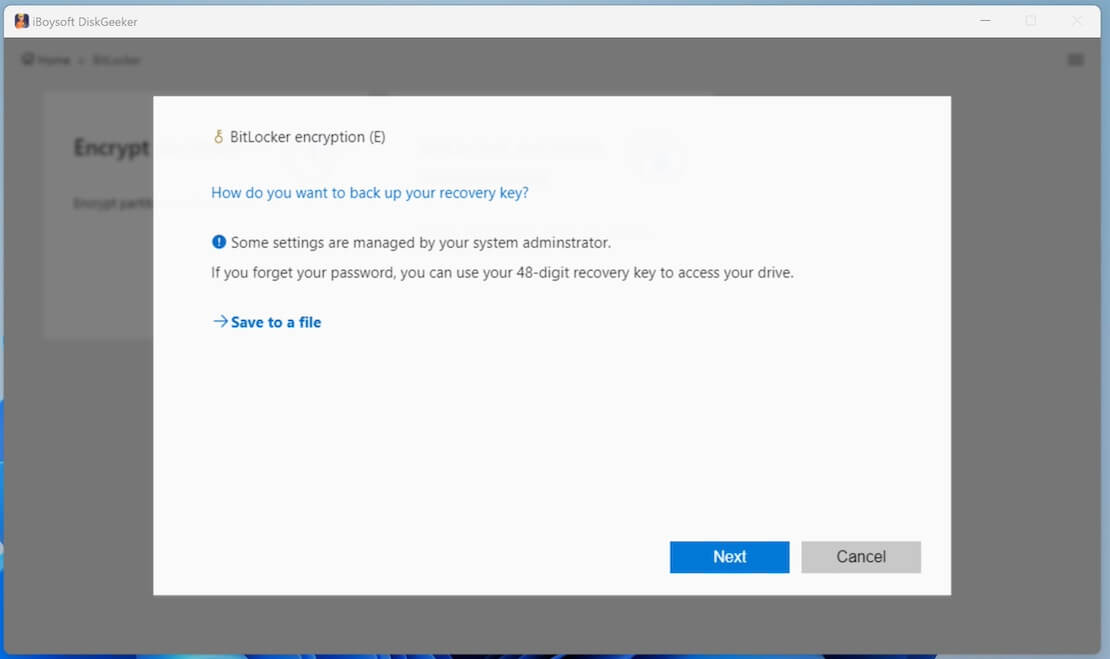
- Save the automatically generated BitLocker recovery key to a safe location on your PC.
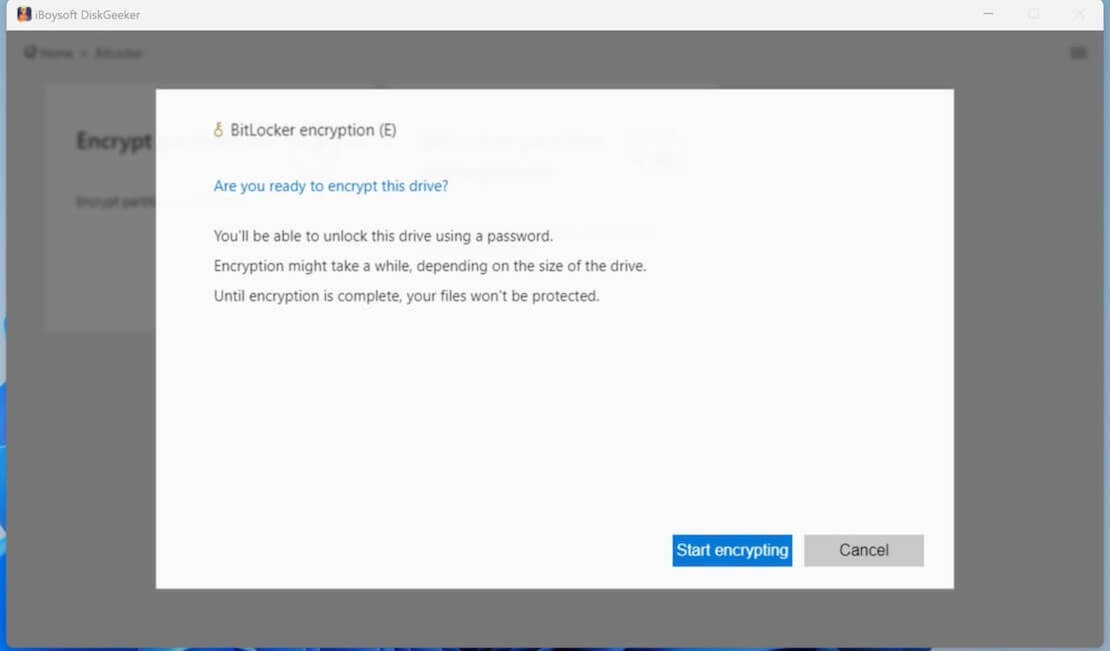
- Click “Start encrypting” to let the encryption begin.
You can share this wonderful disk management tool with your friends!
How to enable BitLocker on Windows 10?
Here we introduce how to turn on BitLocker via File Explorer and Control Panel on Windows 10.
Turn on BitLocker via File Explorer on Windows 10
Using File Explorer on Windows is the easiest way to enable BitLocker, and here is how:
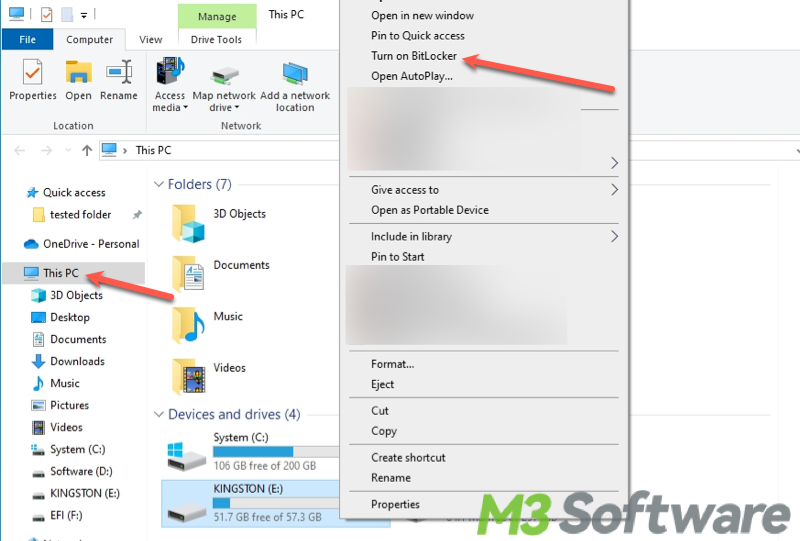
- Press the “Windows+E” keys to open “File Explorer” and choose “This PC” from left panel.
- Right-click on the partition or disk you want to encrypt and select “Turn on BitLocker” from the menu.
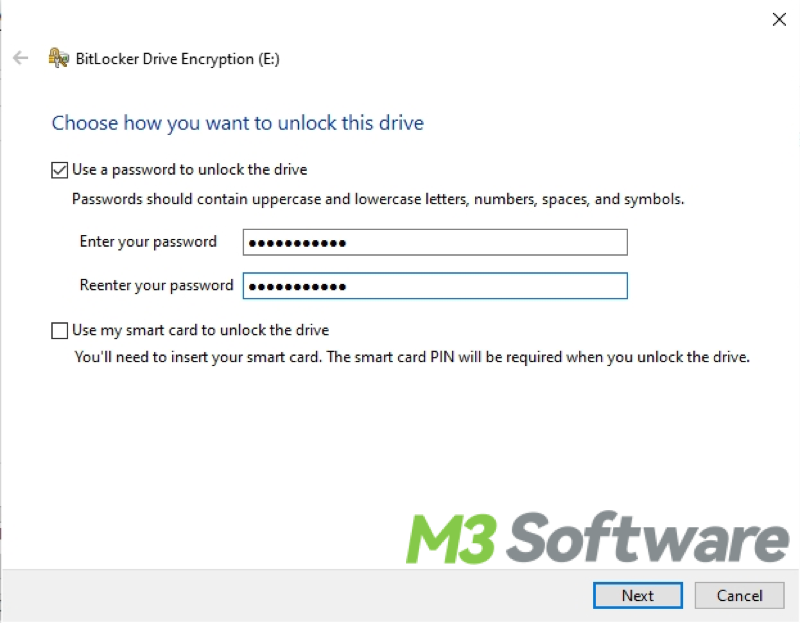
- Enter your password if you want to use password to unlock the drive. Click “Next” to proceed.
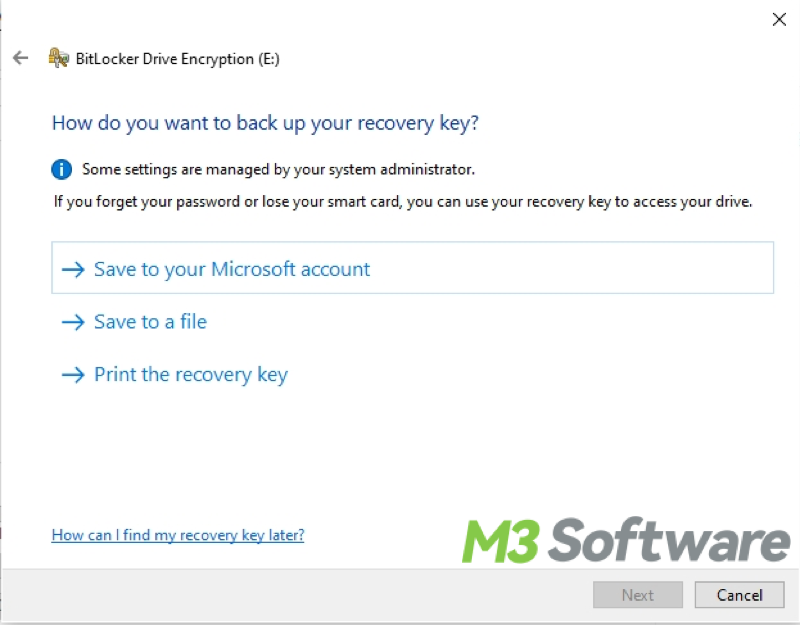
- Choose a way to back up the automatically generated BitLocker recovery key and click “Next.” The recovery key can be used to unlock the drive if you forget the password.
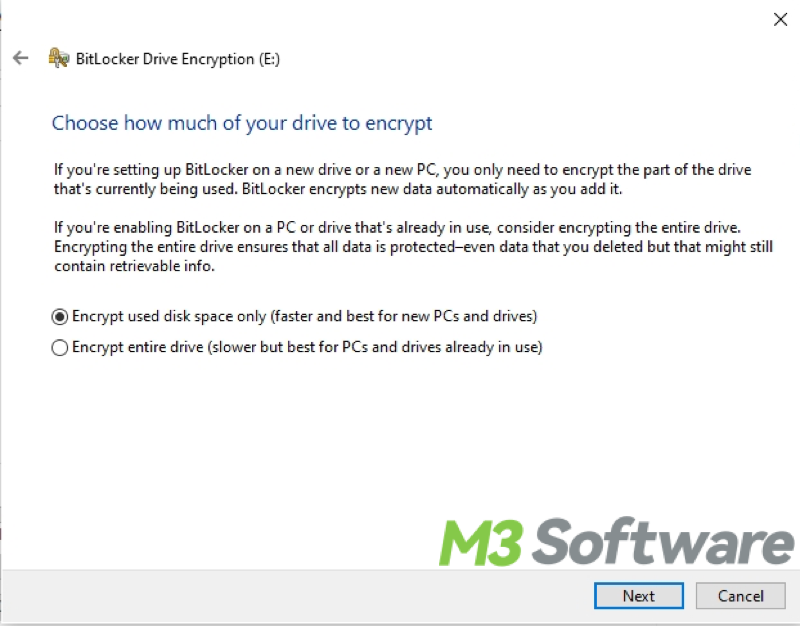
- Choose how much of your drive to encrypt and click “Next.”
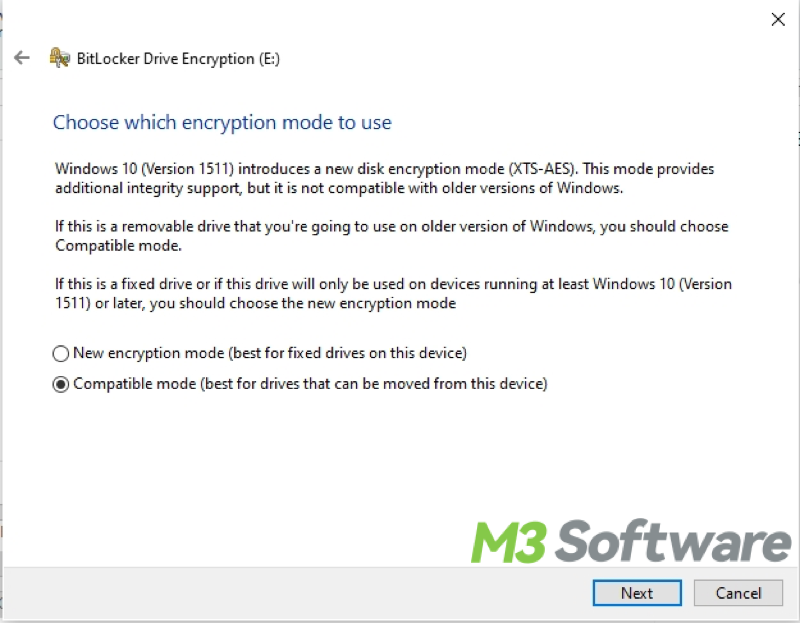
- Select the encryption mode and click “Next.”
- Click “Start encrypting.”
Turn on BitLocker via Control Panel on Windows 10
You can open the Control Panel to enter the BitLocker Drive Encryption pane, where you can enable the BitLocker.
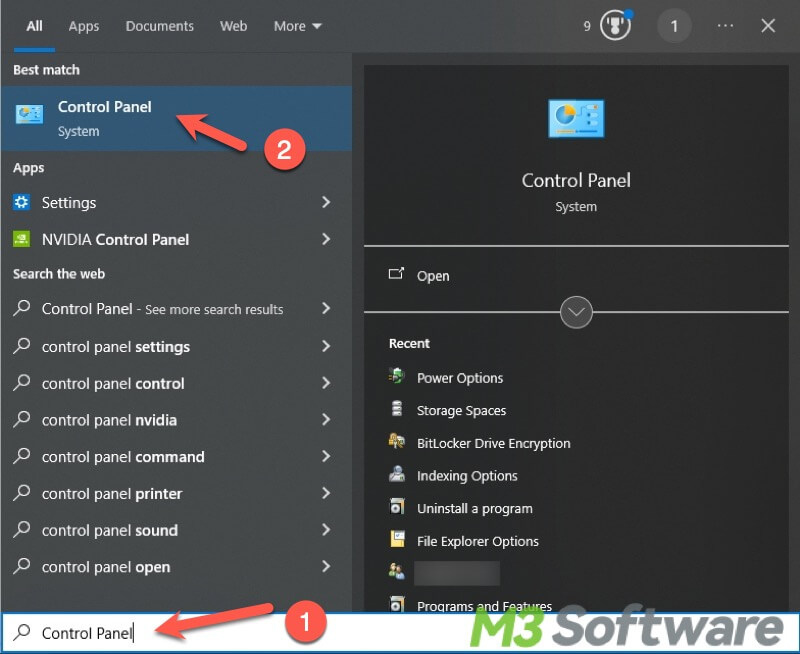
- Type “Control Panel” in the Windows search bar and click the result to open.
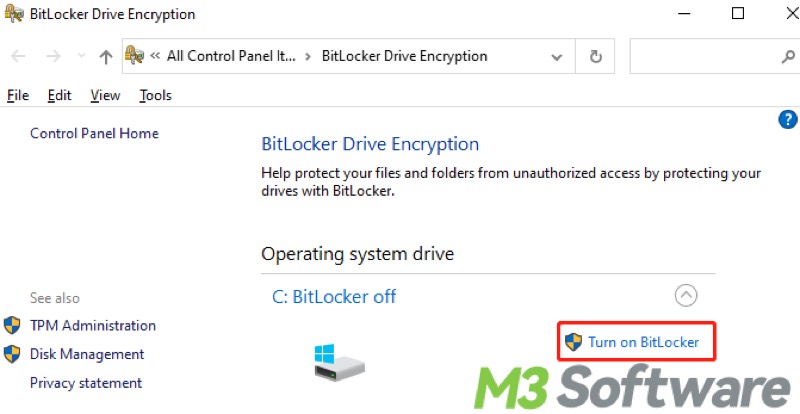
- Click “System and Security” and choose “BitLocker Drive Encryption.”
- Another way to get into the BitLocker Drive Encryption panel is to type “Manage BitLocker” in the search bar and click the result to open.
- Click “Turn on BitLocker” next to the drive icon.
- Follow the wizard to encrypt.
Make sure the BitLocker is successfully enabled via Command Prompt
After enabling and setting up the BitLocker in File Explorer or Control Panel, you can execute the command in Command Prompt to check if the drive is encrypted with BitLocker.
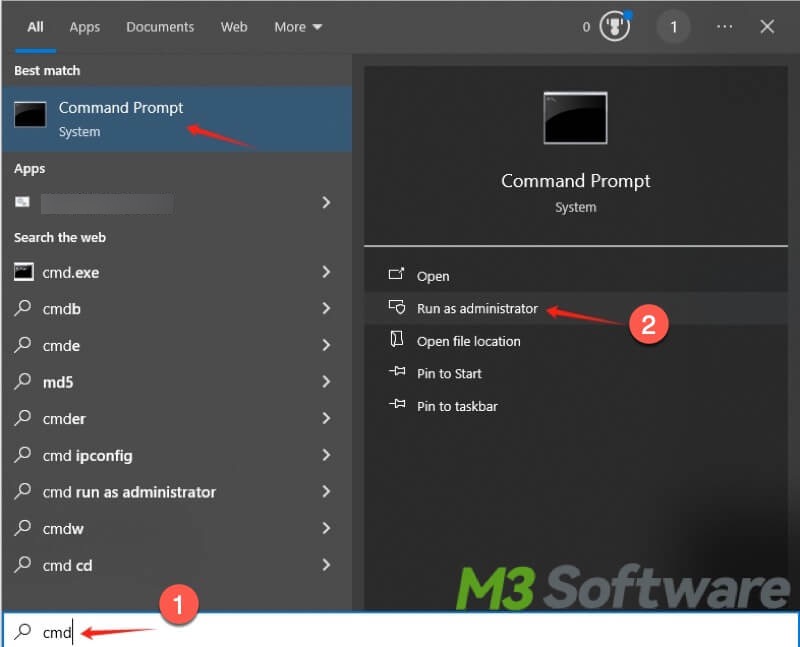
- Type “cmd” in the Windows search bar.
- Choose “Run as administrator.”
- Copy and paste the command below into the command window and hit the “Enter” key on your keyboard. You should replace the letter X in the command with the actual drive letter.
manage-bde status X:
After running this command, the detailed information of the BitLocker-protected drive will be displayed. If the drive is BitLocker-encrypted, you will see Protection On after the Protection Status: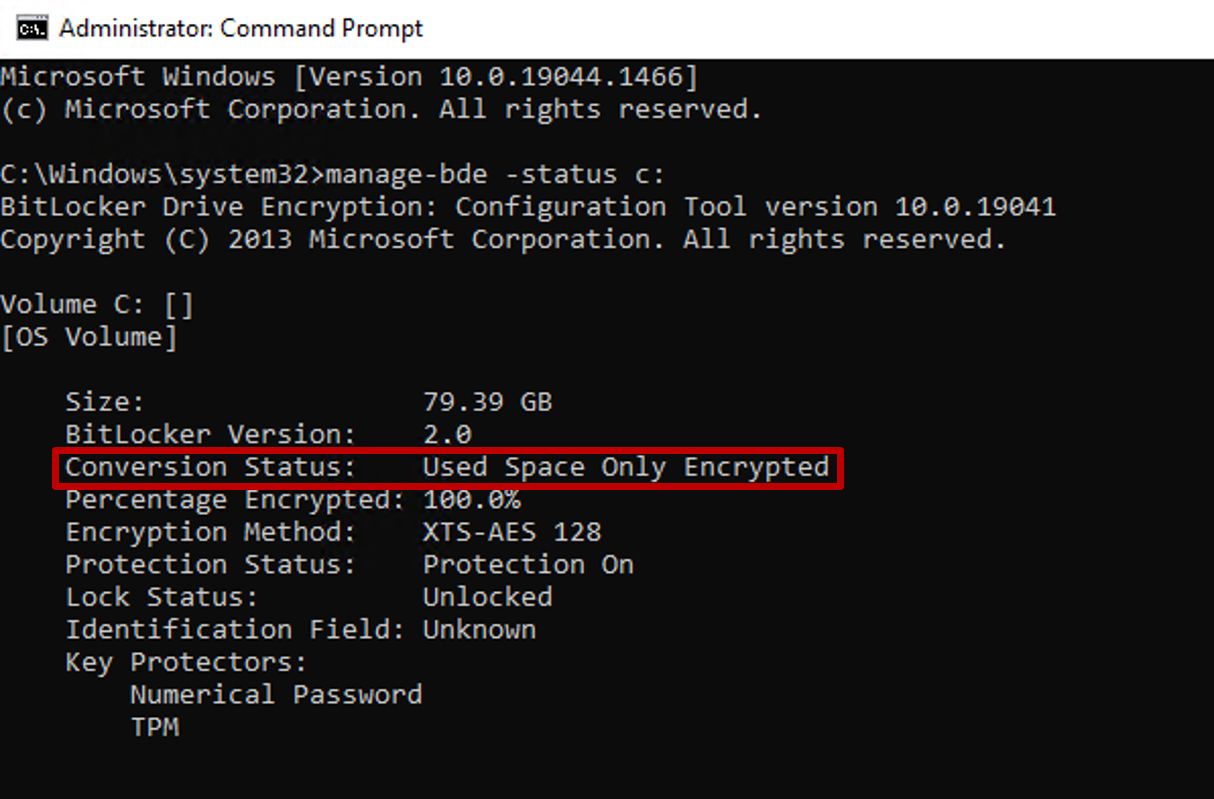
Here are some other channels to check the BitLocker encryption status on your PC: 5 Ways to Check BitLocker Status on Windows!
Manage your BitLocker encrypted drive
In this part, we show you how to turn off or manage BitLocker after the BitLocker is enabled.
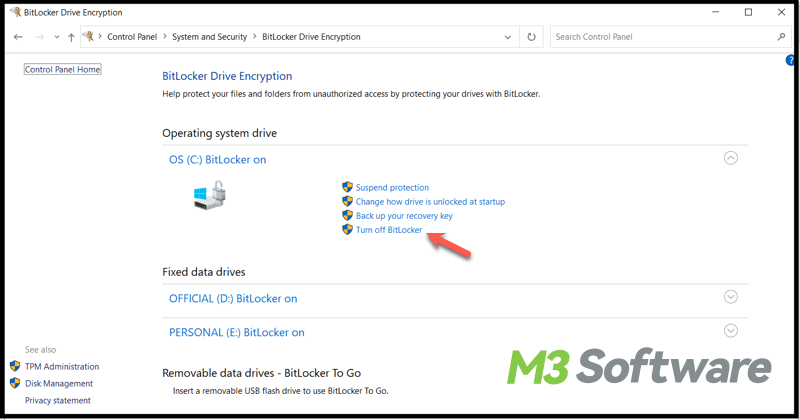
- Type “Manage BitLocker” in the Windows search bar and click the result to open.
- Find the encrypted drive you want and choose the options next to it.
- From here, you can suspend BitLocker, change how drive is unlocked at startup, back up your recovery key, and turn off BitLocker.
Tips: Suspending protection means that while the drive remains BitLocker-encrypted, the protection is temporarily disabled, and any person can gain access to the drive without providing a password or BitLocker recovery key.
Conclusion:
Remember to keep your BitLocker recovery key in a safe place, as it is essential for accessing your encrypted drive in case of emergencies, especially when you forget the password. With BitLocker, you can have peace of mind knowing that your sensitive information is safe from data theft and unauthorized access.
Do you like this post? You can click the buttons below to share!