Written by
Wilsey YoungSummary: This post briefly analyzes the BitLocker error "Starting BitLocker Access is denied" and provides proven solutions. iBoysoft DiskGeeker for Windows can help you easily encrypt a drive or partition with BitLocker, especially on Windows Home Editions PCs.
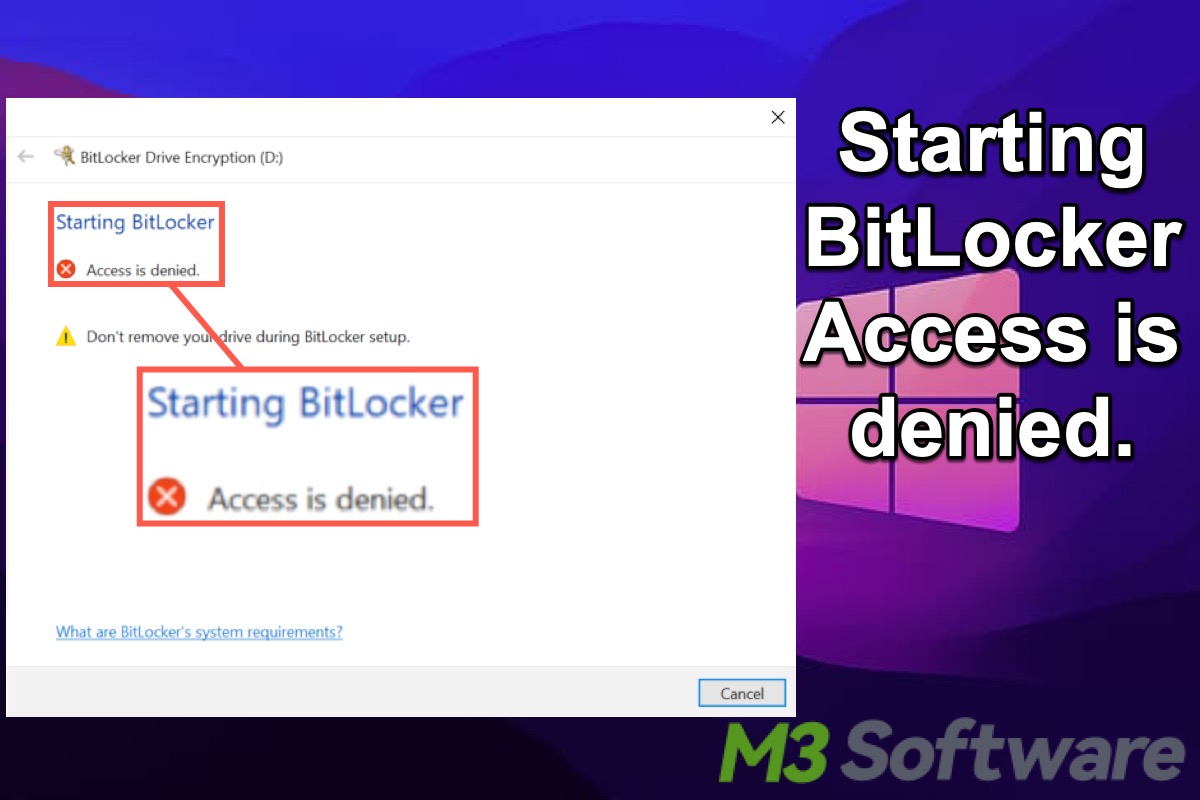
Encrypting a drive or partition using the Windows BitLocker encryption feature is commonly regarded as one of the best methods for protecting important data against unauthorized access, exposure, and loss.
However, many types of errors related to BitLocker drive encryption feature may occur, particularly when you attempt to enable BitLocker on your Windows PC. The "Starting BitLocker Access is denied" error is one of them. 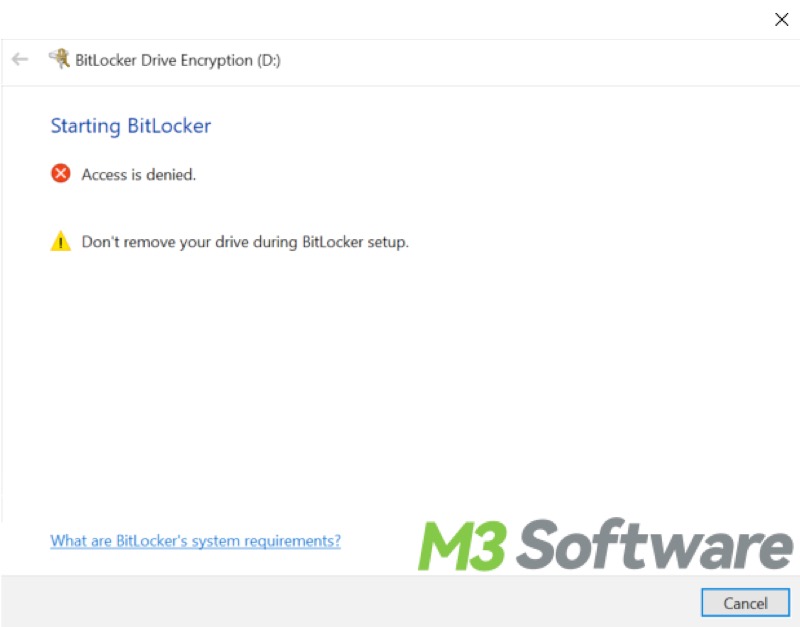
This post explores what causes the "Starting BitLocker Access is denied" error message to pop up on Windows 10 or Windows 11 when enabling BitLocker and shows how to fix the error using the solutions mentioned below.
What causes the "Starting BitLocker Access is denied" error?
The "Starting BitLocker Access is denied Windows 10" or “Starting BitLocker Access is denied Windows 11” error message may appear due to the following reasons:
- Insufficient permissions: Not having the required administrative privileges might lead to the failure of enabling BitLocker. This feature requires administrator access to configure and start encryption.
- Group Policy Restrictions: The incorrect configuration of group policies may restrict the use of BitLocker. These policies may prevent you from starting or modifying BitLocker settings.
- TPM Issues: The Trusted Platform Module (TPM) chip is often required for BitLocker to run properly. If the TPM is not enabled or not functioning correctly, this error will be triggered.
- Incompatible File System: BitLocker requires an NTFS file system for the system and fixed data drives. As for other file systems, BitLocker can encrypt FAT32 or exFAT partitions, but only when used for removable drives with BitLocker To Go.
- Corrupted System Files: This error will be triggered if system files critical for BitLocker or encryption processes are corrupted. Running a system check, such as the System File Checker, might help fix this issue.
- BitLocker is enabled via Remote Desktop Protocol: When you enable BitLocker via Remote Desktop Protocol, specific BitLocker group policy needs to be re-configured.
- BIOS Settings: Sometimes the BIOS settings, such as TPM being disabled, can prevent BitLocker from starting.
Sifting and addressing these potential causes usually solves the "Starting BitLocker Access is denied" issue.
You can share this post by clicking the buttons below:
How to fix the “Starting BitLocker Access is denied” error?
"Starting BitLocker Access is denied Windows 10" or “Starting BitLocker Access is denied Windows 11” error, you can try the following methods to get rid of the issue.
Make sure there's no media in the DVD drive
You should ensure there is no media in the DVD drive connected to the problematic computer. BitLocker will check all drives on your PC when initializing, even if it can't encrypt a DVD. Therefore, if there is media in the DVD drive, the “Access is denied” error message may occur.
Uninstall VPN software
Uninstalling any VPN software on the computer may help tackle the “Starting BitLocker access is denied” issue. VPNs can sometimes mess with BitLocker and interrupt its normal operation prompting the “Starting BitLocker Access is denied” error.
iBoysoft DiskGeeker for Windows
If you encounter errors and issues when using the built-in BitLocker on your Windows PC, download iBoysoft DiskGeeker for Windows and try it out!
With this professional and easy-to-use Windows security tool, you can easily encrypt NTFS, exFAT, or FAT32 partitions and hard disks using the BitLocker drive encryption feature without confronting some common errors caused by the original BitLocker program, such as "Starting BitLocker Access is denied" error.
In addition, iBoysoft DiskGeeker for Windows can make BitLocker available on computers that do not support the BitLocker feature, for example, Windows 11/10/8/7 Home and Windows 7 Professional editions.
You can follow the simple steps below to encrypt a partition with BitLocker via iBoysoft DiskGeeker for Windows:
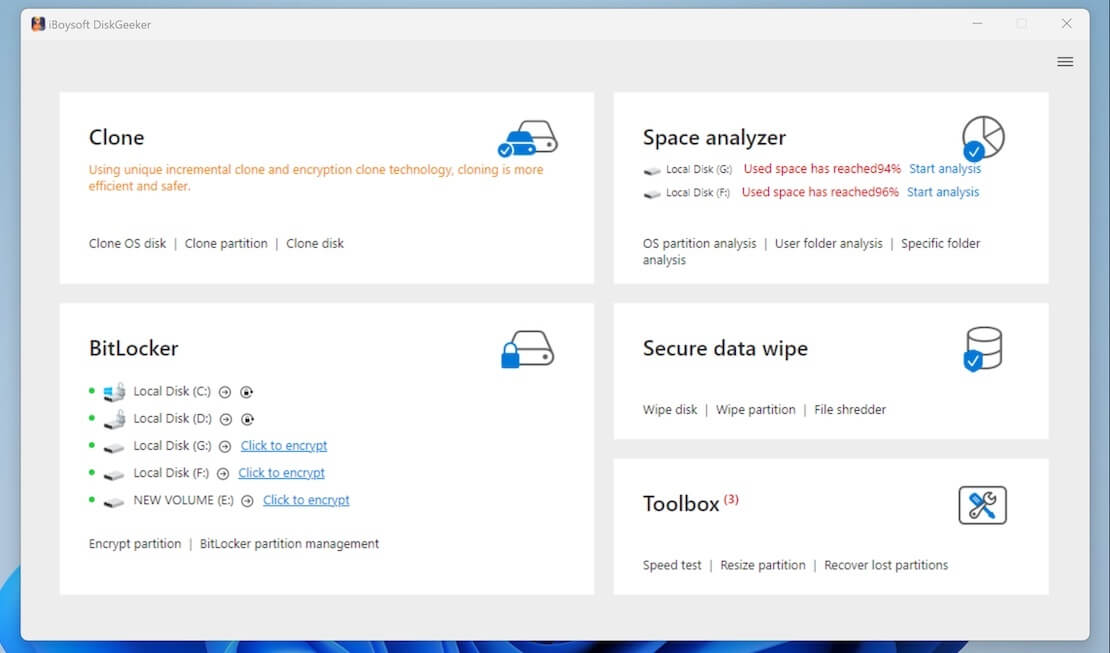
- Click the "Click to encrypt" button from the BitLocker module.
- You can either click the BitLocker module from the main interface, choose Encrypt partition, select a targeted partition, and click "Next."
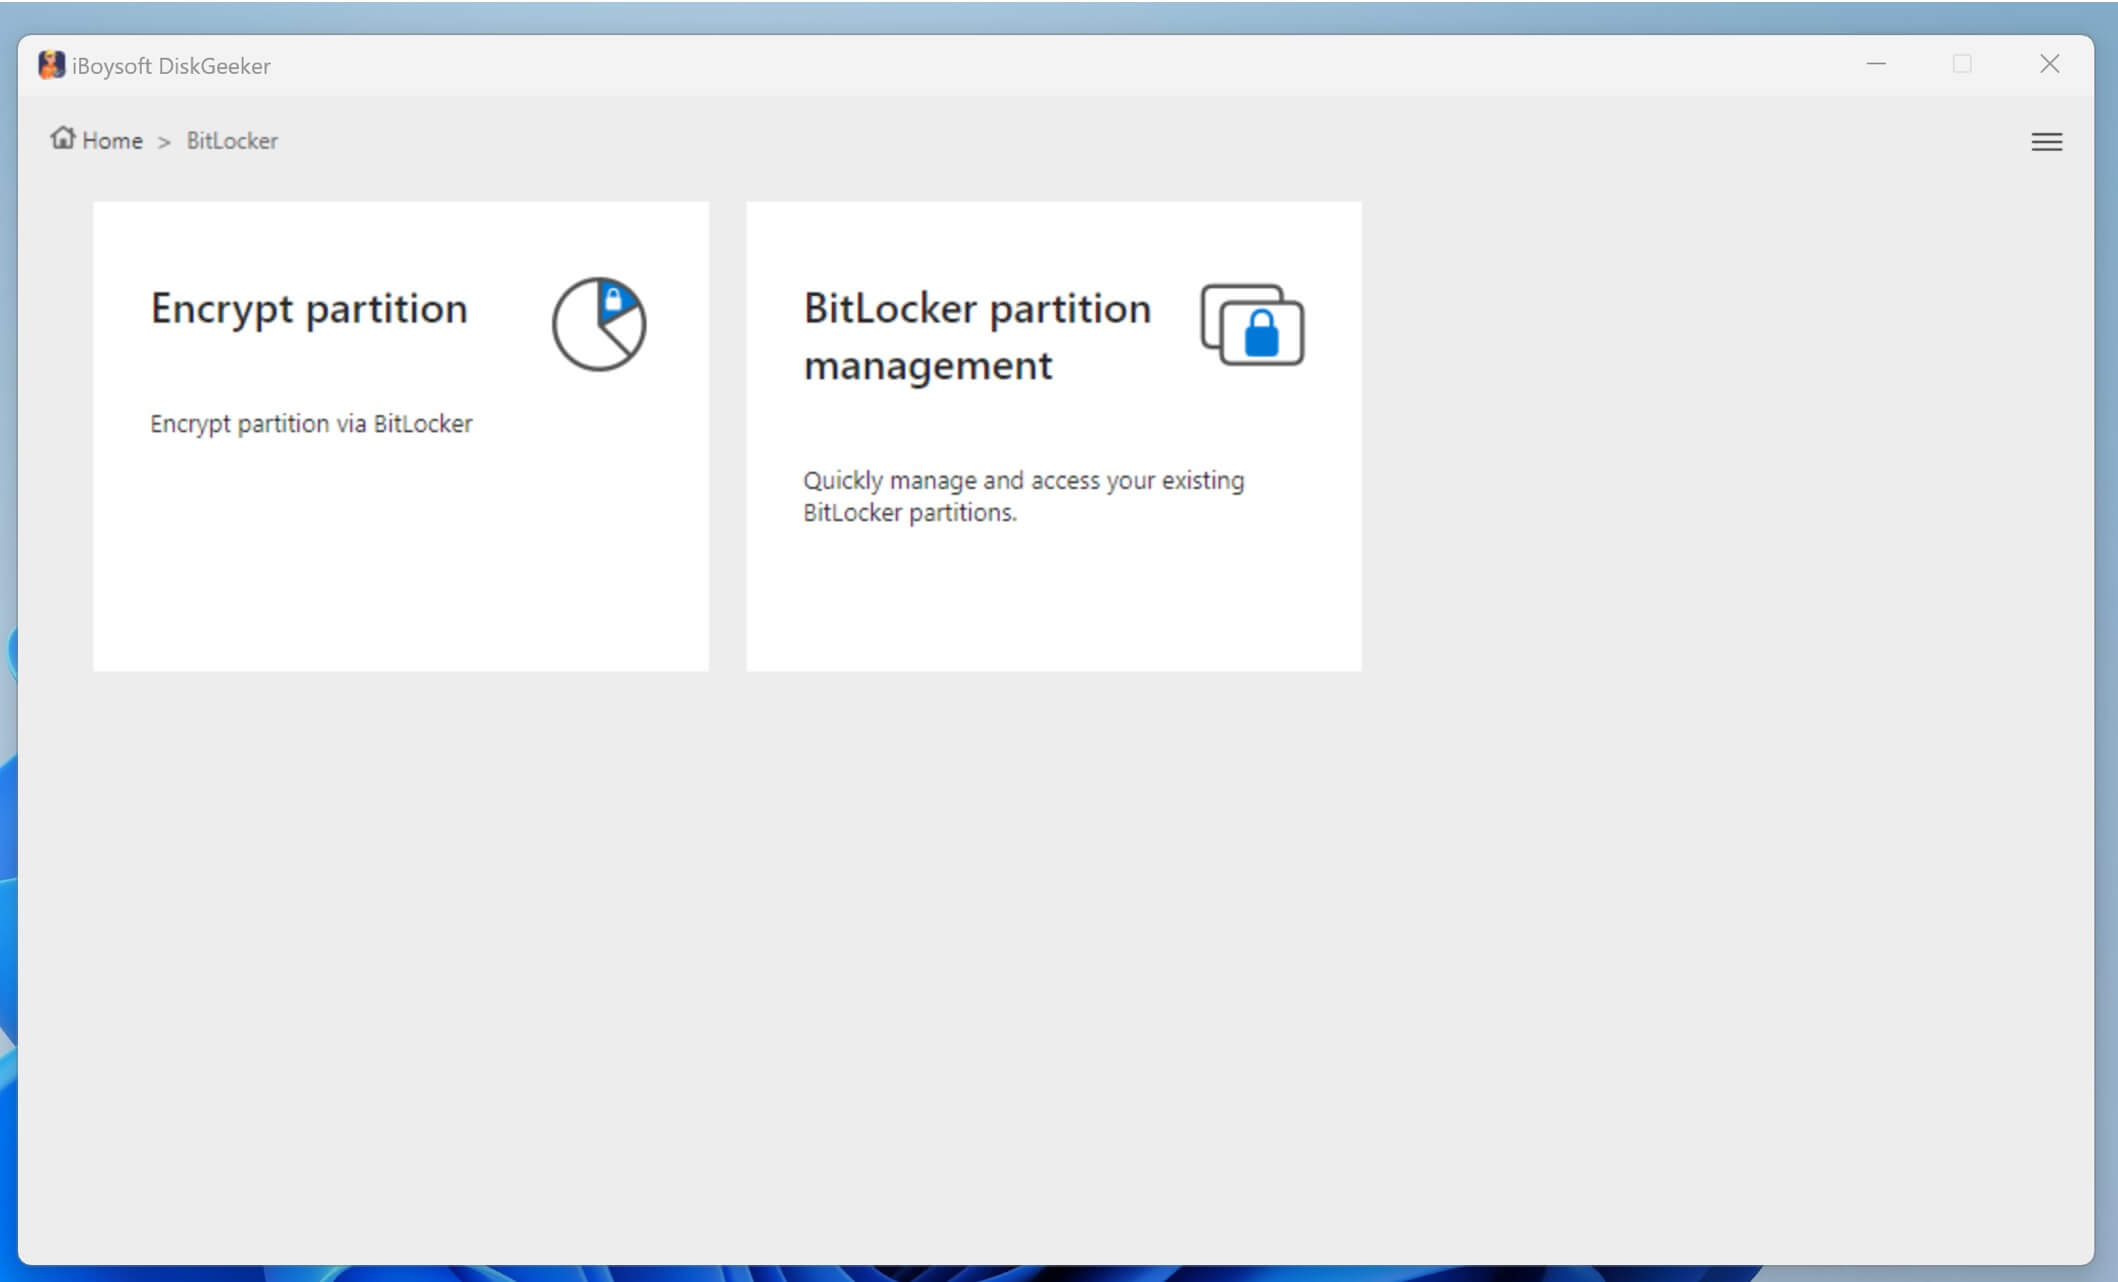
- You can only encrypt an NTFS, exFAT, and FAT32 partition.
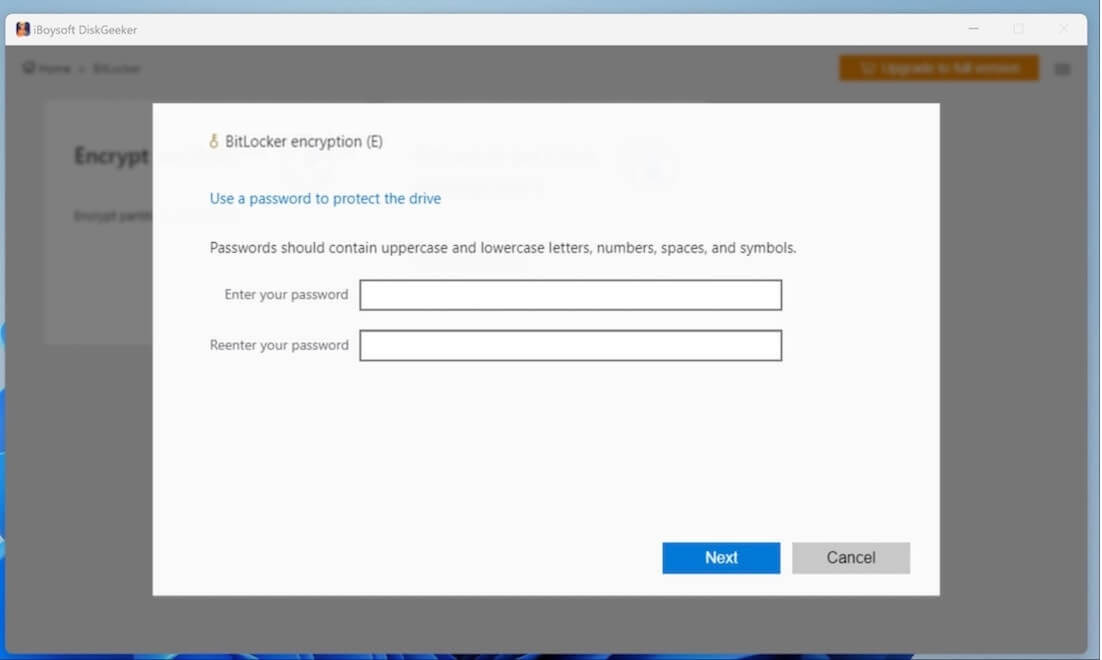
- Enter a password as required, re-enter it, and click Next.
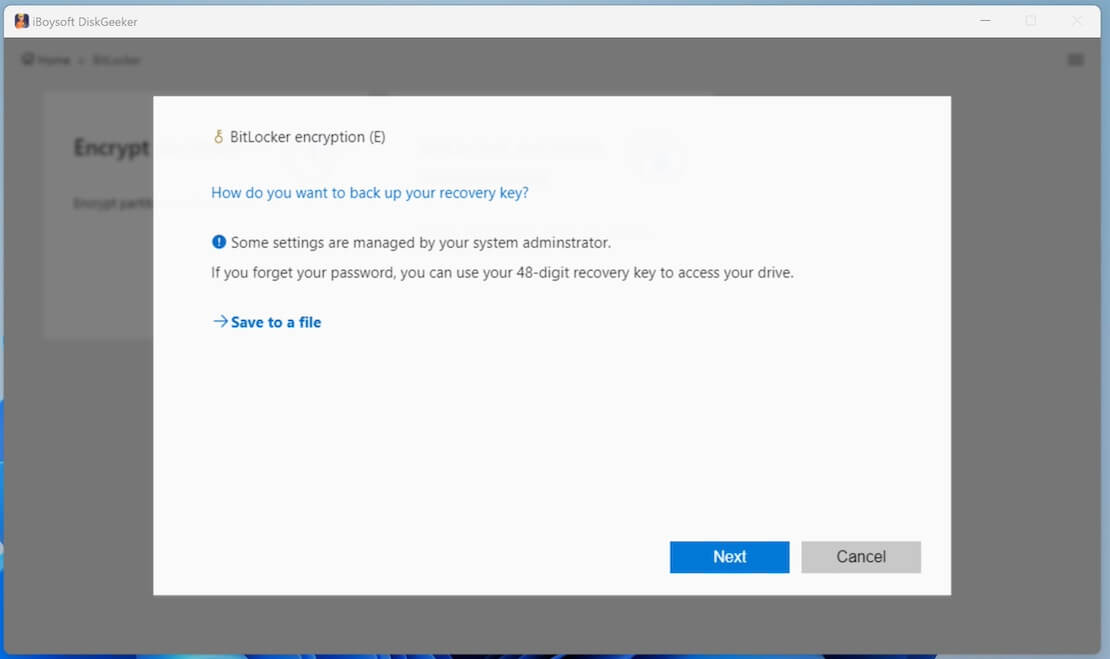
- Save the BitLocker recovery key generated by this software and click Next.
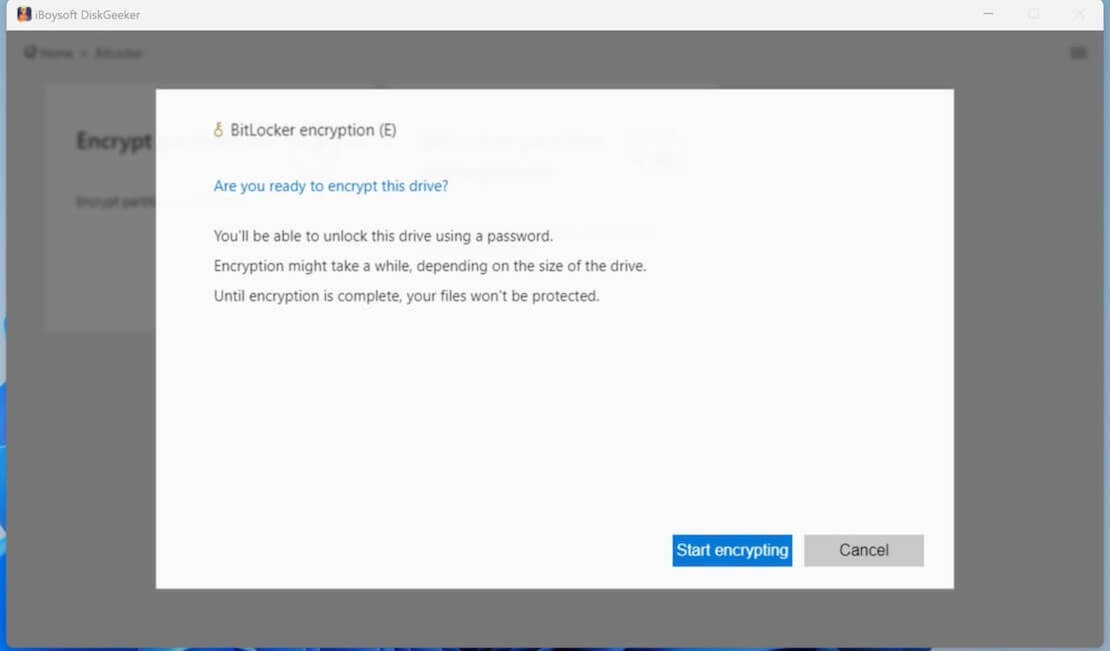
- Click Start encrypting.
You can share this wonderful tool with your friends!
Run SFC (System File Checker) scan
Corrupted system files related to BitLocker may cause the “Starting BitLocker Access is denied” error, so you can run System File Check to let it check and repair corresponding files.
- Open the Windows search bar, type cmd, and select Run as administrator.
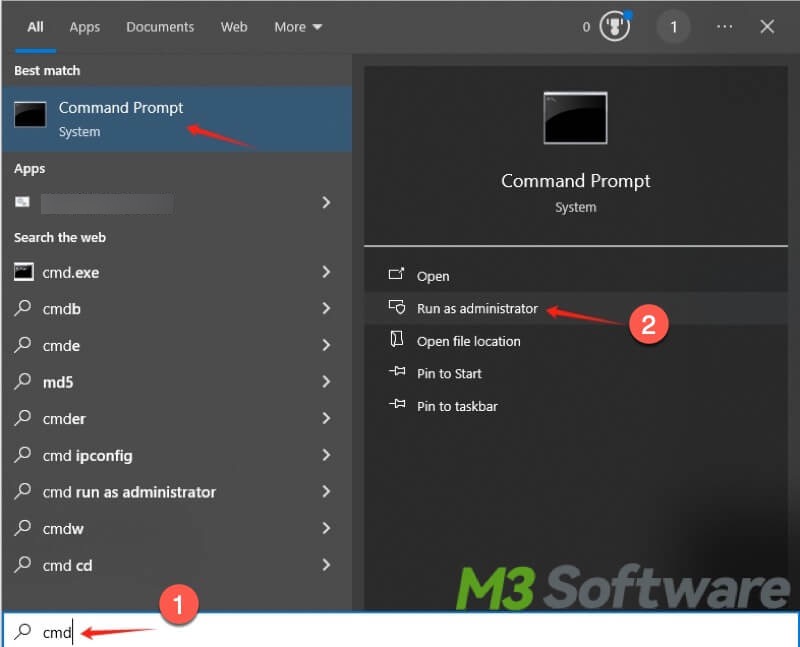
- Type sfc /scannow in the command window and hit the Enter key on your keyboard.
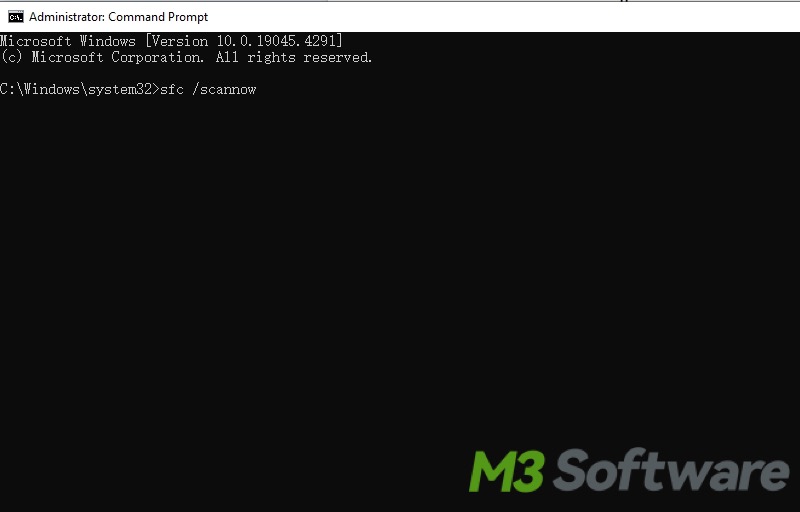
- The SFC command will start scanning and try to fix any corrupted system files it detects.
- Restart your PC and try enabling the BitLocker again.
Start Bitlocker drive encryption service
You can manually start the BitLocker Drive Encryption service to see if the “Starting BitLocker Access is denied” error can be resolved.
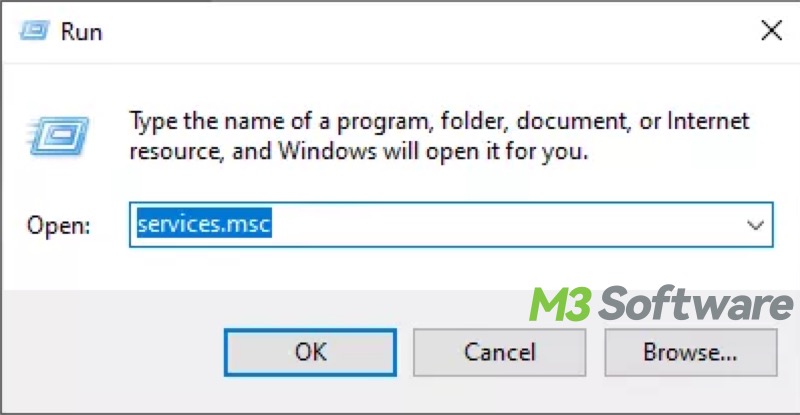
- Press the Win + R keys on the keyboard to open the Run dialog box. In the Run box, type services.msc and then click the OK button.
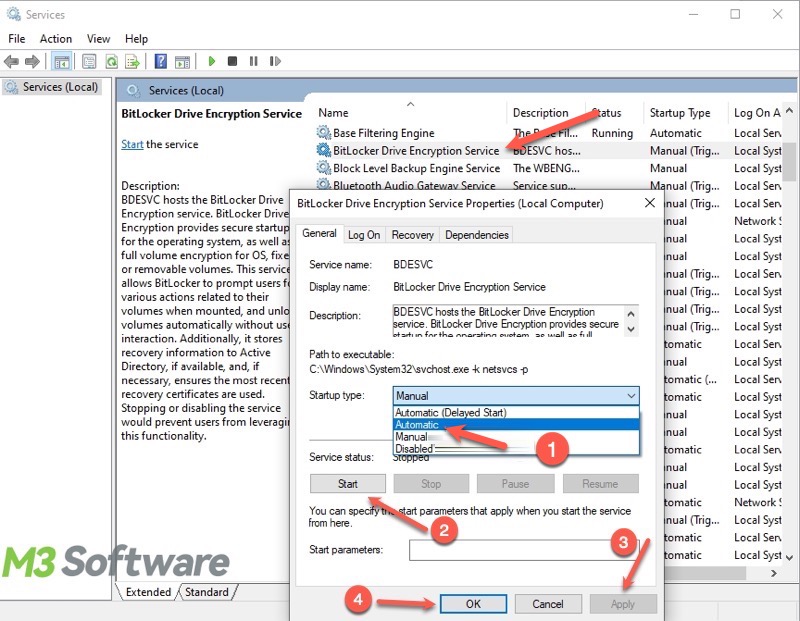
- Locate BitLocker Drive Encryption Service in the right panel and right-click on it to choose Properties.
- When the new window pops up, choose the Automatic option from the Startup type drop-down menu and click Apply and OK to save the changes.
- Restart your PC and enable the BitLocker.
Enable TPM in BIOS
The disabled TPM may affect the security and functionality of your system. You can use the following steps to enable or disable TPM in the BIOS.
- Restart your PC and enter the BIOS by pressing the appropriate key during startup. Note: The key used to enter the BIOS may vary depending on the motherboard brand, model, and version.
- Navigate to the Security or Advanced tab.
- Look for the TPM option and select it.
- Choose the option to enable the TPM.
- Save your changes and exit the BIOS.
- Restart your PC.
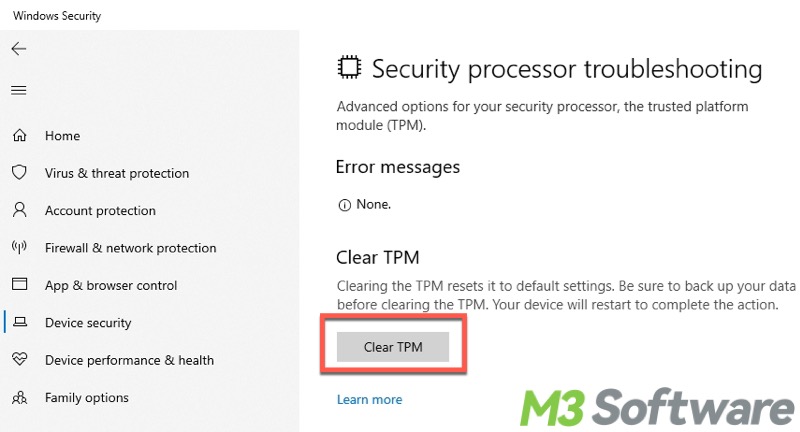
Clear TPM via Settings on Windows
When there's something wrong with the TPM, the "Starting BitLocker Access is denied" error may pop up when you try to turn on BitLocker. In this case, you can clear to TPM to reset it to default settings.
Note: Be sure to back up your important data before clearing the TPM.
- Open Settings on Windows.
- Click Update & Security > Windows Security > Device Security.
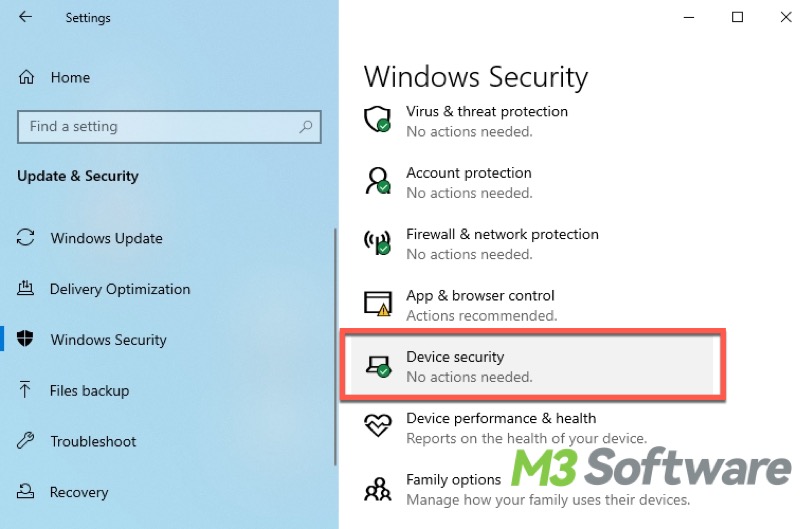
- Click the "Security processor details" under "Security processor."
- Choose "Security processor troubleshooting."
- Click "Clear TPM."
Enable BitLocker group policy that supports Remote Desktop Protocol
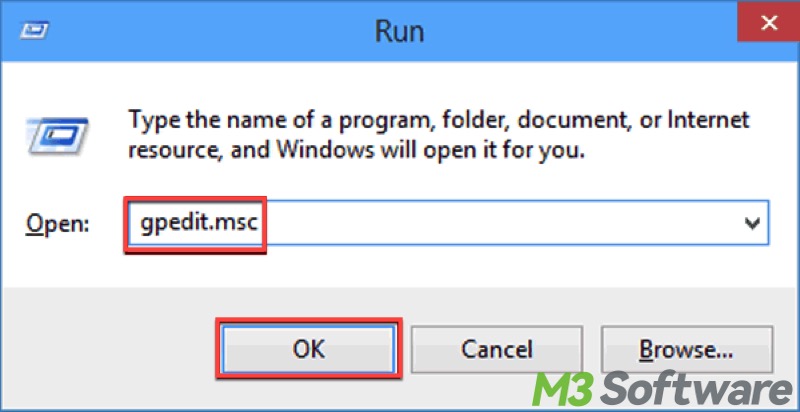
Did you enable the BitLocker drive encryption via the Remote Desktop Protocol? If yes, please enable the following group policy to see if the “Starting BitLocker Access is denied” error persists:
- Press the Win+R keys to open the Run dialog box, type gpedit.msc in it, and hit the Enter key on your keyboard.
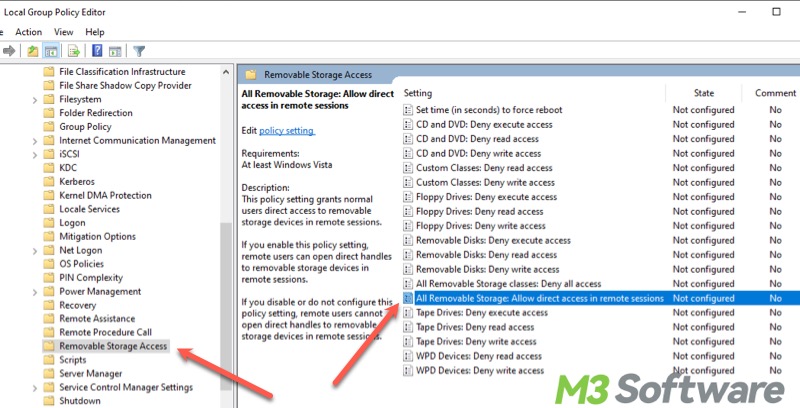
- Navigate to: Computer Configuration > Administrative Templates > System > Removable Storage Access > All Removable Storage.
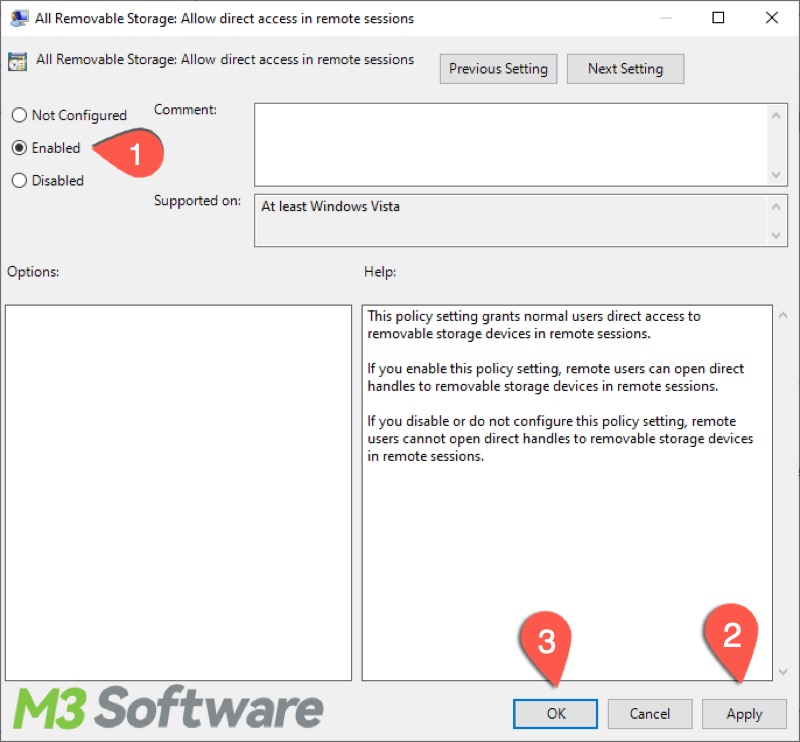
- In the right pane, locate and double-click “Allow direct access in remote sessions.”
- Switch to “Enabled”, click “Apply” and “OK.”
You can click the buttons below to share this post immediately!
