Written by
Yuri ZhangSummary: This article explains Windows Remote Assistance and compares it with another common feature, Quick Assist. How to enable Remote Assistance and disable it are contained here.

Suppose there are problems on your computer during work and life, it occurs to you that somebody can help, whereas he/she is at somewhere else. Or when you are telecommuting, your coworker can only help with a remote tool.
Luckily, Windows Remote Assistance is the tool we yearn for. It allows us to receive help from someone else remotely. It provides a way to troubleshoot and fix issues without the need for physical presence. Now let's explore Windows Remote Assistance, compare it to Quick Assist, and learn how to utilize it.
What is Windows Remote Assistance?
Remote Assistance is a built-in feature of Windows that allows a trusted person to remotely access our PC, either to view the screen or take control to help troubleshoot problems. The process requires our permission and is often used by technical supports or to aid less tech-savvy friends or family members.
There are two main ways to connect using Remote Assistance:
- Invitation File: You send a file to the person providing assistance.
- Easy Connect: If both computers support Peer Name Resolution Protocol (PNRP), the helper can connect using a security code.
Tip 1: Invitation File allows you to create a file that contains the necessary information for the person helping you to connect to your computer. Once the file is sent to the helper, they can open it and, using the password within, establish a remote connection.
Tip 2: Easy Connect is a simpler option, where a security code is generated on your computer. If both devices support Peer Name Resolution Protocol (PNRP), the helper can enter the code to connect quickly. This eliminates the need for file transfers and works best when both computers are on the same network.
How to use Windows Remote Assistance
If Windows Remote Assistance does not work, you can use third-party alternatives or Quick Assist (available on Windows 10 and 11). If your device supports it, let's master how to use it:
- Press Win + R, type msra, and press Enter to open Windows Remote Assistance.
- Or go to Control Panel > System and Security > Windows Remote Assistance.
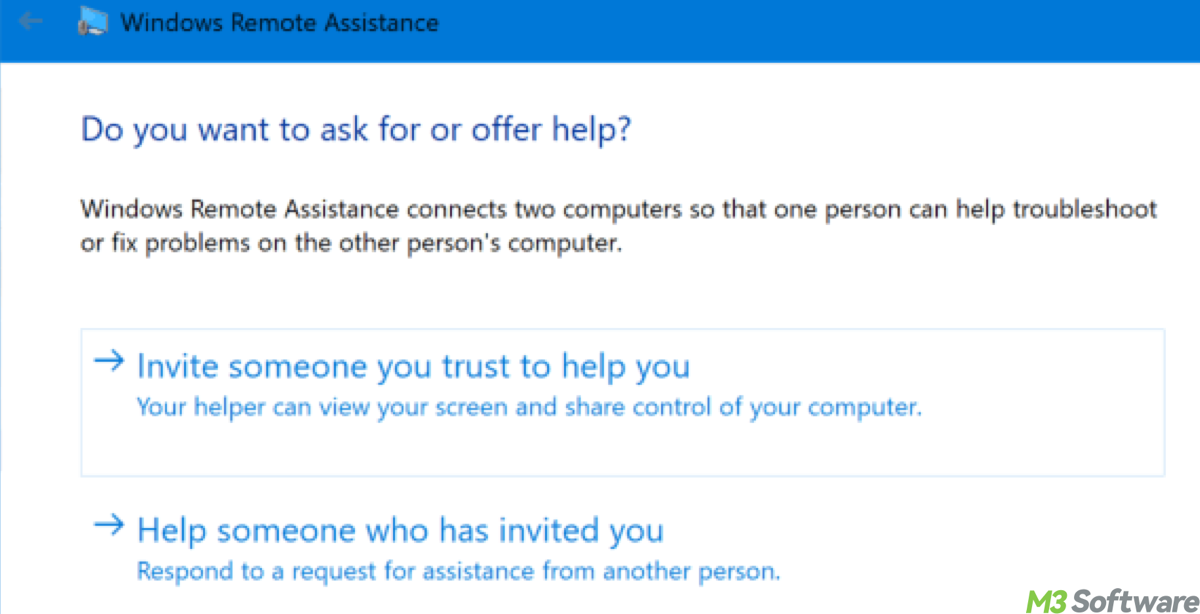
- Click Invite someone you trust to help you.
- Choose how to send the invitation (Save the invitation as a file and send it manually/Use email/ Use Easy Connect).
- Share the Invitation and Password (The person helping you will need the invitation file and password to connect).
- If you're the helper, follow the first two steps, then click Help someone who has invited you and enter the connection details.
- Once connected, you can either view the screen or request control of the mouse and keyboard.

Note: Both Remote Assistance and Quick Assist are free and come pre-installed with Windows 7 and newer versions.
Alternatives to Windows Remote Assistance
How about Windows Remote Assistance vs. Quick Assist since they are so alike.
- Quick Assist (Built into Windows 10/11): You can press Win + S, type Quick Assist, enter to choose Give assistance (for helpers) or Get assistance (for the user needing help). Then follow the instructions to connect.
- Microsoft Remote Desktop (For Full Control): You can download Microsoft Remote Desktop from the Microsoft Store. Then enable Remote Desktop (Win + I > System > Remote Desktop).
- Third-Party Remote Tools: If Remote Assistance is unavailable, try AnyDesk, TeamViewer, or Chrome Remote Desktop.
While Windows Remote Assistance is more feature-rich and suitable for IT professionals, Quick Assist is better for everyday, quick support between friends or family. Choose the one tailored to your needs.
Kindly share this throughout the following social media and assist more people!
How to disable Windows Remote Assistance (Optional)
If not used actively, leaving Remote Assistance enabled may pose a security risk. On the other hand, if you don't need remote help, disabling it reduces the services running on the system and ensures that no one can connect remotely unless you specifically enable it. Once you decide to disable it, here's how:
Method 1: Using System Settings
- Open Control Panel.
- Click on System and Security > System > Remote settings (on the left).
- In the Remote tab, uncheck Allow Remote Assistance connections to this computer.
- Click Apply and then OK.
You can re-enable it by ticking Allow Remote Assistance connections to this computer.
Method 2: Using Group Policy (for advanced users)
- Press Win + R, type gpedit.msc, and press Enter.
- Navigate to Computer Configuration > Administrative Templates > System > Remote Assistance.
- Double-click "Allow Remote Assistance connections to this computer" and set it to Disabled.
- Click Apply and OK.
Note: In a nutshell, use Windows Remote Assistance if you frequently need help from others, especially for troubleshooting or technical support. Use Quick Assist for simpler, faster support, especially in non-technical situations. Disable Windows Remote Assistance if you're concerned about security risks or don't use it often.
You may also want to read:
Memory.dmp file: the silent witness to system crashes
File Name Extensions for Mac & Windows
Virtualization-Based Security (VBS) in Windows
Features and uses of Microsoft Power Automate
Share this post and we will provide further useful guidance in this world.
