
Written by
Wilsey YoungHard drive partitions are logical divisions or parts of a physical hard disk that can be managed separately by operating systems and file systems, so each disk partition is called a logical drive or volume. Partitioning hard drive can help you organize and manage your data efficiently and easily.
This guide first tells you why partition a hard drive, and it will walk you through the steps to partition a hard drive via Disk Management tool on Windows 10 operating system. You can read recommended article to learn how to remove a partition on Windows: 4 Ways to Remove Partition on Windows 11! (2024 Updated)
You can free download iBoysoft DiskGeeker for Windows, a reliable and easy-to-use disk management tool, to help you securely shrink or extend NTFS partitions, which can improve PC performance and better manage disk space. It won't cause any data loss and corruption, you can free download and use it without worries.
Why partition a hard drive?
If a new hard drive is not partitioned and the file system is not created, you would be unable to use the hard drive to store any data and files. This is one of the most important reasons to partition a hard drive. Of course, there are some other benefits after partitioning a hard drive.
Organizing the data efficiently
A partitioned hard drive can help you organize your data more efficiently. For example, one partition can be assigned for your operating system and applications, and another serves for your personal important files.
Improving system performance
Smaller partitions can improve system performance as the operating system can access data more quickly, and partitioning can save more disk space.
Installing multiple operating systems
Partitioning allows you to install multiple operating systems on a single drive. Meanwhile, if a hard drive is partitioned, the Windows OS can be easily reinstalled without losing the data.
Backing up and recovering data easily
Keeping your data separate from your operating system can make backups and recovery easier and faster. You can back up one partition stored with the data you want instead of choosing the whole disk.
Preparing for partitioning hard drive
To prevent unnecessary troubles or data loss, there's something important you need to confirm before partitioning a hard drive in Windows 10.
Making sure there is enough space on hard drive
You won't be able to create the new partition if the hard drive does not have enough space. You need to open File Explorer and check the drive to make sure there are enough free space in it.
Backing up important data before partitioning hard drive
Before you set out to partition your hard drive, it's crucial to back up all the important data. Partitioning involves modifying the structure of your hard drive, which can lead to data loss if not done correctly.
How to open Disk Management
Disk Management is a built-in system utility in Windows, which allows you to manage hard drives and other storage devices. With Disk Management, you can create, resize, and manage partitions. Here's how to open it on Windows 10:
- Press “Windows + X” or right-click “Start” button at lower left of Windows.
- Select “Disk Management” from the menu.
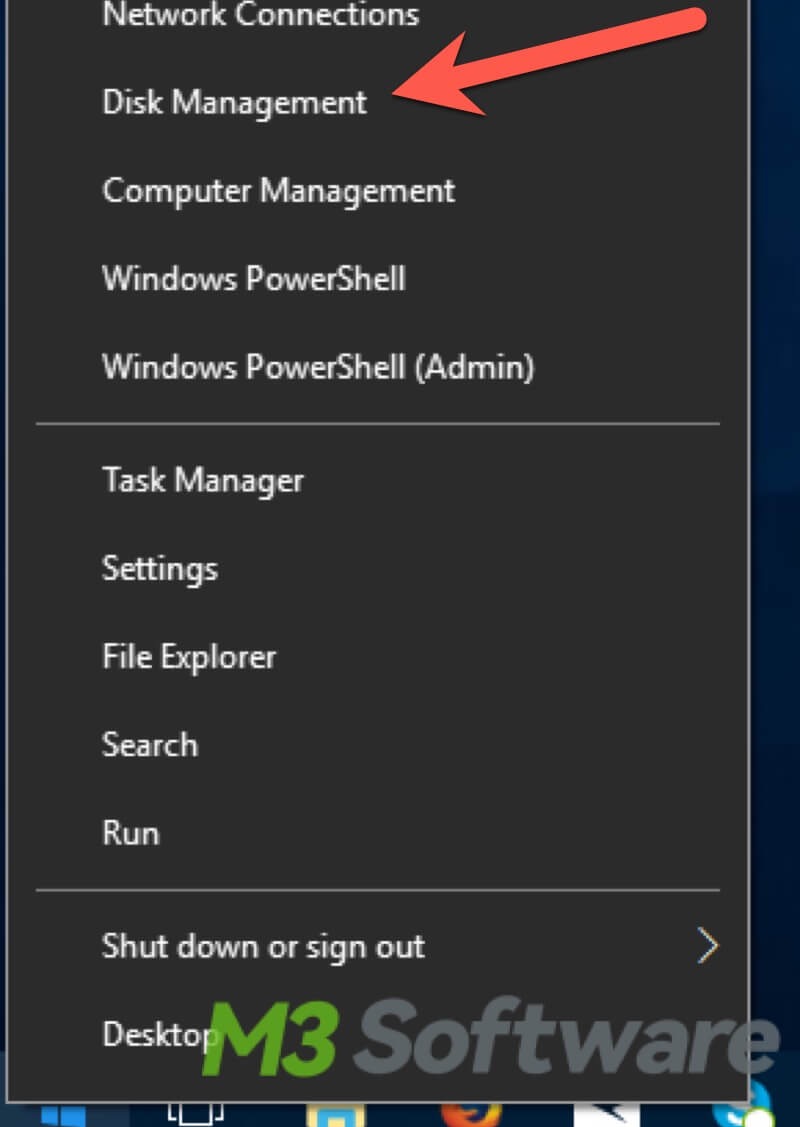
You can search for "Disk Management" in the Start menu.
- Press “Windows+S” to open search bar and type “Disk Management”.
- Select “Create and format hard disk partitions”.

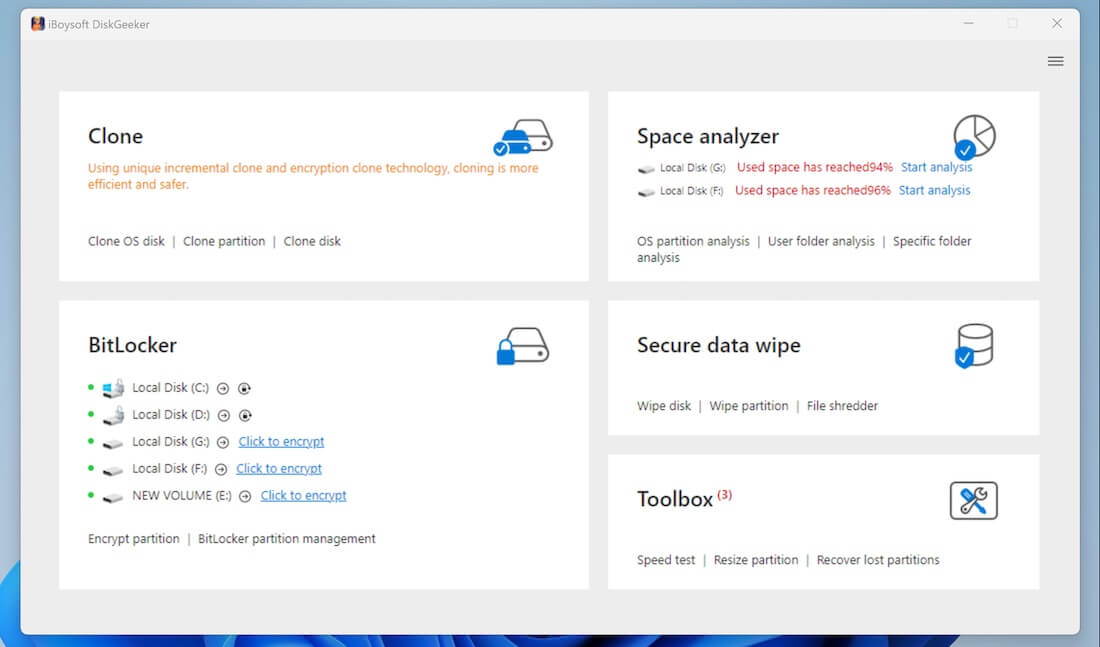
Shrinking a partition with iBoysoft DiskGeeker for Windows
With professional iBoysoft DiskGeeker for Windows, you can easily shrink the partition's unused space to release more unallocated space, you can follow the simple steps below to complete partition shrinking.
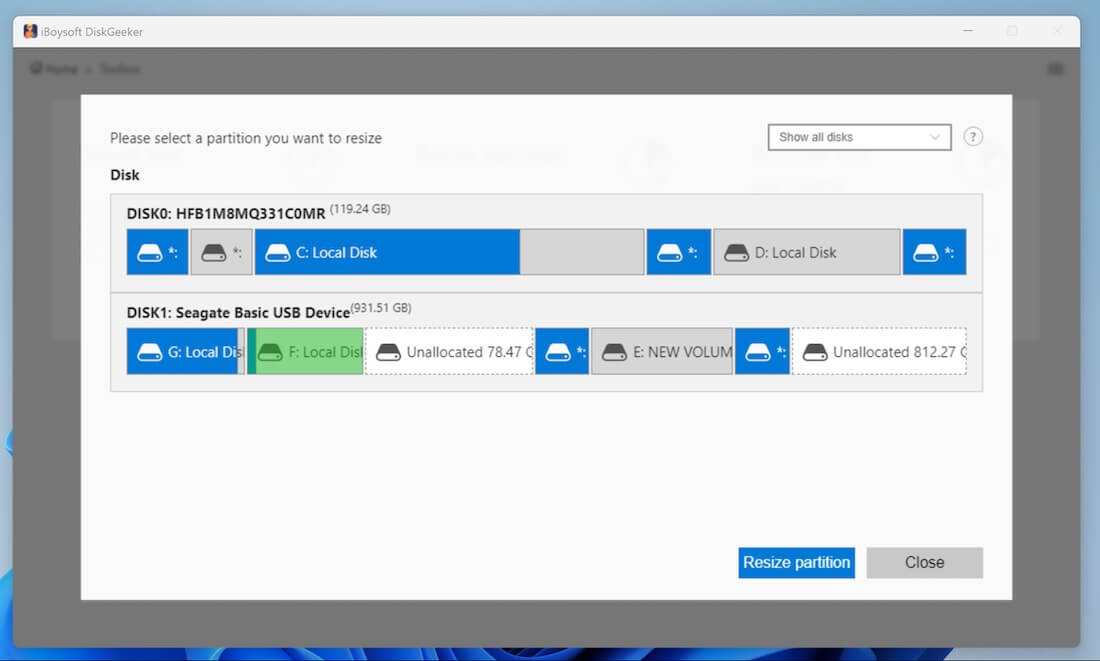
- Free download, install, launch iBoysoft DiskGeeker for Windows, and select “Resize partition” in the “Toolbox” module.
- Select the partition of which you want to shrink the size, and click “Resize partition” button to continue.
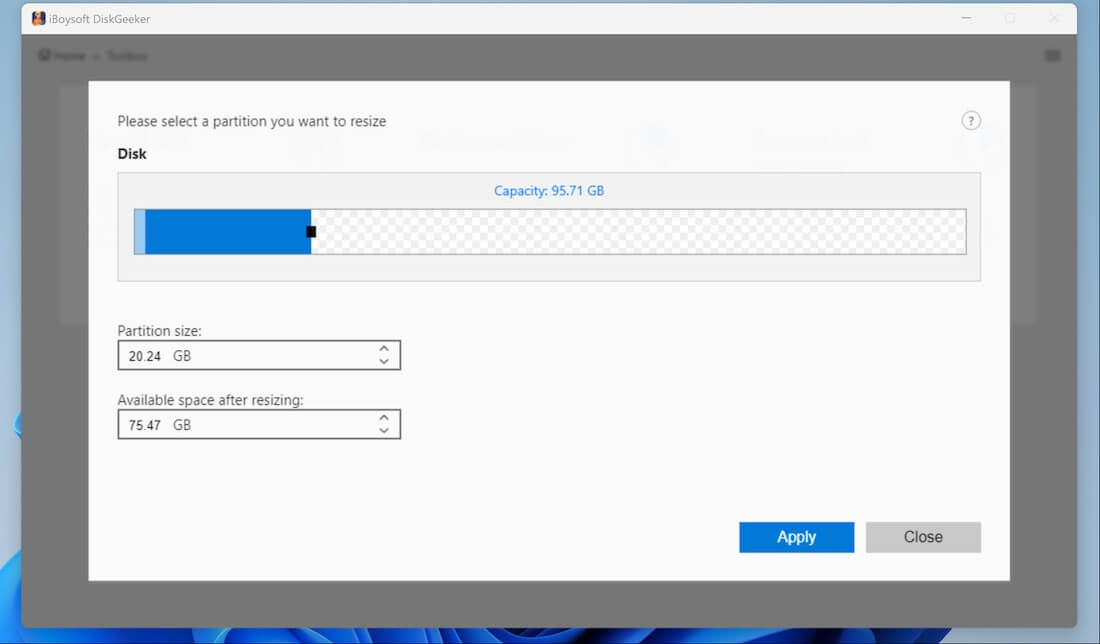
- Adjust the size value to be shrunk, then click “Apply” to start resizing.
You can share this easy-to-use disk management tool with your friends!
Shrinking a partition in Disk Management
if you you need another partition but don't have more disks, you can shrink the existing partition to create new unallocated space.
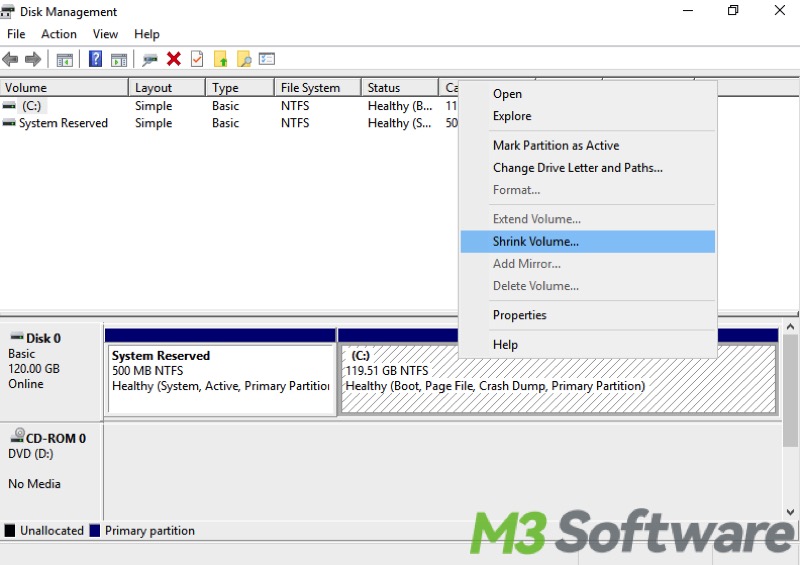
- Open Disk Management, right-click on the partition you want to shrink and select “Shrink Volume”.
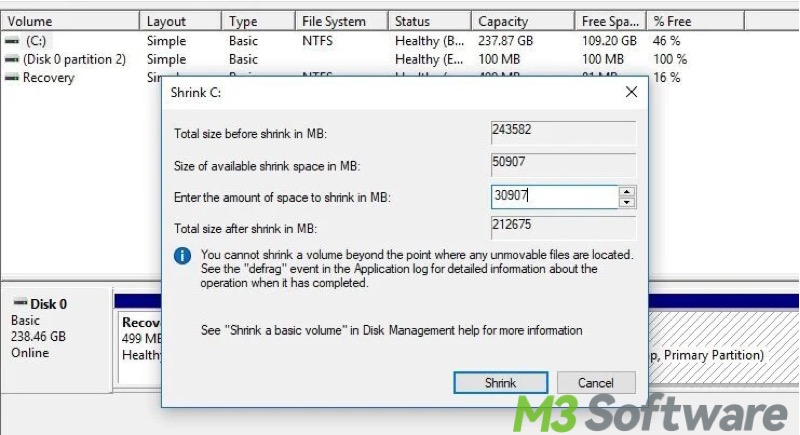
- Enter the amount of space to shrink in megabytes (MB). Ensure you leave enough space for the existing data and system files.
- Click “Shrink”. The unallocated space will now appear next to the shrunken partition.
Creating a new partition
With the unallocated space available, you can now create a new partition:
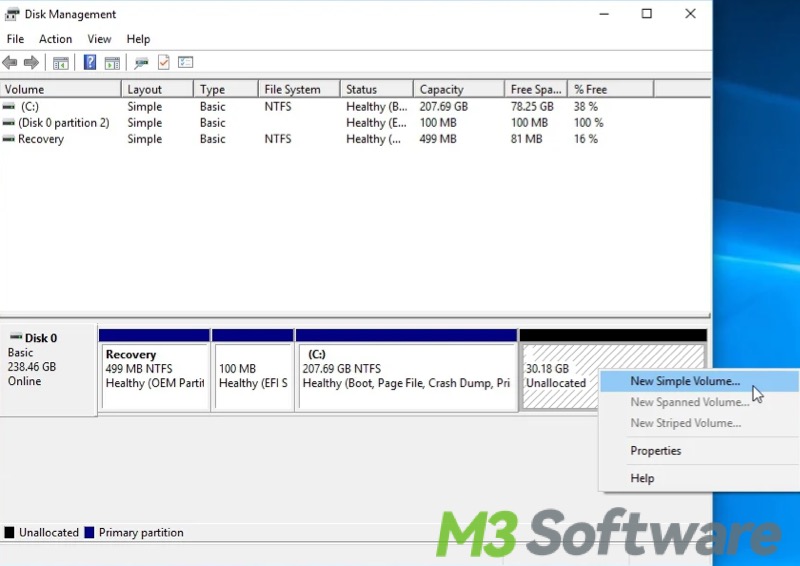
- Right-click on the unallocated space and select “New Simple Volume”. The New Simple Volume Wizard will open, and click “Next”.
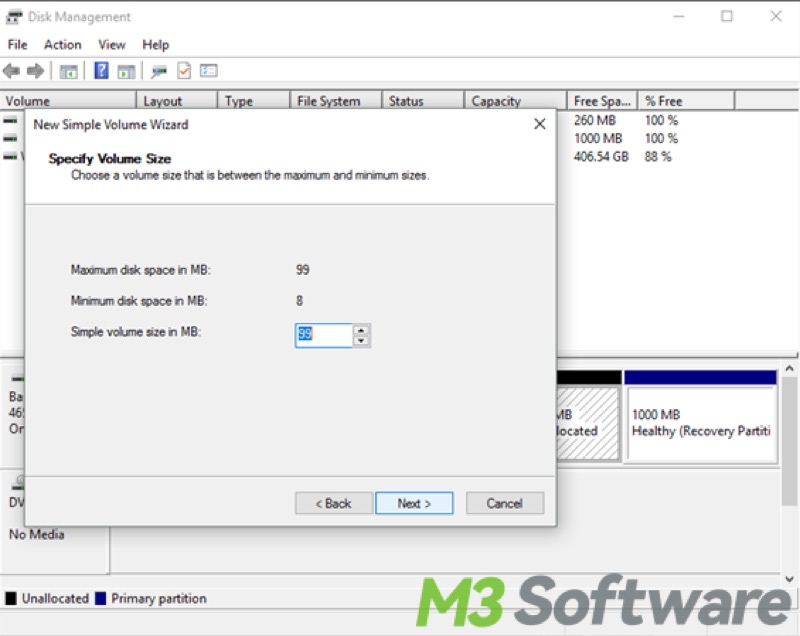
- Specify the size of the new volume in MB and click Next.
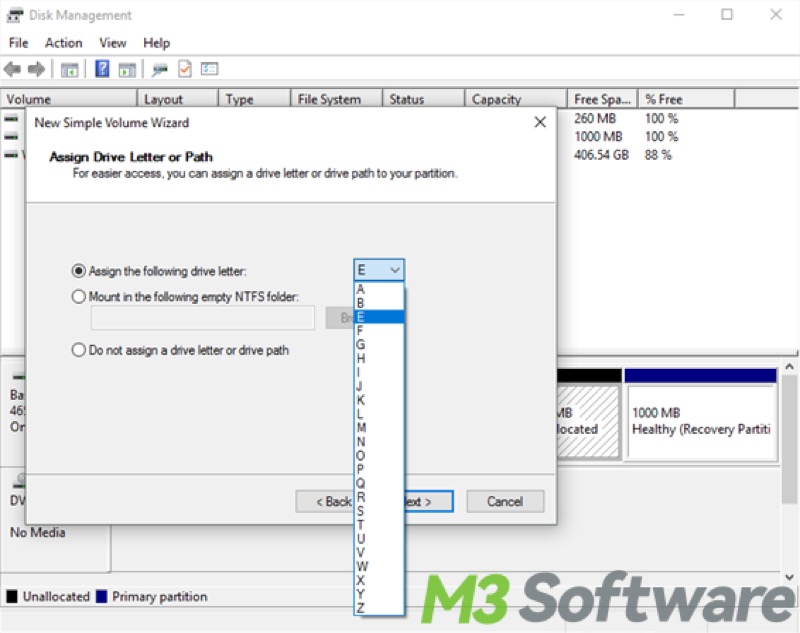
- Assign a drive letter or mount point and click “Next”.
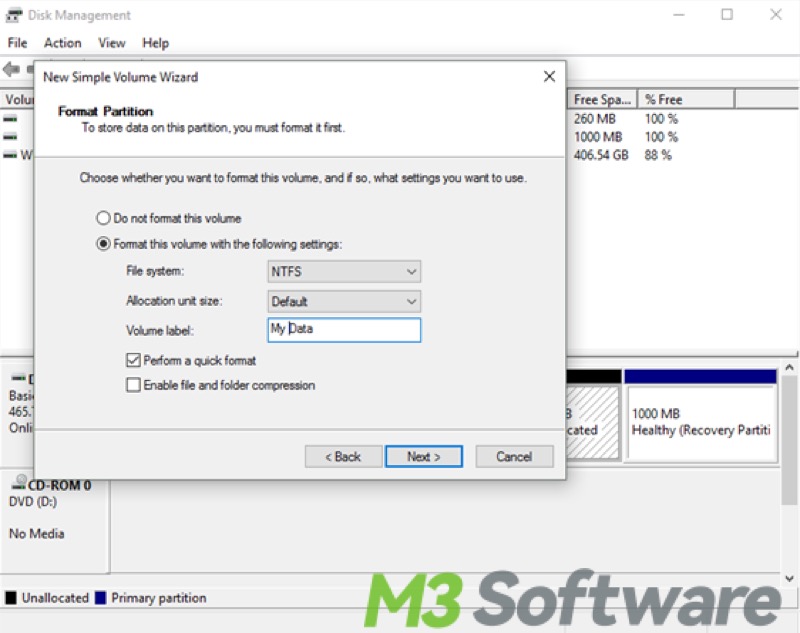
- Choose the file system format (NTFS is recommended) and provide a volume label if desired.
- Click “Next”, then finish to create the new partition.
Formatting the new partition
After creating the new partition, it may need to be formatted. If the format option was selected during the partition creation, the new partition should be ready to use. If not, you should follow the steps below.
- Right-click on the new partition and select “Format”.
- Choose the file system and volume label, then click “OK”.
Conclusion
Partitioning a hard drive can greatly enhance your computing experience by providing better organization and management. With these steps, you should be able to partition your hard drive via Disk Management on Windows 10 with ease. Always remember to back up your data and proceed with caution to avoid any potential data loss.
You can click the buttons below to share this article