Written by
Wilsey YoungSummary: This article discusses whether or not Windows 11 Home has the BitLocker encryption feature, and it also tells you how to use BitLocker encryption via iBoysoft DiskGeeker for Windows
BitLocker encryption is a feature provided by the Microsoft Windows operating system. It is designed to encrypt entire disk volumes, including operating system files, user files, and even swap files, to protect them from unauthorized access and data theft.
Nevertheless, Many Windows users grumble that BitLocker seems only available in Pro, Enterprise, and Education editions of Windows, that is to say, those who use the Home edition of Windows cannot protect their data with BitLocker.
Does Windows 11 Home have BitLocker? This post discusses this question and tells you how to use BitLocker encryption in Windows 11 Home. You can free download iBoysoft DiskGeeker for Windows to use BitLocker to encrypt personal data on Windows 7/8/10/11 Home edition.
You can share this article with your friends and fans on social media!
Does Windows 11 Home have BitLocker?
Unfortunately, Windows 11 Home does not come with BitLocker encryption. However, You can still protect your precious data by using "Device encryption", which is generally regarded as the lite version of BitLocker, and it's available for devices that meet certain hardware requirements:
- TPM (Trusted Platform Module) 2.0
- Unified Extensible Firmware Interface(UEFI) firmware
Main differences between BitLocker and Device encryption:
The main differences between BitLocker and Device Encryption are listed as follows:
- BitLocker allows you to encrypt each drive individually on your computer. Device encryption encrypts the entire system and secondary drives, which means you cannot exclude a disk or partition.
- BitLocker is not included in Windows 7/8/10/11 Home Edition. Device encryption is available on all Windows operating systems.
- You need to turn on BitLocker for a certain drive or all drives. Device encryption is generally enabled by default.
- As for BitLocker, the BIOS or UEFI firmware must be Trusted Computing Group (TCG) compliant and have Trusted Platform Module (TPM) 1.2 or later. Regarding Device encryption, UEFI Secure Boot and Platform Secure Boot are turned on in your computer. Direct memory access (DMA) protection should be enabled.
To see if your PC supports Device Encryption:
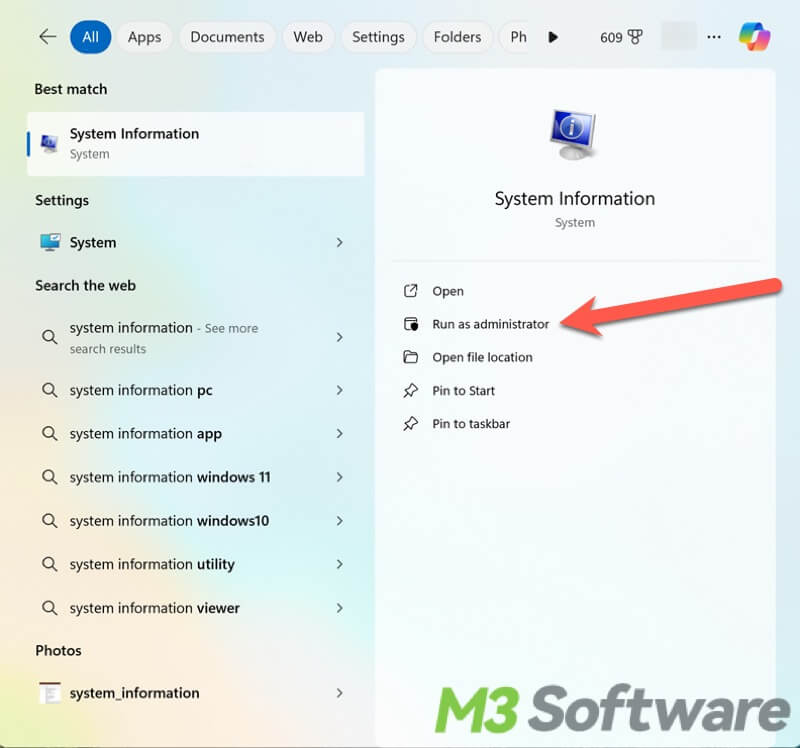
- Press the “Windows+S” keys, type “System Information” in the search bar, and select “Run as administrator”.
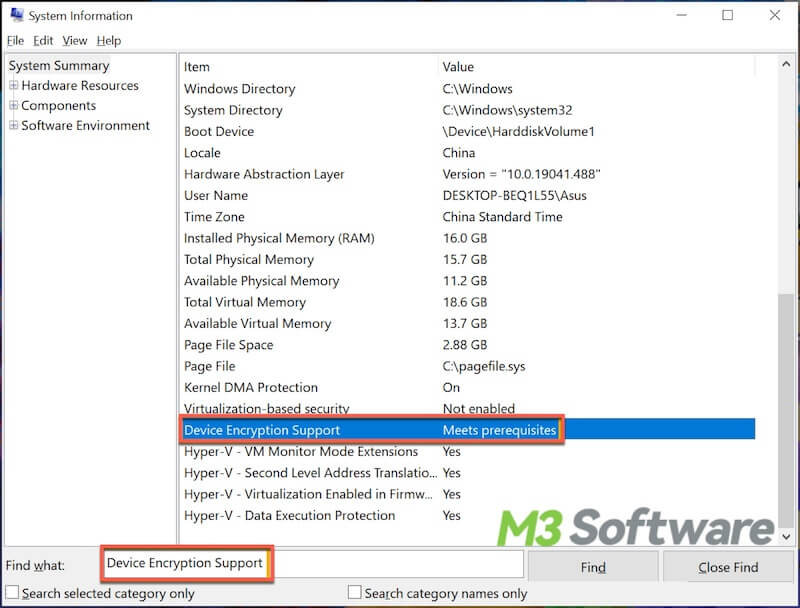
- Find “Device Encryption Support”. If the “Value” column shows “Meets prerequisites”, it means your PC supports device encryption.
How to use BitLocker encryption via iBoysoft DiskGeeker for Windows
iBoysoft DiskGeeker for Windows is a disk management tool that contains the BitLocker drive encryption feature, and it allows you to encrypt the drive in the Home edition of Windows 7/8/10/11 operating systems. Through this iBoysoft DiskGeeker for Windows, the encrypted container you can create is compatible with BitLocker drive encryption, the same as the Pro or Enterprise Edition of Windows OS.
The tutorial below shows you how to encrypt a drive in Windows 7/8/10/11 Home Edition:
- Free download, install, and launch iBoysoft DiskGeeker for Windows. You can choose “Click to encrypt” right next to the disk to encrypt a entire disk, or you can click “Encrypt partition” at the bottom to encrypt one specific partition you want.

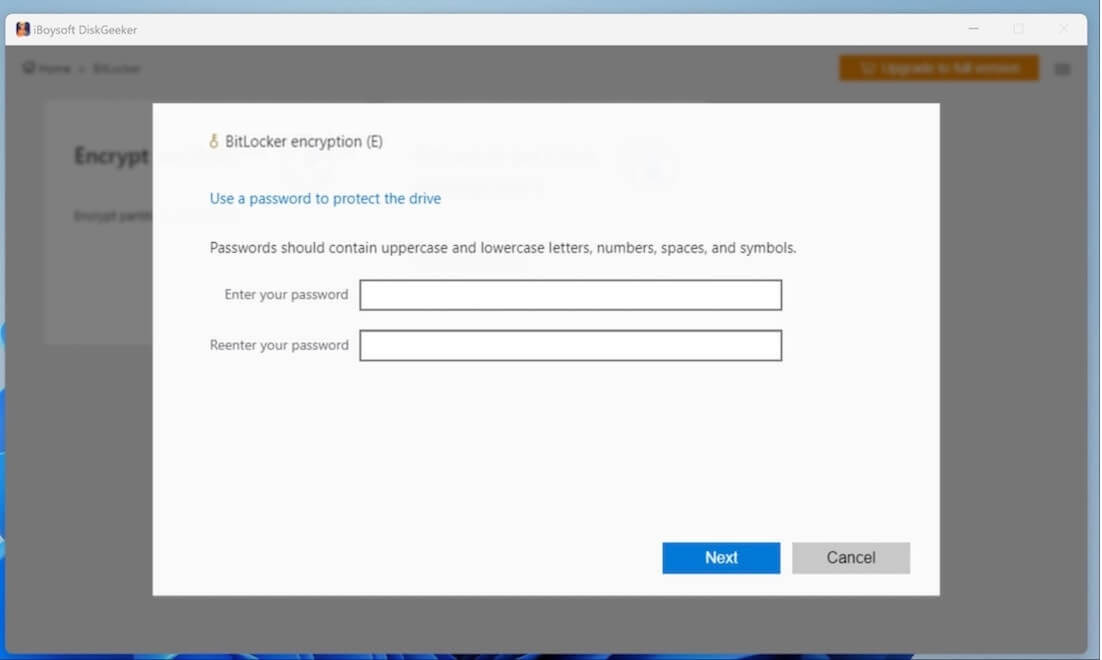
- Enter the password and click “Next” to continue.
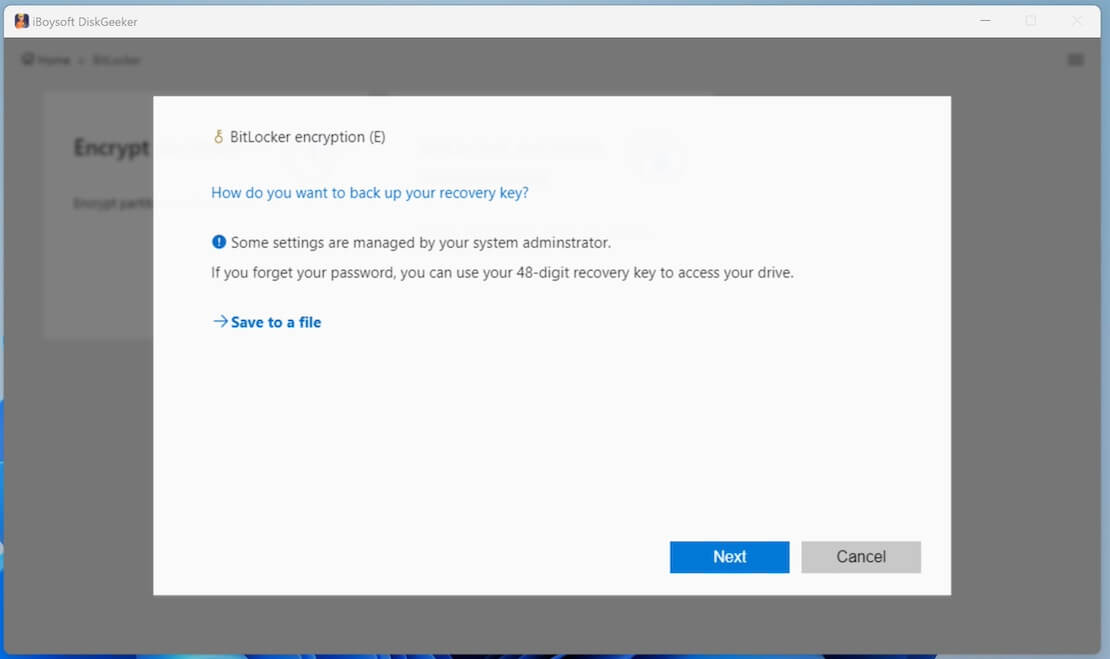
- A 48-digit BitLocker recovery key will be generated, you need to save it to a file or note it down, and click “Next”. The recovery key can be used to unlock the BitLocker encrypted drive if you forget the password you set or your PC detects problems.
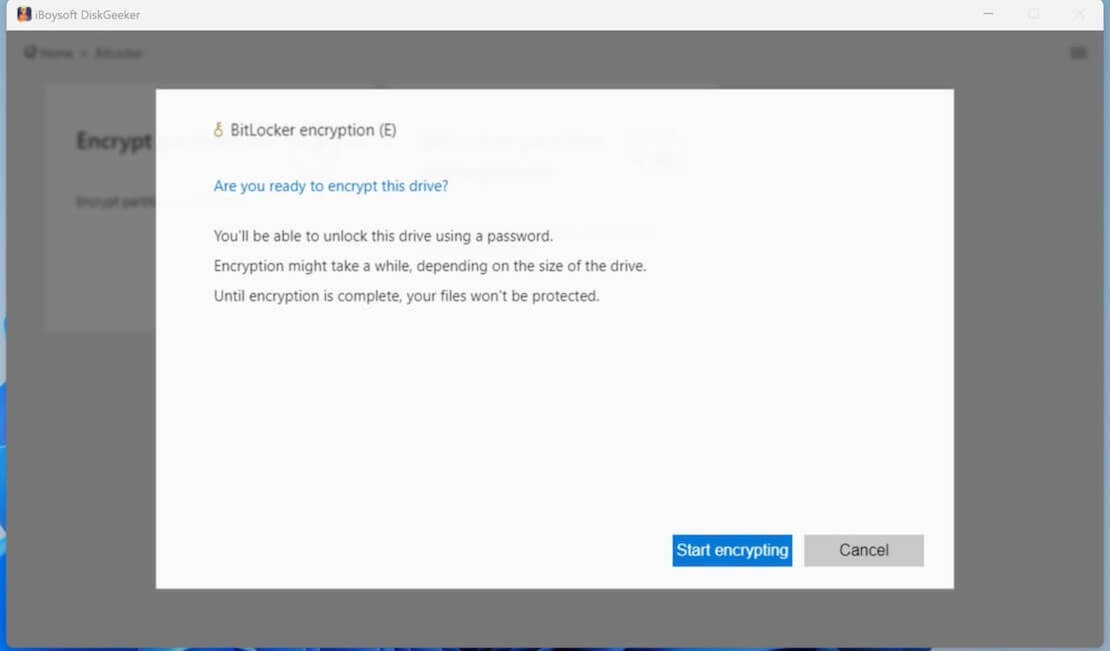
- Click “Start encrypting” to confirm and start the BitLocke encryption.
Tips: iBoysoft DiskGeeker for Windows boasts various functions, such as disk clone, disk space analyzer, disk speed test, disk wipe, etc. More features in this tool await your discovery!
You can share this post and tell your friends about this disk management tool for Windows:
How to enable device encryption in Windows 11 Home
You can follow the steps below to turn on device encryption in Windows 11 Home Edition:
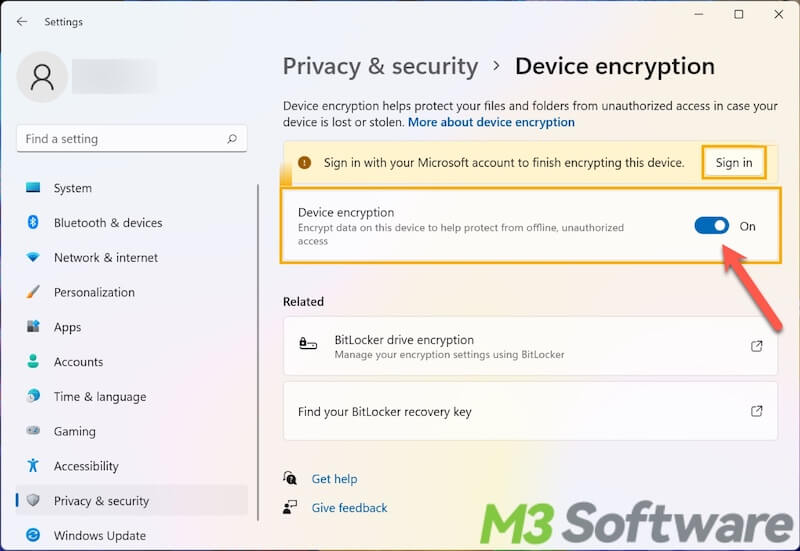
- Press the “Windows+i” keys to open Settings.
- Click “Privacy & Security”.
- Choose “Device encryption”.
- Click the toggle to turn on the device encryption.
- Open File Explorer, and you can see a lock icon on the drive icon, it indicates that the drive has been encrypted.
How to disable device encryption in Windows 11 Home
If you don't want the hard disk protected by "Device Encryption" anymore, you can turn off "Device Encryption" in Settings.
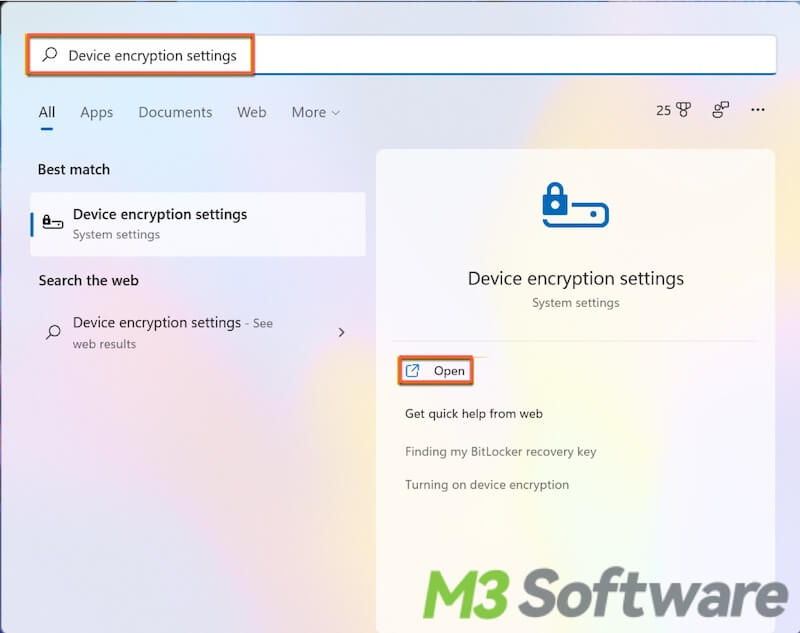
- Type “Device encryption settings” in the Windows search bar and click “Open”.
- Click the toggle to turn off the device encryption.
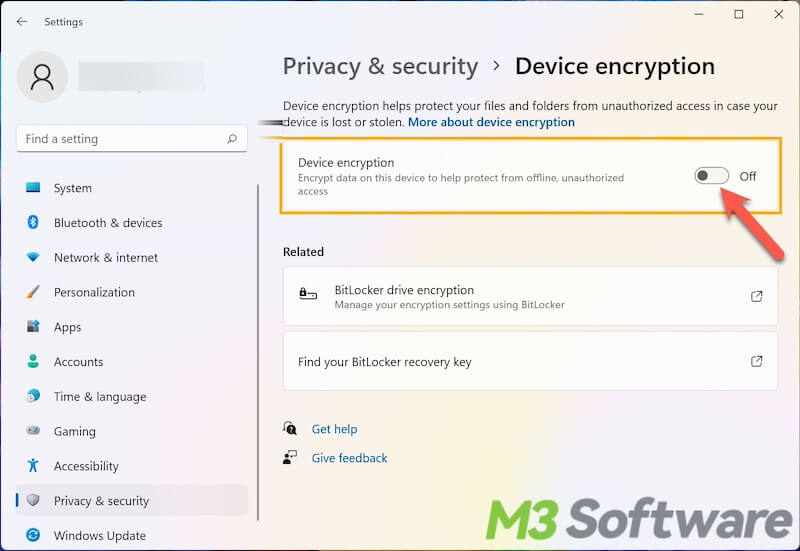
- Click “Turn off” in the popping-up window to confirm your decision.

How to turn on standard BitLocker in Windows 10/11?
The tutorial below shows you how to turn on standard BitLocker in Windows 10/11 Pro, Enterprise or Education Edition.
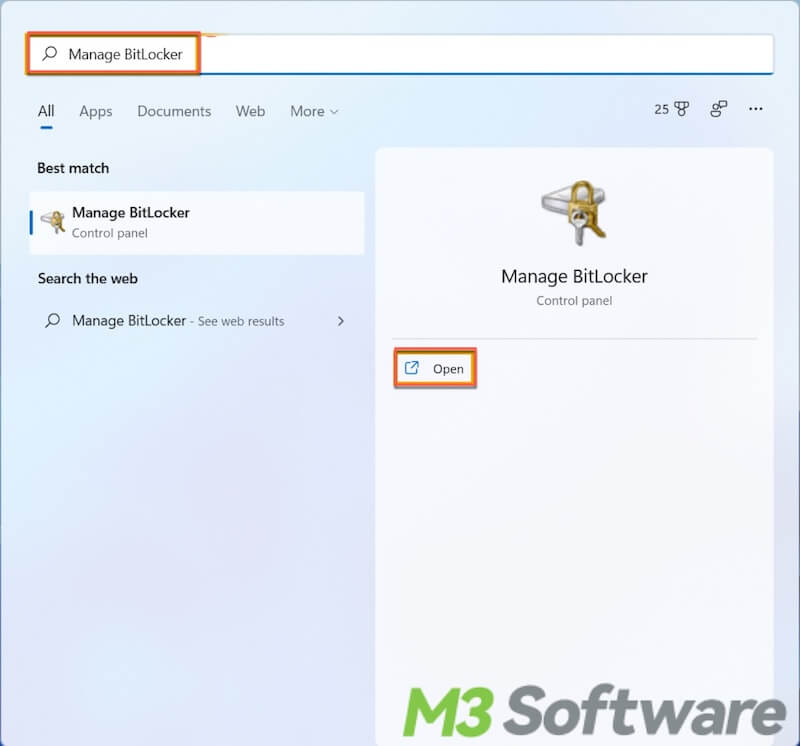
- Type “Manage BitLocker” in the search bar and click “Open”.
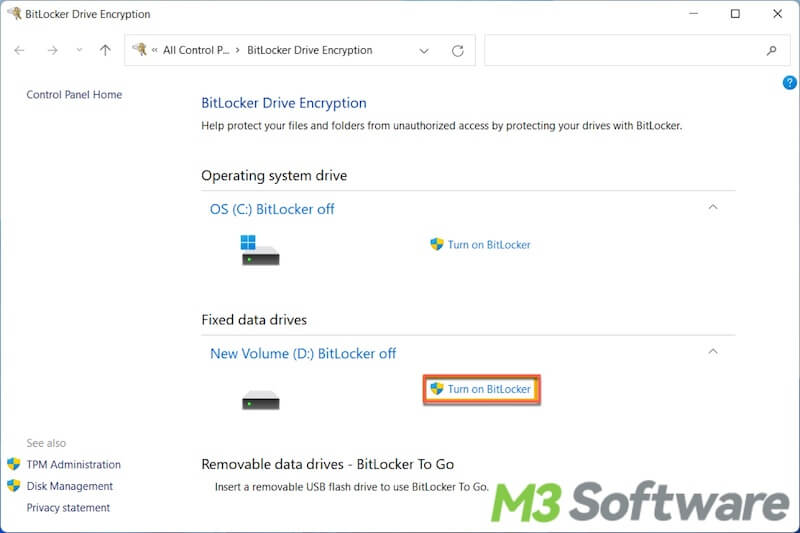
- Find the drive you want to encrypt and click “Turn on BitLocker”.
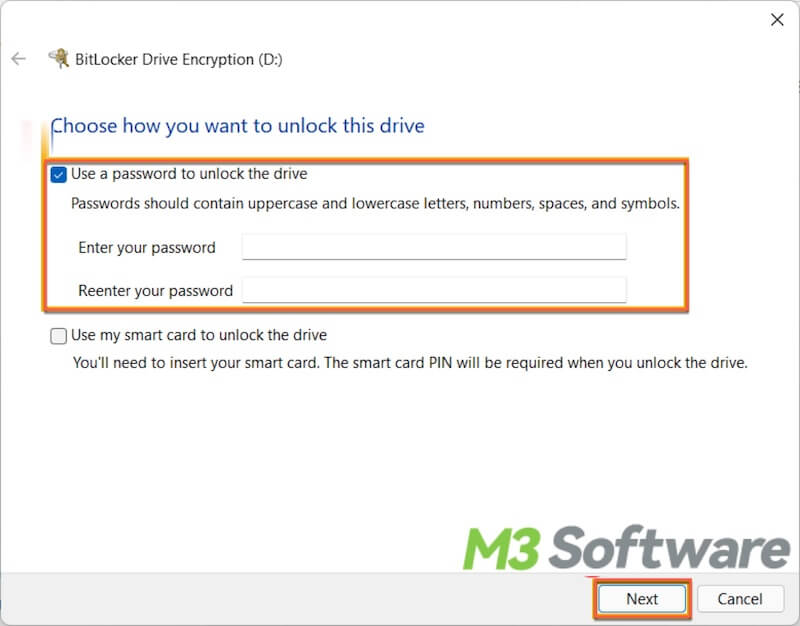
- Choose “Use a password to unlock the drive”, input the password you want to set, and click “Next”.
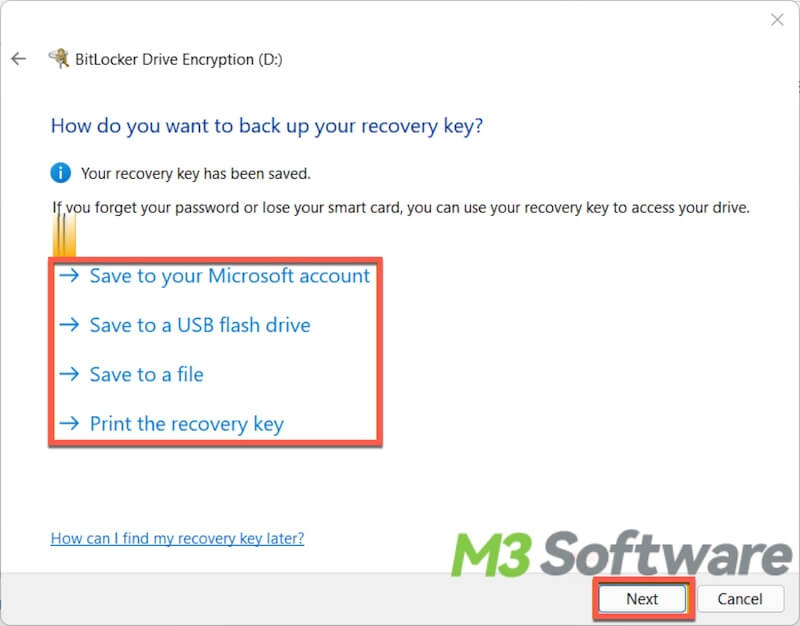
- Select a way to back up the BitLocker recovery key, then click “Next”.
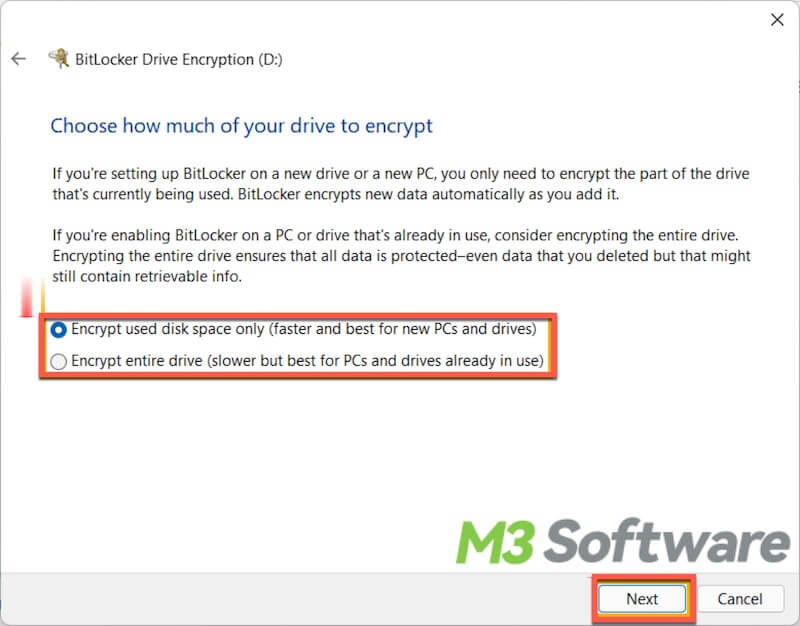
- Choose how much of your drive to encrypt, then click “Next”.
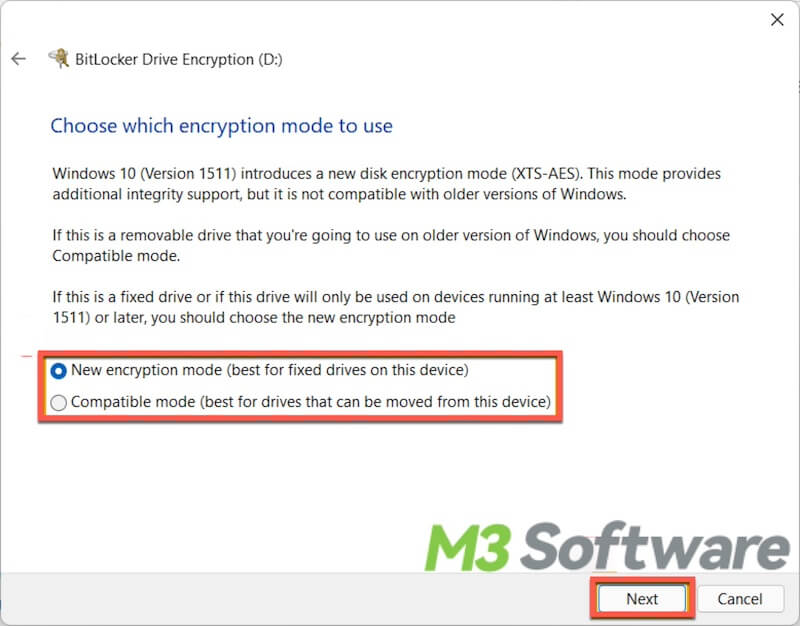
- Choose which encryption mode to use and click “Next”.
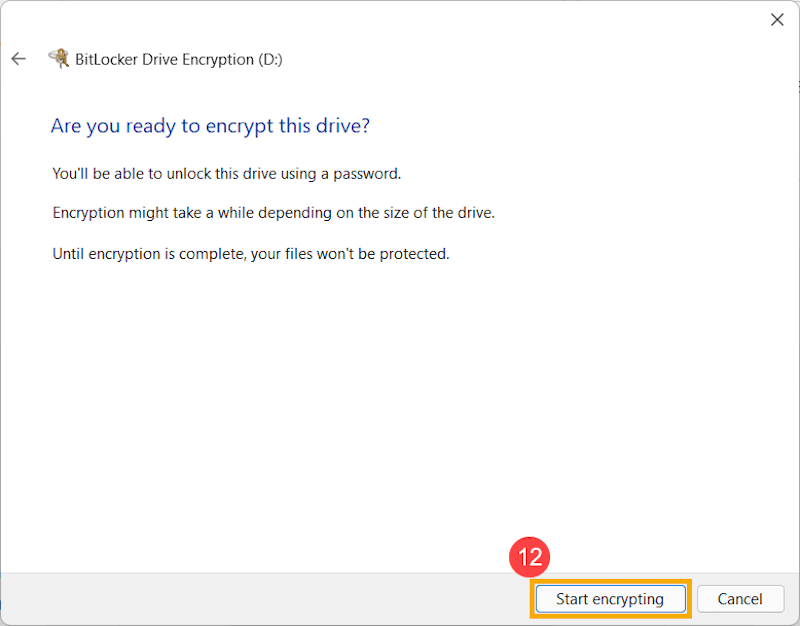
- Click “Start encrypting” to let the encryption begin.
Conclusion:
Sadly, Windows 11 Home Edition doesn't have the standard BitLocker encryption feature, meanwhile, the device encryption feature is not as safe and reliable as BitLocker. With the help of iBoysoft DiskGeeker for Windows, you can encrypt your precious data in disk or partition with BitLocker on any Windows Home Editions.
Did this article offer any help? You can click the buttons below to share!
