Written by
Wilsey YoungSummary: This post explains what causes the "Starting BitLocker an internal error was detected" error message to appear in Windows OS. Moreover, several solutions are provided. You can download iBoysoft DiskGeeker for Windows to use the BitLocker encryption feature available on Windows Home Editions.
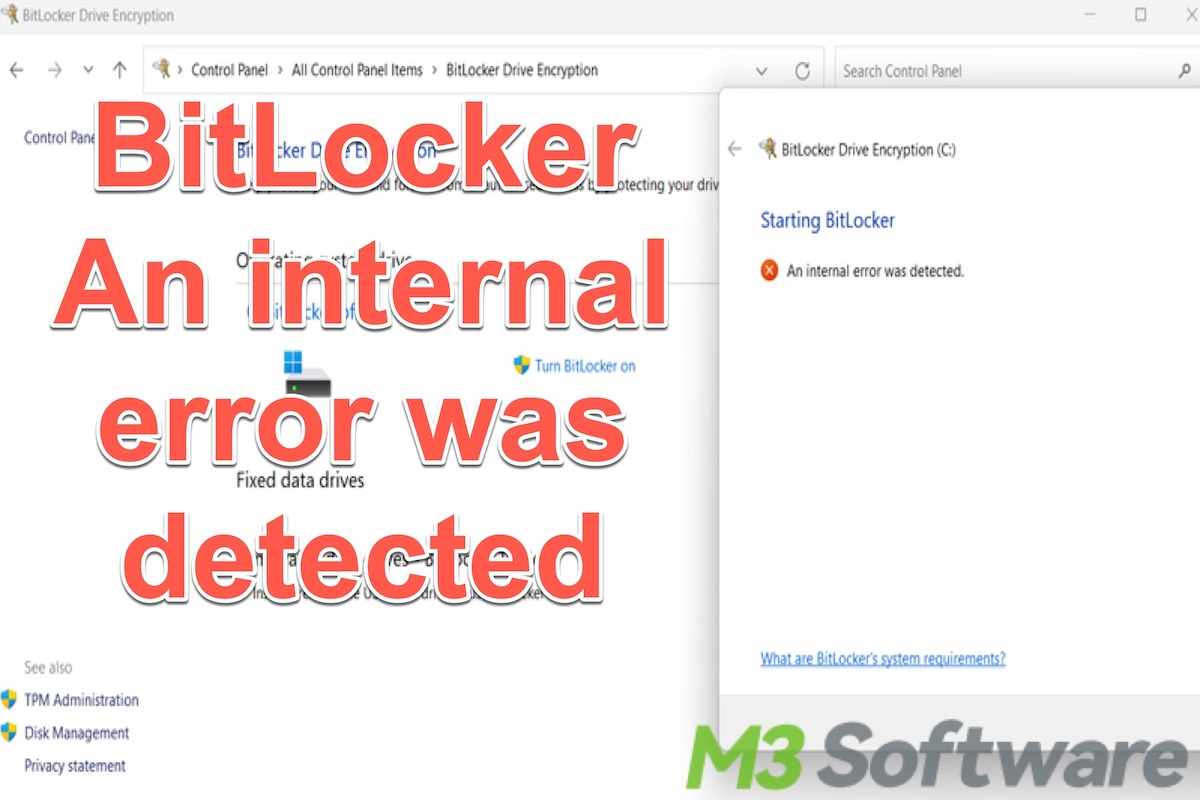
Some Windows users reported that they received the "Starting BitLocker An internal error was detected" error message when tried to turn on BitLocker via the BitLocker Drive Encryption panel on a Windows PC. Here is a real case from the forum:
I wanted to use the BitLocker drive encryption feature to encrypt the internal hard drive on my PC installed with Windows 10, FYI, my laptop originally was originally embedded with Windows 10 Home, but I added a key for Windows 10 Education which then upgraded the OS. When I went to Control Panel>System and Security>BitLocker Drive Encryption and clicked "Turn on BitLocker," an error message popped up and said "Starting BitLocker An internal error was detected." Can anyone tell me what happened and how to fix the error? Any help would be appreciated!
You can keep reading this post to learn what causes the "BitLocker an internal error was detected" error message and how to deal with it. iBoysoft DiskGeeker for Windows is highly recommended for encrypting drives or partitions with BitLocker on Windows Home Editions.
You can click the buttons below to share the post!
What causes the "Starting BitLocker An internal error was detected" error message?
This "Starting BitLocker An internal error was detected" error message often pops up when you open the BitLocker Drive Encryption panel to turn on BitLocker to encrypt drive C, and here's what it looks like: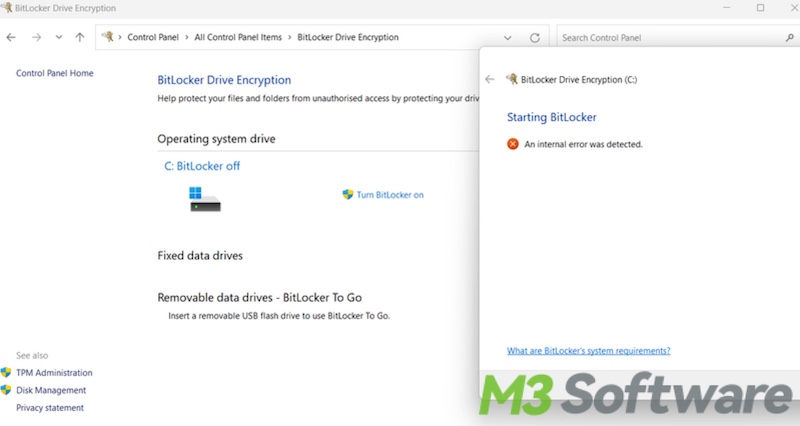
Here are some possible causes that may result in the "Starting BitLocker An internal error was detected" message:
- The computer motherboard doesn't have a TPM chip.
- Something goes wrong with TPM.
- The outdated BIOS or UEFI version.
- BitLocker encryption feature is not available on Windows Home Editions.
How to fix the "Starting BitLocker An internal error was detected" error?
According to the possible causes we discussed above and the solutions mentioned by Windows users in the forum, 4 major ways are available for you to choose from:
Use iBoysoft DiskGeeker for Windows to encrypt with BitLocker
Some Windows users may not know that the BitLocker drive encryption feature is not available on Windows Home Editions. Therefore, you may encounter the "Starting BitLocker An internal error was detected" error when enabling BitLocker via the Control Panel.
With iBoysoft DiskGeeker for Windows, a reliable and professional disk management tool, you can easily encrypt partitions or hard disks using BitLocker drive encryption on Windows 11 Home, Windows 10 Home, Windows 8 Home, Windows 7 Home, and Windows 7 Professional editions, etc.
You can follow the tutorial below to encrypt a partition with BitLocker in Windows Home Editions:
- Download, install, and open iBoysoft DiskGeeker for Windows.
- Choose the “BitLocker” module in the main interface.

- Click the “Encrypt partition” feature.
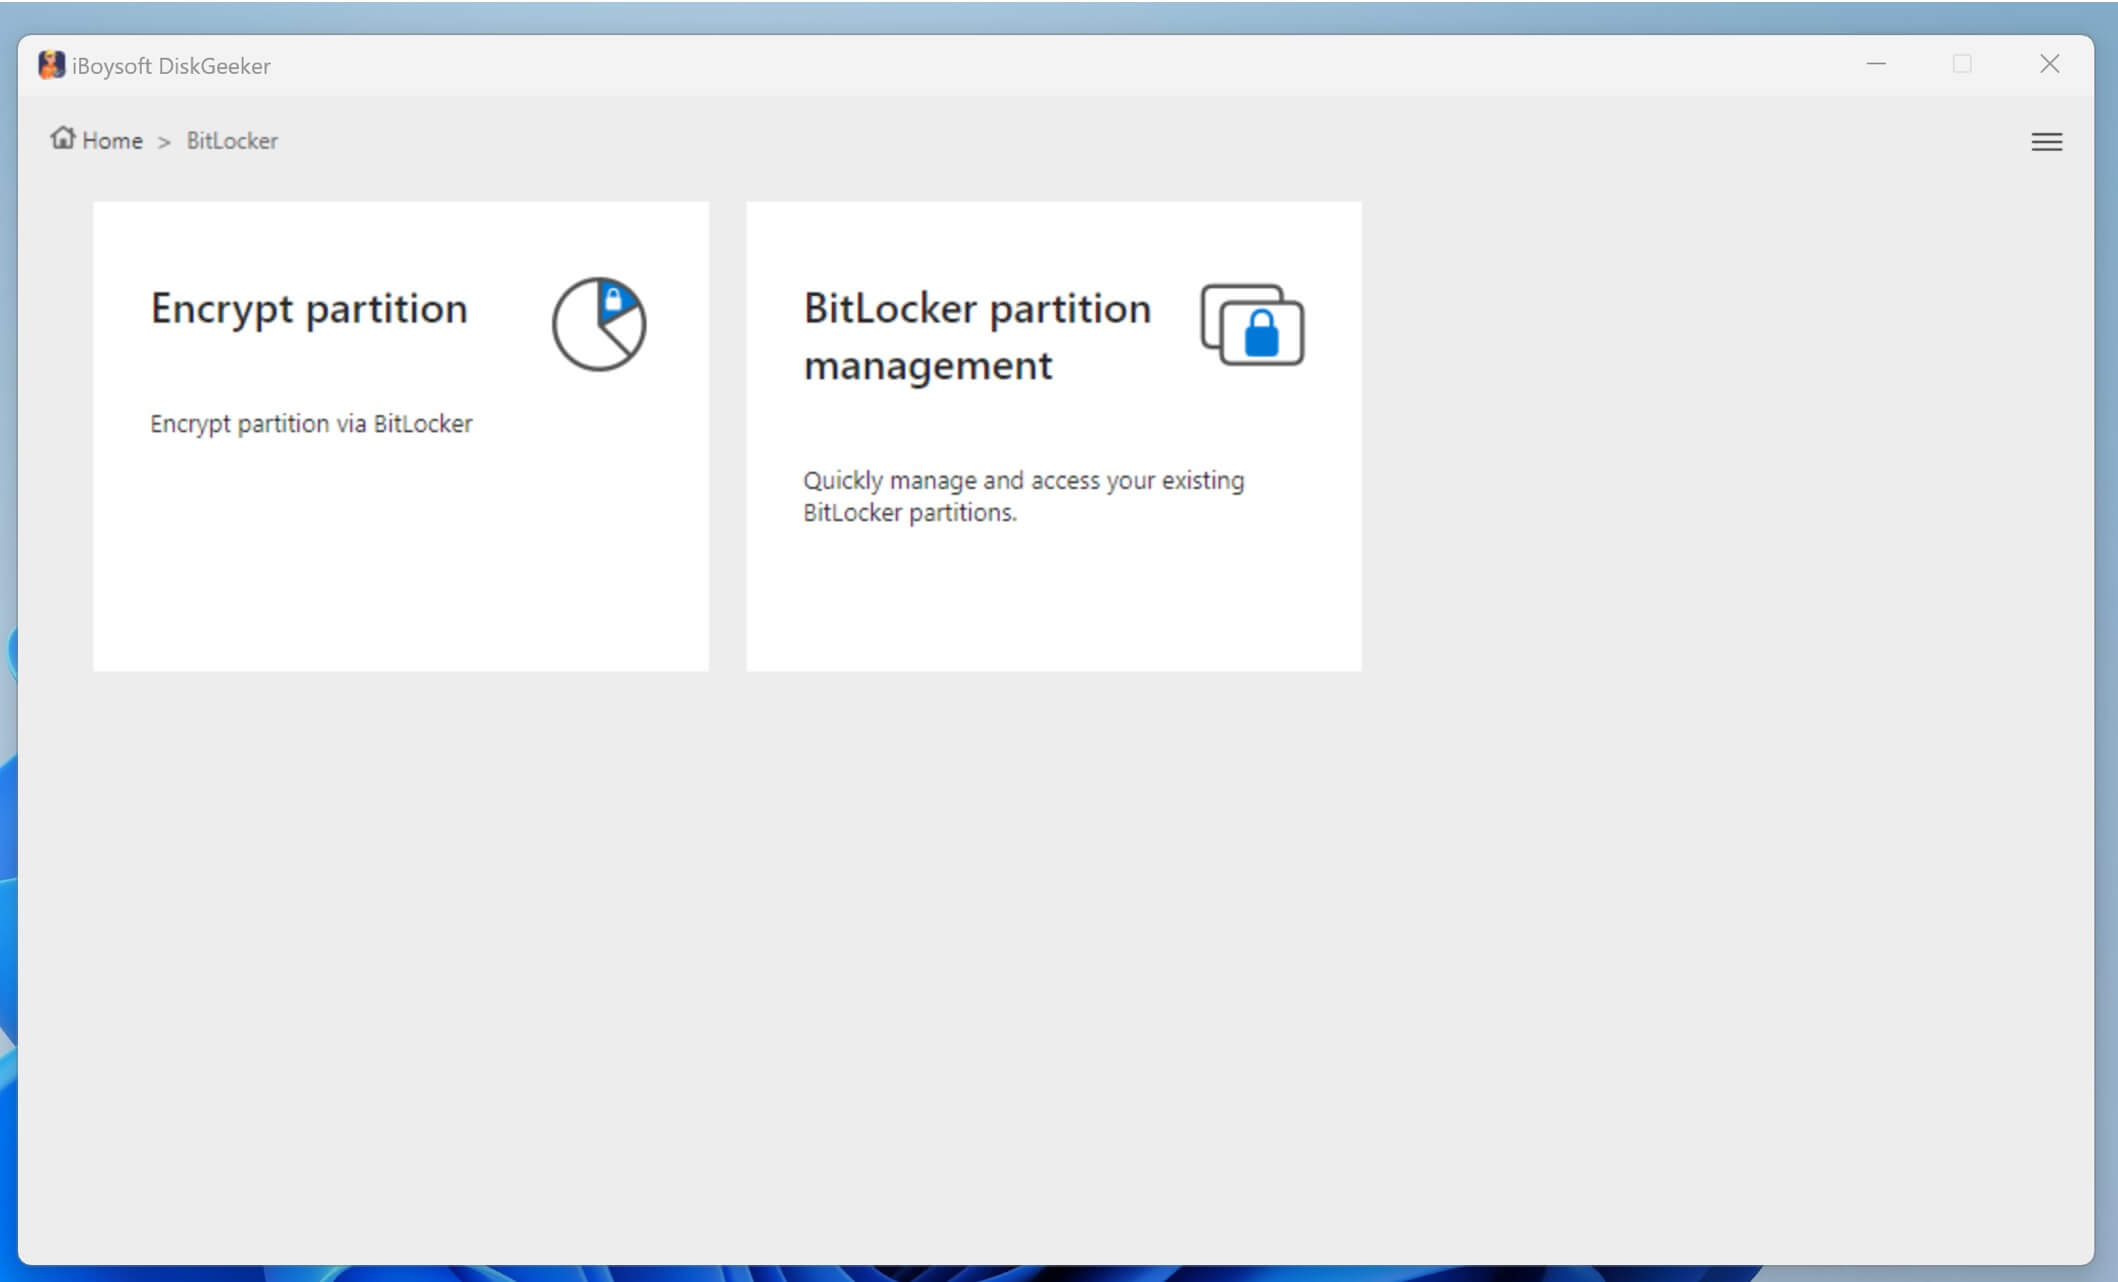
- Choose a partition you want to encrypt and click “Next". The partition must be formatted as the NTFS, exFAT, or FAT32 file system before encrypting.
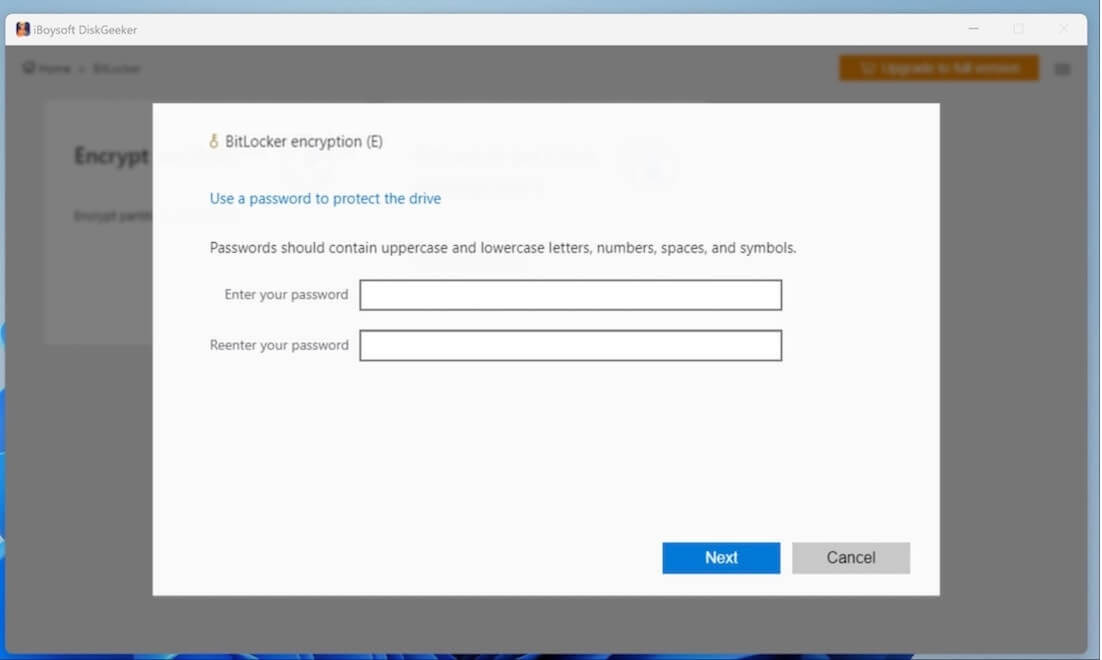
- Enter the password and click “Next” to continue.
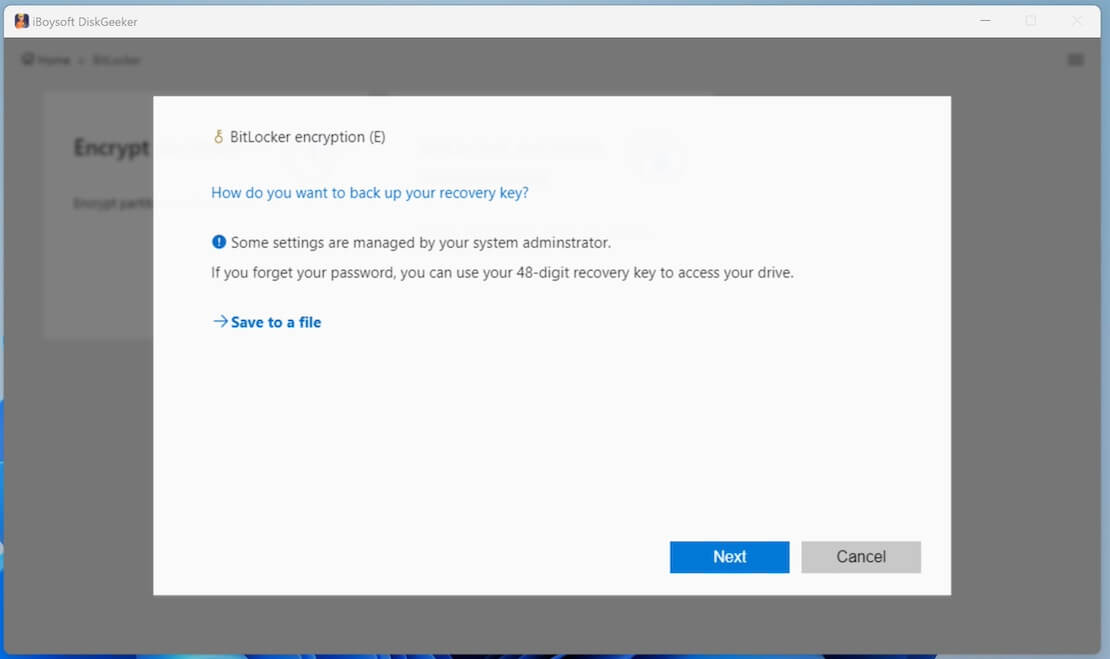
- Save the BitLocker recovery key, which can be used to unlock the encrypted drive when you forget the password.
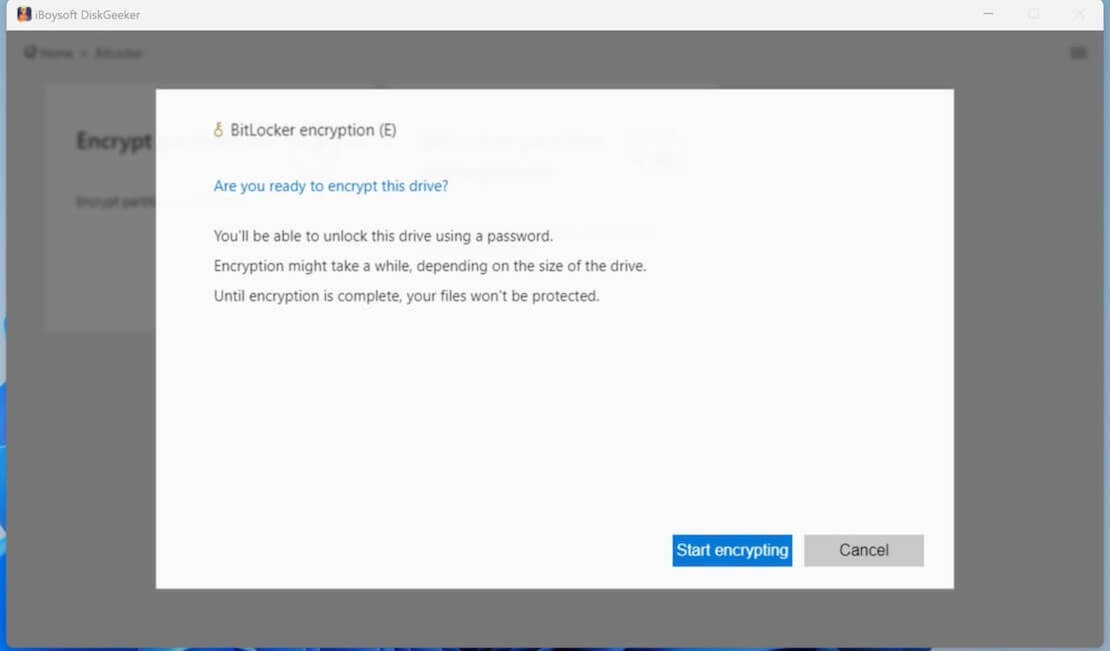
- Click “Start encrypting” to begin. Encryption might take a while, depending on the size of the drive.
You can share this disk management tool with your friends!
Enable BitLocker in Local Group Policy Editor
You can first try enabling BitLocker via Local Group Policy Editor, especially when your PC doesn't have a TPM chip on the motherboard. First of all, you should check if your PC has a TPM chip by following the following steps:
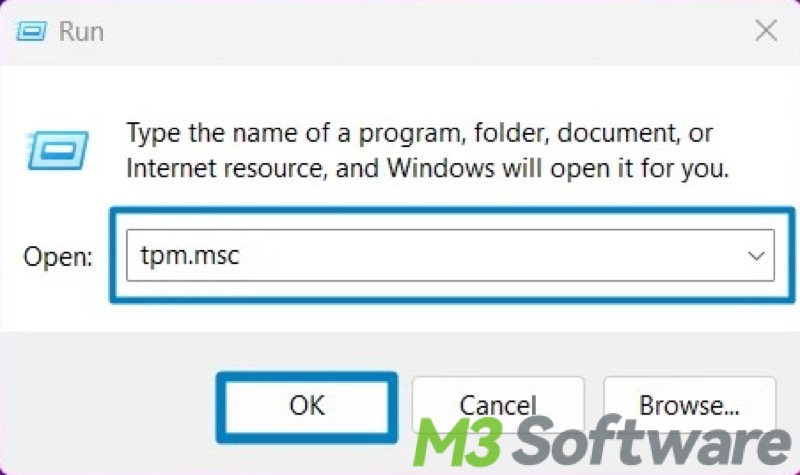
- Press the "Windows+R" keys on your keyboard to open the Run dialog box.
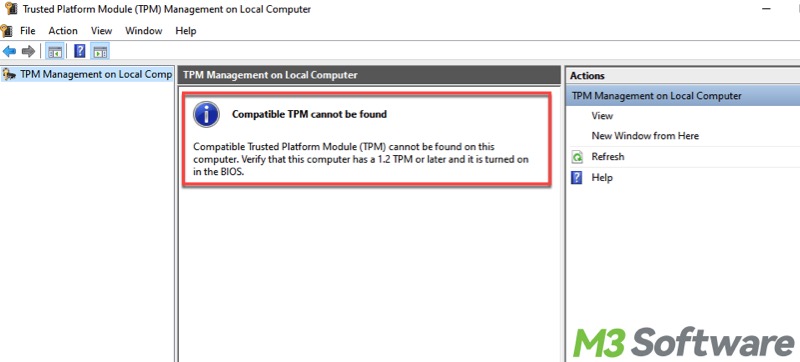
- Type “tpm.msc” in the box and hit the "Enter" key to open the "Trusted Platform Module (TPM) Management on Local Computer" window.
- When it says "Compatible TPM cannot be found," it means your PC does not have the chip.
- You will see “TPM is ready” and related details here if your PC has one.
Here's how to enable BitLocker in Local Group Policy Editor:
- Press the "Windows+R" keys to open “Run” dialog box.
- Type "gpedit.msc" in the box and hit the "Enter" key on your keyboard to open Local Group Policy Editor.
- Navigate to: Computer Configuration > Administrative Templates > Windows Components > BitLocker Drive Encryption > Operating System Drives.
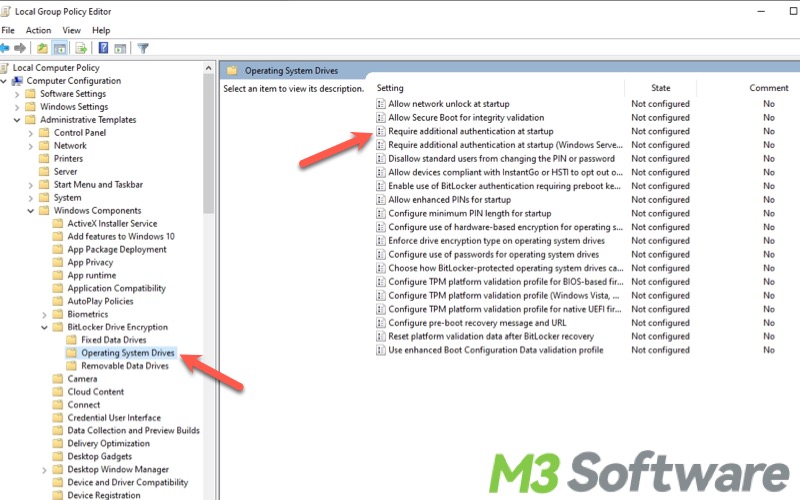
- Double-click the "Require additional authentication at startup" option.
- Switch from "Not Configured" to "Enabled."
- Check the box for "Allow BitLocker without a compatible TPM."
- Click "Apply" and "OK."
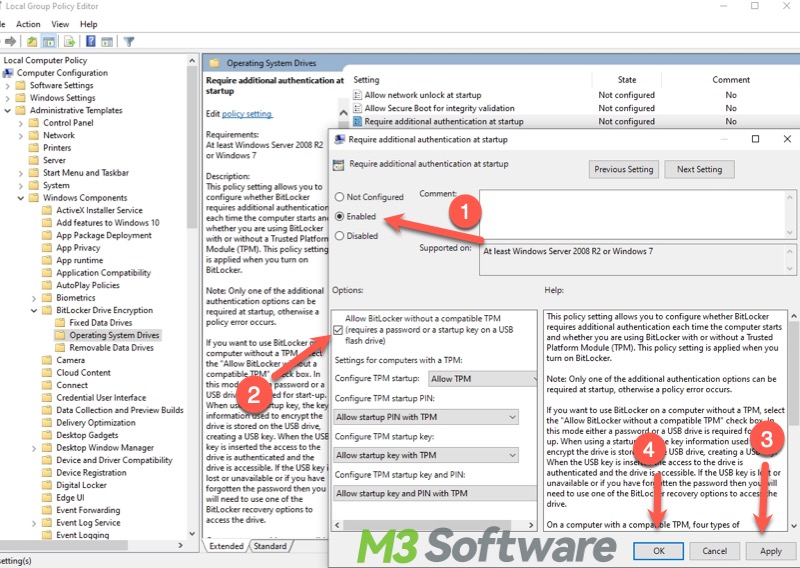
- After changing the BitLocker Group Policy settings, you can enable BitLocker without a TPM.
Clear TPM via Settings on Windows
If there's something wrong with the TPM, the "Starting BitLocker An internal error was detected" error message may show up when you try to turn on BitLocker. In this case, you can clear to TPM to reset it to default settings.
Note: Be sure to back up your important data before clearing the TPM.
- Press the “Windows+i” keys to open Settings.
- Click Update & Security > Windows Security > Device Security.
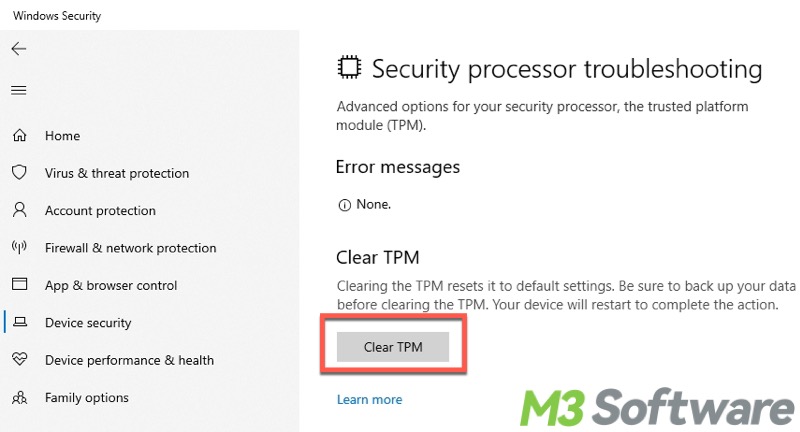
- Click the "Security processor details" under "Security processor."
- Choose "Security processor troubleshooting."
- Click "Clear TPM."

Update the BIOS to the latest version
The outdated BIOS version may lead to the "Starting BitLocker An internal error was detected" error message as well, so you can follow the steps below to update the BIOS.
- Go to the motherboard manufacturer's website and download the BIOS update file according to your motherboard model.
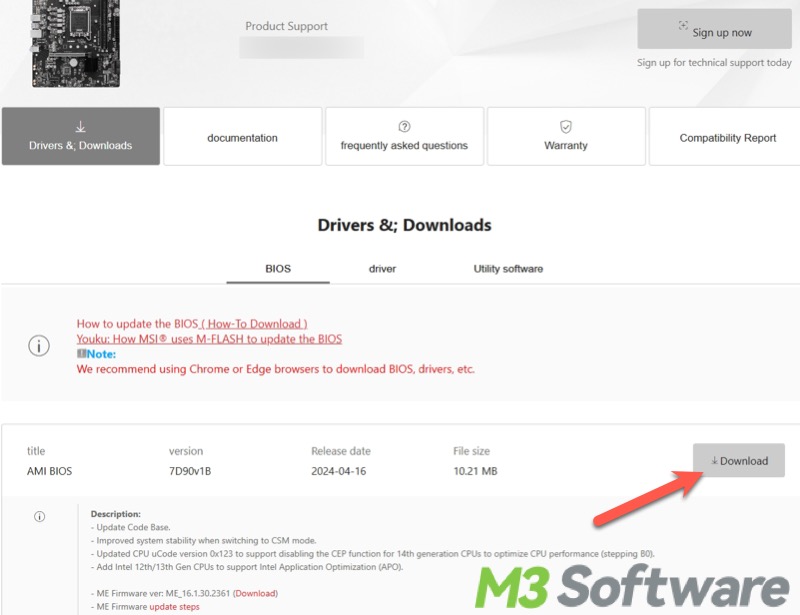
- Unzip the compressed file to get the folder containing the update files.
- Insert a blank USB flash drive into the USB interface on the motherboard. Note: The USB flash drive must be formatted as a FAT32 file system.
- Restart the computer and keep pressing the required key during the startup to access the BIOS page.
- Choose the advanced mode, and click M-Flash. Locate the inserted USB flash drive and the BIOS update folder.
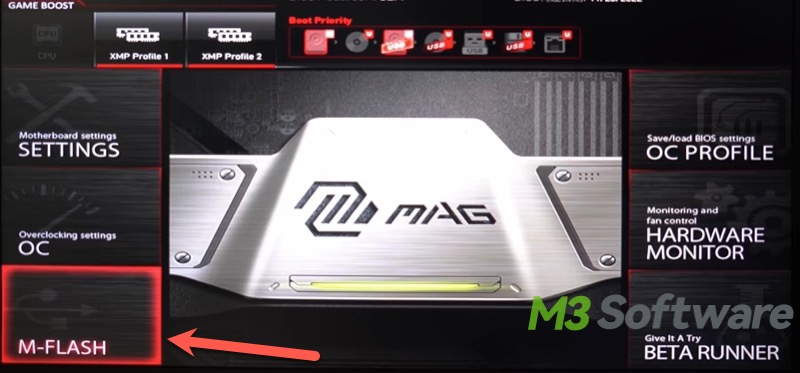
- Open the folder and choose the BIOS update file.
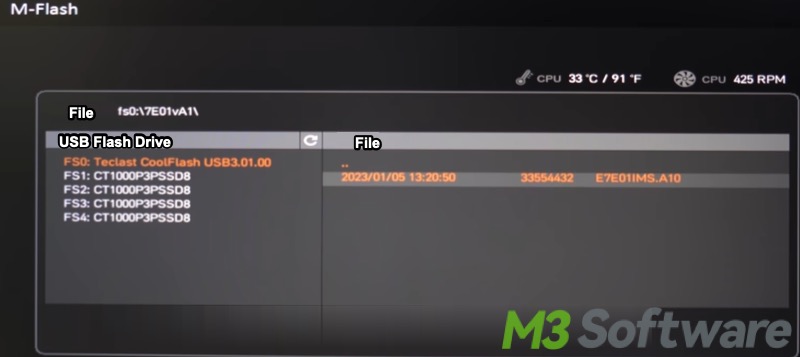
- Click “Yes” to start the BIOS update.
- Once the BIOS update is done, the system restarts at once, and you can keep pressing the required key to enter BIOS again.
- Exit the BIOS and let the system start.
Do you like this post? You can click buttons below to share!
