
Written by
Yuri ZhangWindows often installs updates and restarts automatically, which can be bothersome, especially if you're working or gaming. This guide will show you how to use Registry Editor (regedit) to stop those automatic restarts or updates.
The Windows Registry is a database where your system stores settings for Windows and installed programs. You can think of it as the brain of your computer's configuration. Regedit is the tool used to view and edit that database.
Warning: Because Registry controls core settings, making a wrong change can affect how your system behaves or even cause it not to boot properly. We advise you to back up Registry in the first place as follows.
Step 1: Back up the Registry (and how to restore it if needed)
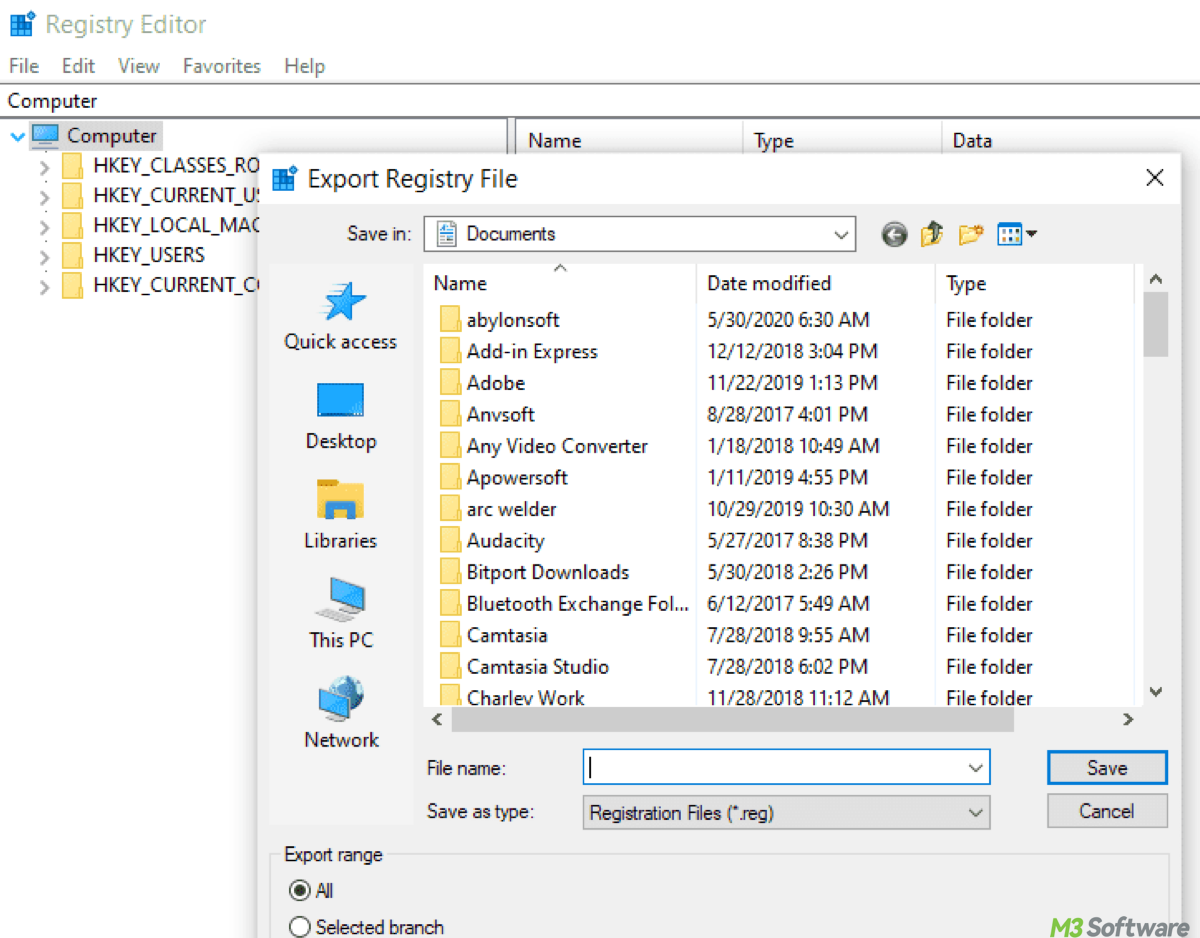
Before you make any changes, create a backup. This lets you undo things if something goes wrong. To Back up:
- Press Win + R, type regedit, and hit Enter.
- In the top-left menu, click File > Export.
- Choose where to save it (like Desktop) and name it something like RegistryBackup.
- At the bottom, make sure "Export range" is set to All.
- Click Save.
If your system acts weird after editing, to restore:
- Just double-click the backup .reg file you saved earlier.
- Click Yes when asked if you want to add it to the registry.
- Restart your computer to apply the restored settings.
This way, your registry is back to how it was.
Step 2: Stop Windows from restarting with Registry
Sometimes, Windows installs an update and restarts on its own—even if you're using the PC. Here's how to prevent that with Registry:
- Open regedit (press Win + R, type regedit, and hit Enter).
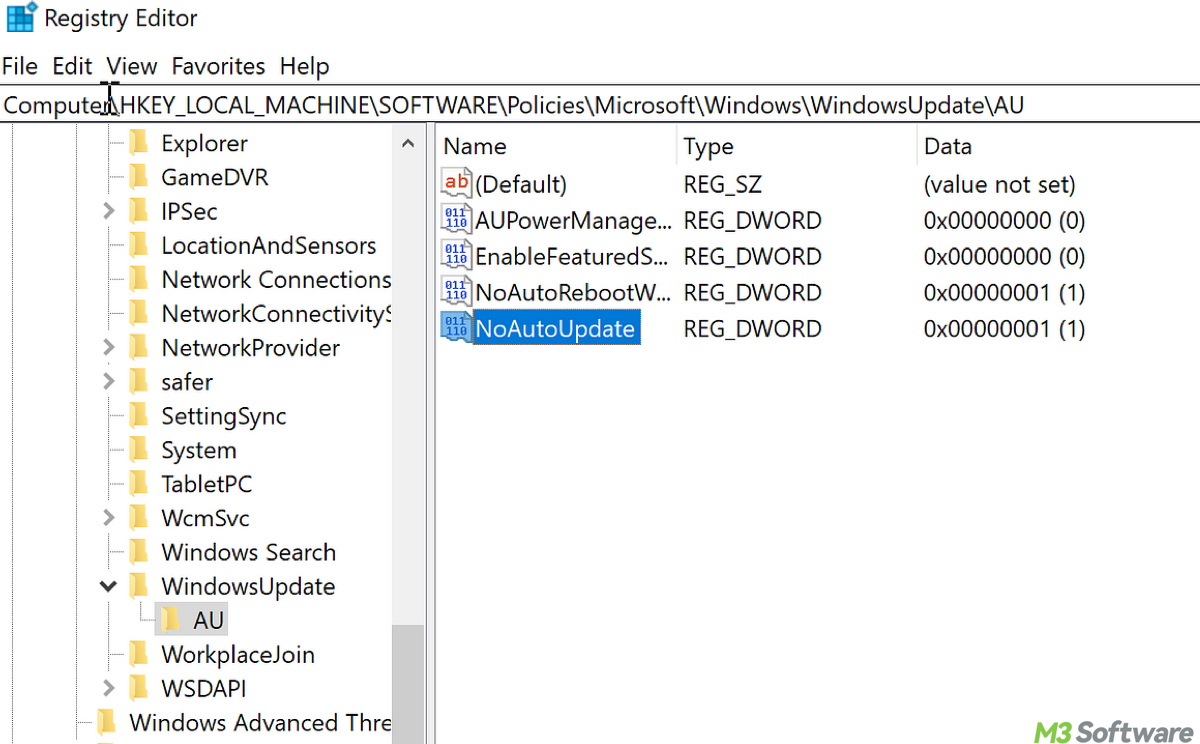
- Go to: HKEY_LOCAL_MACHINE\SOFTWARE\Policies\Microsoft\Windows\WindowsUpdate\AU
- If WindowsUpdate or AU doesn't exist, right-click Windows, select New > Key, name it WindowsUpdate, then inside it create another key named AU.
- In the right-hand area, right-click and choose New > DWORD (32-bit) Value.
- Name it: NoAutoRebootWithLoggedOnUsers
- Double-click it and set its value to 1
This tells Windows not to restart while you're logged in.
Spread this post if you get the hang of it.
Step 3: Turn off automatic updates completely via Registry
If you want to stop updates from downloading and installing on their own. In the same AU folder as above, right-click and create a new DWORD (32-bit) Value. Then, name it NoAutoUpdate and set its value to 1.
This stops Windows from automatically checking for or installing updates. You can still check for updates manually in Settings > Update & Security.
(Optional) Get notified instead of automatic updates in regidit
Don't want to stop updates, but just want a warning before anything happens? Use this option: In the same AU key, right-click and create a new DWORD (32-bit) Value. Name it AUOptions and set the value to 2.
For more values, take a look at this:
| Value | What it means |
| 2 | Notify before download and install |
| 3 | Auto-download, notify before install |
| 4 | Auto-download and auto install |
Last but not least, once you've added the registry values, restart your computer to apply the changes.
Final thought
Always back up before making changes. If something feels off, restore the .reg file backup you created earlier. Disabling updates means your system might miss out on important security patches—check for updates manually every few weeks. Here's a summary table to use Registry for your quick reference.
| Goal | Registry Value | Value |
| Stop auto restart | NoAutoRebootWithLoggedOnUsers | 1 |
| Turn off updates | NoAutoUpdate | 1 |
| Notify before download/install | AUOptions | 2 |
Related articles:
How to Turn On Do Not Disturb on Windows 10/11
How to Keep Device Drivers Updated on Windows System
How to Repair Windows 11/10/8/7 Using DISM
Share this beginner-friendly guide to help more onliners.