Written by
Wilsey YoungBitLocker is a primary disk encryption feature built into certain versions of Windows OS. It can protect your data by encrypting the entire drive or specific volume with Advanced Encryption Standard.
However, some Windows users reported encountering a BitLocker recovery blue screen that asked for a BitLocker recovery key when their PC booted up. They were pretty sure they had never manually enabled BitLocker before.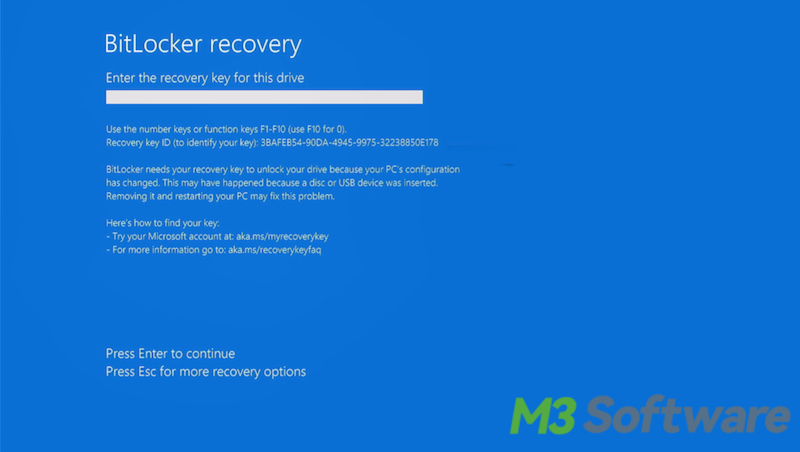
This post discusses the phenomenon above and explains what BitLocker Automatic Device Encryption is. Beyond that, we show how to disable BitLocker Automatic Device Encryption on Windows.
You can share this post with your friends!
What is BitLocker Automatic Device Encryption?
BitLocker Automatic Device Encryption is a special Windows feature that encrypts the internal drive to protect your data against unauthorized access, especially when you boot up a newly installed Windows system and sign in with a Microsoft account.
Compared to the original BitLocker drive encryption feature that requires manual activation, BitLocker Automatic Device Encryption is enabled by default on supported devices, typically those that boast certain hardware and meet security standards. If the device is lost or stolen, BitLocker encryption ensures that sensitive data cannot be accessed without the password, PIN, or BitLocker recovery key.
You can read the following post to learn more about BitLocker: BitLocker Pros and Cons in Windows Operating System
BitLocker automatic device encryption is enabled when:
- A TPM (Trusted Platform Module) chip is embedded in your PC, TPM 1.2 or TPM 2.0.
- UEFI Secure Boot is enabled.
- Secure Boot is enabled.
- Modern Standby or HSTI compliant.
As a side note, here are the Windows versions and editions that support the BitLocker encryption feature:
- Windows 11: Pro, Enterprise, and Education editions
- Windows 10: Pro, Enterprise, and Education editions
- Windows 8 and Windows 8.1: Pro or Enterprise editions
- Windows 7: Enterprise or Ultimate editions
- Windows Embedded Standard 7 and Windows Thin PC
- Windows Vista: Enterprise or Ultimate editions
- Windows Server 2008 R2: All editions
- Windows Server 2012: All editions
How to find the BitLocker recovery key if you run into the recovery key blue screen for the first time?
When you first sign in or set up a device with a Microsoft account, Device Encryption is enabled and a recovery key is attached to that account. You may encounter the recovery key blue screen during the startup and be asked to provide the correct BitLocker recovery key to boot up the system as usual. Some users may panic and wonder what the BitLocker recovery key is and where to find it.
A BitLocker recovery key can be used to access your files and folders if you are having problems unlocking your PC, especially when you forget the password. However, to those who don't know the existence of BitLocker Automatic Device Encryption, a recovery key is an annoyance.
Usually, your BitLocker recovery keys would be backed up automatically by the Microsoft account. Here's how to find BitLocker recovery key in your Microsoft account:
- Log into your Microsoft account using another computer.
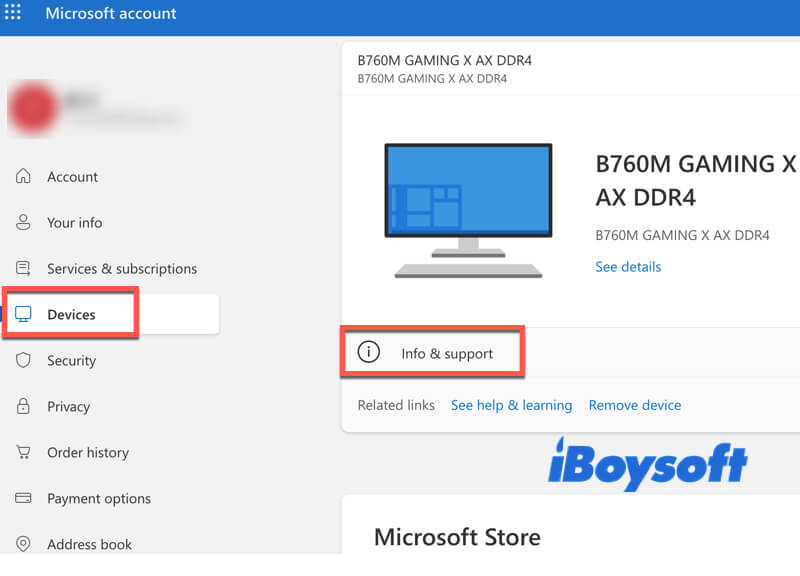
- Click the “Devices” on the left side panel and choose “Info&support.”
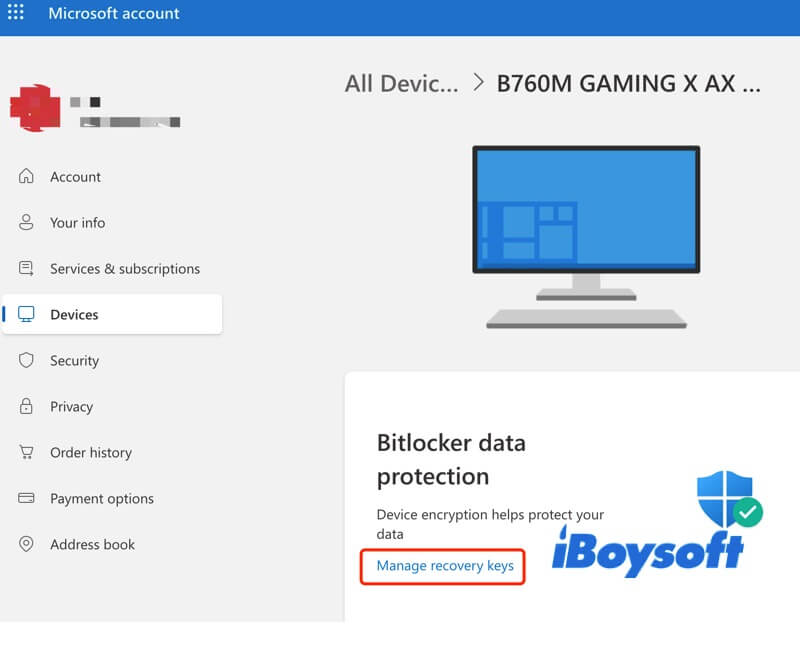
- Click “Manage recovery keys.”
- You can see the BitLocker recovery key information.
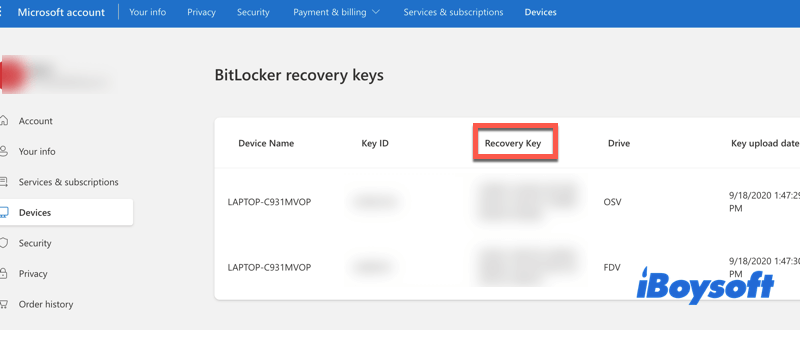
- Enter the recovery key on the computer that is experiencing recovery blue screen.
How to disable BitLocker Automatic Device Encryption on Windows 10 or 11?
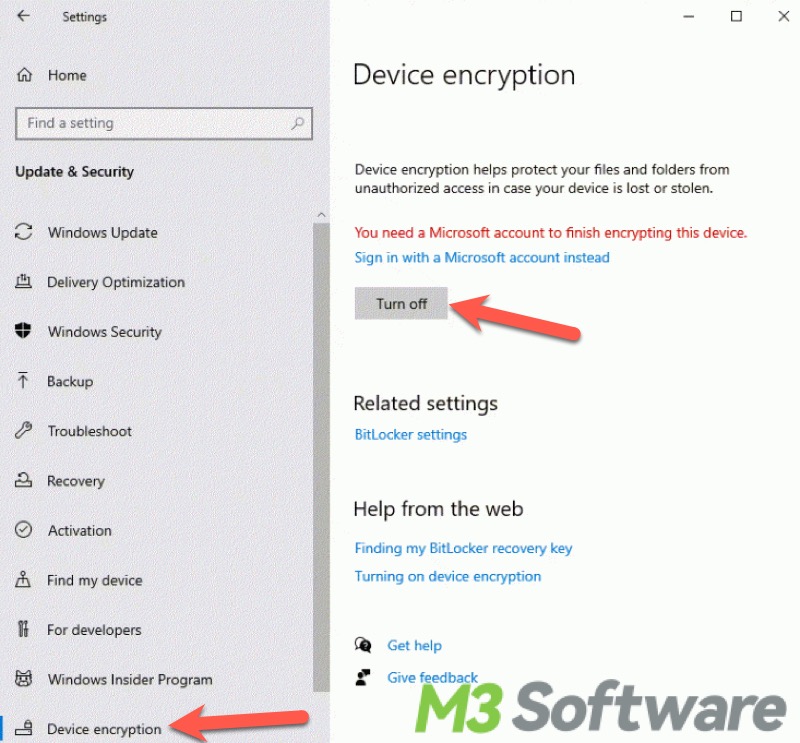
You can open Settings to disable the Device Encryption feature to prevent the data from being automatically encrypted.
- Sign in to Windows with an administrator account.
- Press the “Windows+i” keys or click the gear icon in the “Start” menu to open “Settings.”
- Choose “Update & Security.”
- Click “Device Encryption” on the left side panel.
- Click the “Turn off” button in the Device Encryption section.
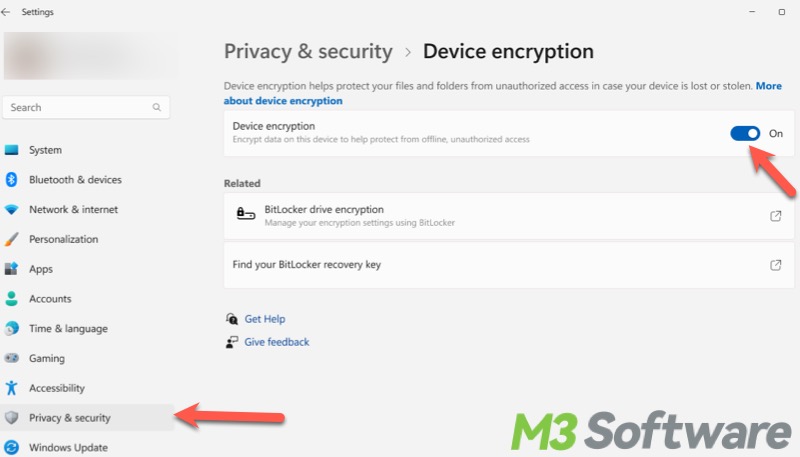
- Device Encryption can also be disabled via Settings on Windows 11.
You can click the buttons below to share the article!
