
Written by
Wilsey YoungSummary: This post shows how to fix the error message when installing or upgrading Windows: Windows could not prepare the computer to boot... iBoysoft DiskGeeker for Windows is ideal for cloning Windows OS so that you can run Windows without reinstallation. -From m3datarecovery.com

Some Windows users run into the following error message in the process of reinstalling or upgrading Windows OS through a bootable USB drive:
“Windows could not prepare the computer to boot into the next phase of installation. To install Windows, restart the installation.”
This post revolves around this error message related to the Windows 10/11 OS installation or upgrade and offers step-by-step solutions.
You can click the buttons below to share the post
Reddit discussions on "Windows could not prepare the computer to boot"
There are heated discussions about the "Windows could not prepare the computer to boot" error message in the post on Reddit. The original poster created the bootable USB drive through Rufus and the partition scheme (including SSD) was set to GPT.
Quite a lot of warm-hearted geeks and netizens offered their suggestions or solutions. You can check the following post for more details.
[HELP] Windows could not prepare the computer to boot into the next phase of installation.
by u/RegLoiD in buildapc
Solutions to "Windows could not prepare the computer to boot"
The solutions are provided based on the possible causes of the "Windows could not prepare the computer to boot" error message, including conflicts caused by hardware equipment, incompatible BIOS, outdated BIOS, incorrect partition scheme, etc.
Remove unnecessary hardware equipment or peripherals
The excessive hardware equipment connected to the Windows PC may trigger the BIOS-related glitch and cause the "Windows could not prepare the computer to boot" error message to appear during Windows OS installation or upgrade.
It is suggested that users remove unessential hardware equipment and peripherals, including USB adapter, docking station, USB drive, SD card, CD, and more. However, you need to make sure the disconnected devices will not stand in the way of Windows OS installation. 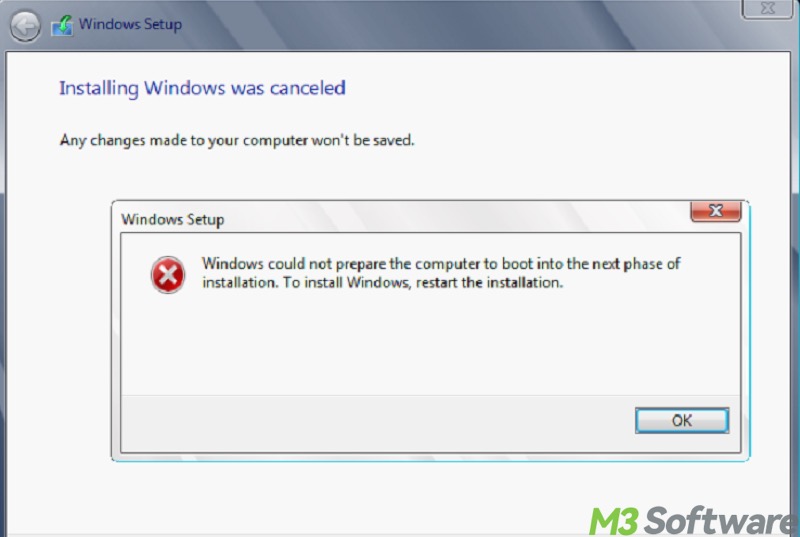
Clone the Windows OS from one disk to another
There are different methods for users to install a Windows OS, such as Clean Install, Upgrade Installation, Repair Installation, Reset This PC. All these methods are inevitably complex and time-consuming and unable to retain the apps, settings, data, or personal files important for users.
Moreover, users might come across various errors when installing or upgrading Windows, e.g. "Windows could not prepare the computer to boot." Therefore, system clone through a reliable tool has become quite the thing these days, which allows you to completely clone the Windows OS to another hard disk
iBoysoft DiskGeeker for Windows is a professional and easy-to-operate disk management tool that can help you make an exact copy of the system partition along with system files, data, settings, apps, and other components essential for Windows to boot and run.
iBoysoft DiskGeeker for Windows is a perfect choice when you want to migrate Windows, upgrade the hard drive without reinstalling Windows, set up multiple computers with the same configuration, run Windows from an external hard drive, etc.
Here's how to clone Windows OS disk through iBoysoft DiskGeeker for Windows:
Note: The destination disk will be erased and reset with the same type of disk as the source drive and create the system partition.
- Download, install, and launch iBoysoft DiskGeeker for Windows.
- Make sure the system partition is selected correctly.
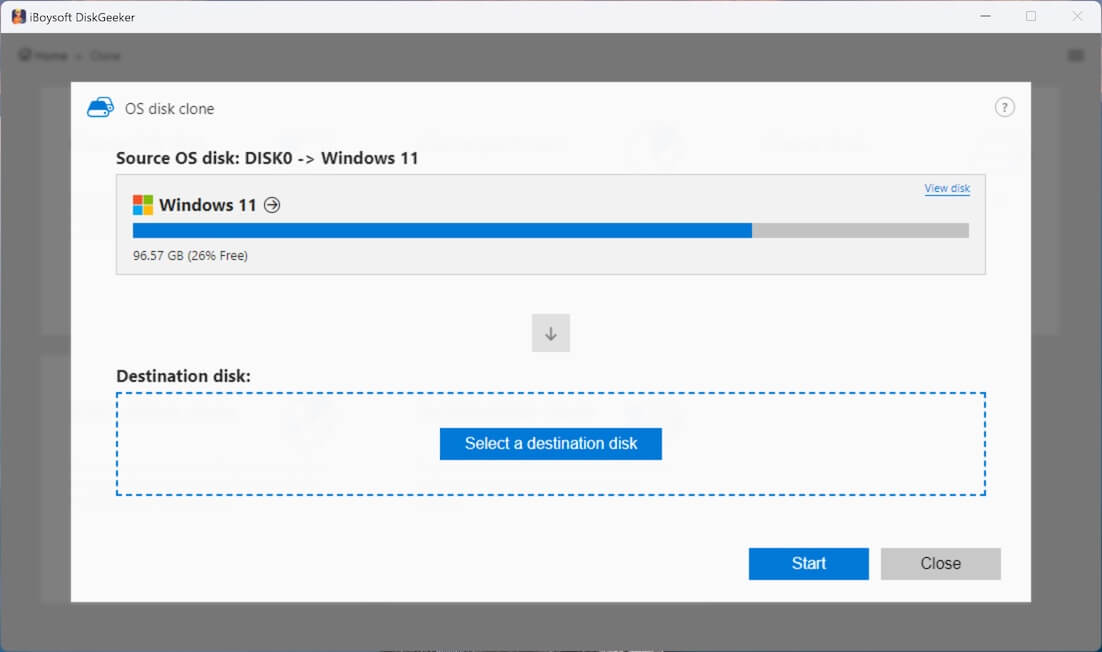
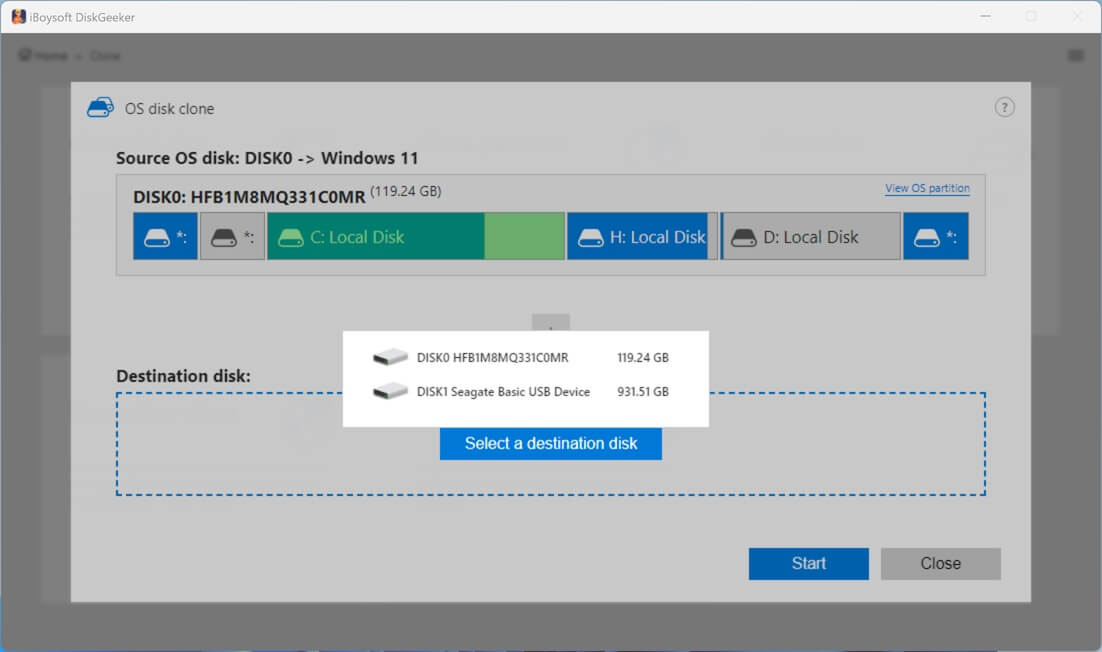
- Click "Select a destination disk" and choose the drive to which the cloned system will be saved.
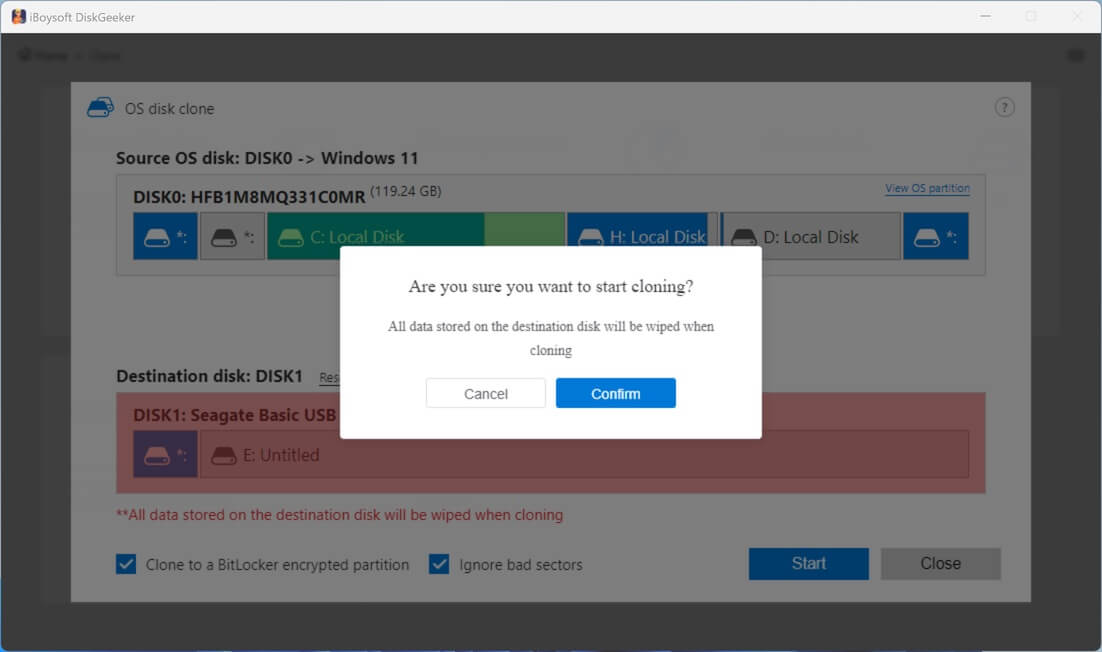
- The Clone to a BitLocker encrypted partition" option allows you to encrypt the clone with BitLocker. If you tick it, you'll be required to set a password for BitLocker.
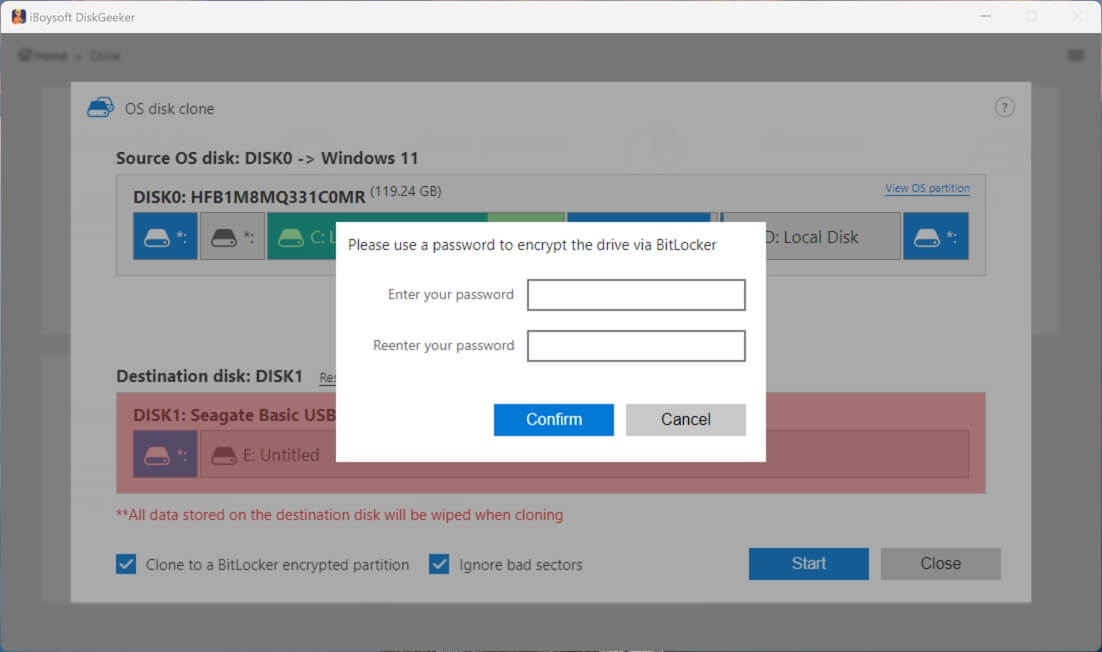
- If you want this tool to ignore bad sectors on the source disk to prevent interruption caused by them, the "Ignore bad sectors" option will be an ideal choice.
- Click Start and Confirm to begin cloning.
- Wait patiently for the cloning process.
- When the system clone is complete, you can open Disk Management to check if the system partition is copied. You can also find the system partition and maybe the EFI partition on the destination disk.
You can share this tool with your friends!
Check BIOS compatibility
Whether the BIOS is properly set up or compatible with the Windows OS is the key to solving the "Windows could not prepare the computer to boot" issue. You can visit the motherboard manufacturer website or contact them to seek help.
Update the BIOS
The outdated BIOS version may be the culprit for the "Windows could not prepare the computer to boot" error message when installing Windows. Here's how to update the BIOS using a USB flash drive on Windows 10:
Step 1: Check BIOS version:
- Press Windows+R key to launch Run dialog box, type msinfo32, and hit the Enter key.
- In the System Information window, scroll down to find the "BIOS Version/Date."
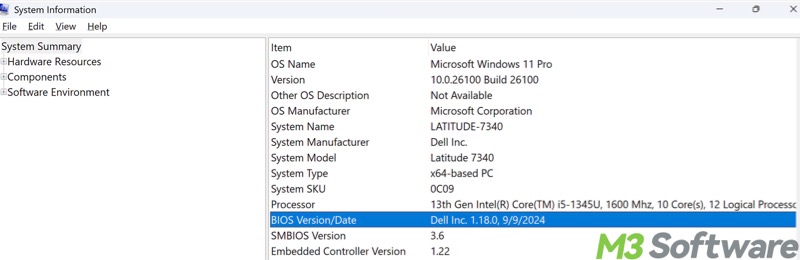
- Note down the BIOS version info.
Step 2: Prepare and format the USB drive:
- Connect an empty USB flash drive to your PC, right-click on it in File Explorer, and select "Format…"
- Choose the FAT32 file system, select "Quick Format", and click "Start."
Step 3: Download the BIOS update file from the manufacturer website:
- Visit the motherboard manufacturer's website and check the "Support" or "Downloads" page.
- Download the latest BIOS update file according to your motherboard model, and compare the BIOS version to which you noted down just now.
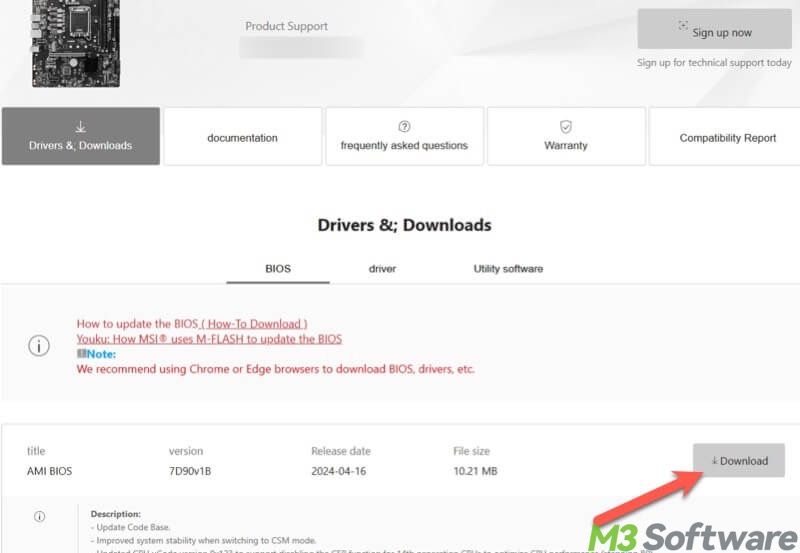
- Save the BIOS update file to the formatted USB flash drive. If it's a ZIP file, extract it first and then delete the ZIP file.
Step 4: Enter the BIOS to update
- Insert USB drive containing the BIOS update file into the USB port on the motherboard.
- Restart your PC, and press the F12 key (the key may vary depending on different manufacturers) continuously to enter the BIOS.
- Locate the connected USB drive under the "Boot", "M-FLASH", "Q-FLASH", or "Advanced" section.
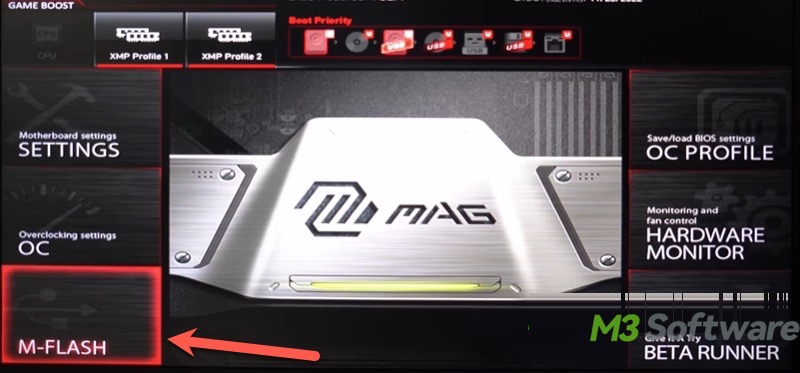
- Select the BIOS update file in the USB drive and press the "Enter" key to start the update.

- Follow the instructions to complete the BIOS update.
- The system may reboot once the update is complete.
Configure the installation media in a proper way
The "Windows could not prepare the computer to boot" error could occur due to an improperly configured installation media, especially those who rely on the USB drive to install Windows.
In this case, all you need is a tutorial on installing Windows from a bootable USB, which involves details on the configuration: How to Free Install the Windows from USB? (with Pictures)
Set correct partition scheme based on UEFI or BIOS
Improper partition scheme applied to the UEFI or BIOS firmware interface will result in the "Windows could not prepare the computer to boot" error message. UEFI works perfectly with the GPT (GUID Partition Table), and BIOS uses MBR (Master Boot Record).
The following tutorial is about how to convert MBR into GPT when installing Windows OS with UEFI, thus the "Windows could not prepare the computer to boot" error message will be solved eventually.
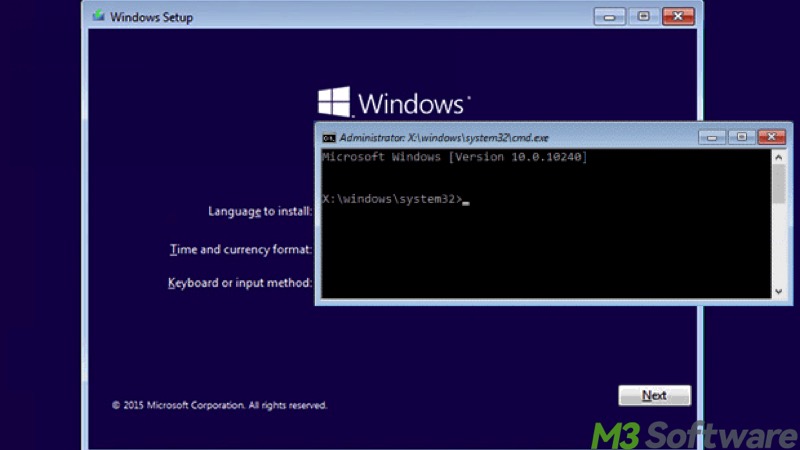
Step 1: Launch Command Prompt during Windows setup
- Boot from Windows installation media and wait until the Windows setup window appears.

- Press the Shift+F10 keys on your keyboard to launch Command Prompt.
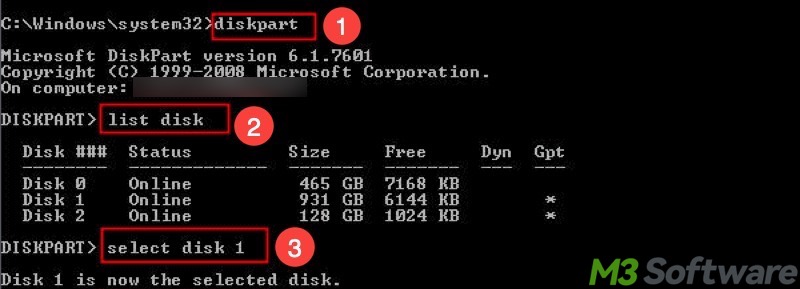
Step 2: Delete volume by inputting commands below and hit the Enter key after each.
- disk part
- list disk
- select disk # (Note: Replace # with the actual number of the bootable disk. See example below)
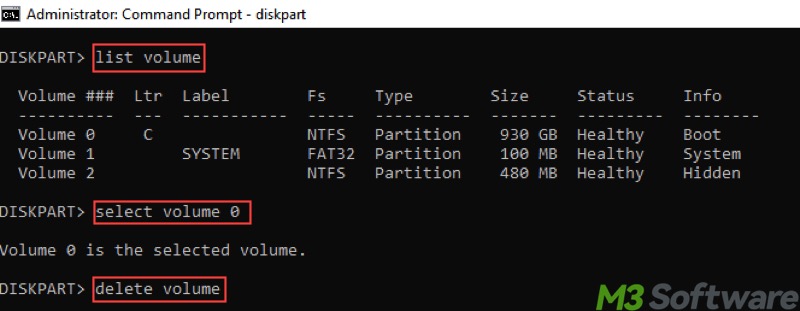
- list volume
- select volume # (Note: Replace # with the actual number of the volume that contains the Windows OS file)
- delete volume (See example below)
Step 3: Convert MBR into GPT and create primary partition by inputting commands below and hit the Enter key after each (You don't need to restart Command Prompt):
- convert gpt
- create partition primary size=100
- create partition primary
- list partition
- select partition # (Note: Replace # with the number of the system volume)
- active
Step 4: Format volume by inputting commands below and hit the Enter key after each (You don't need to restart Command Prompt):
- list volume
- select volume # (Note: Replace # with the number of volume where you want to install the Windows OS)
- format fs=ntfs quick
- assign letter=C
- exit
When all steps and commands above are correctly done, you can resume the Windows installation process, in which the "Windows could not prepare the computer to boot" error will not pop up.
Delete all partitions during Windows setup
Deleting all partitions is the ultimate means if the "Windows could not prepare the computer to boot" still persists. Given that deleting partitions erases all the data, creating a Windows System Image backup is necessary.
Here's how to delete partitions during Windows setup:
- Boot from Windows installation media
- Choose all partitions and tap on the Delete button.
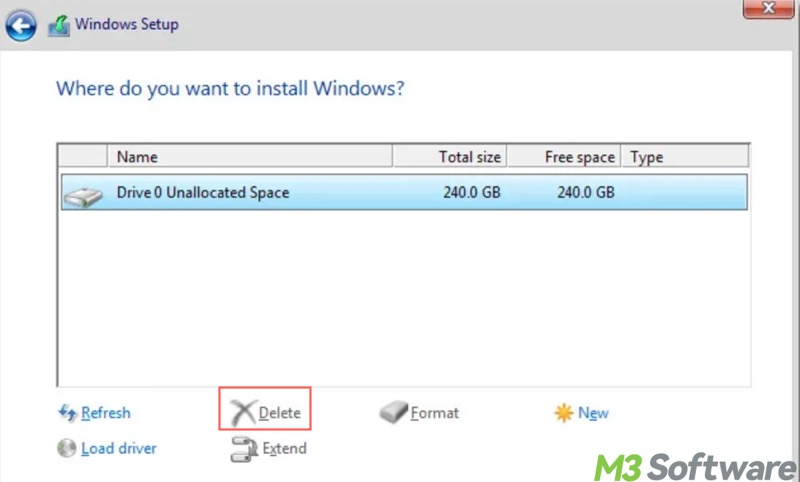
- Create new partitions using the unallocated space.
- Start over the Windows installation.
Do you find this post helpful? You can share it by clicking the buttons below!