
Written by
Wilsey YoungSummary: This post revolves around the Boot Device Not Found issue on Windows 10/8/7 and offers proven solutions. iBoysoft Data Recovery for Windows is highly recommended for restoring your data from a computer that won't boot. -From m3datarecovery.com
The error message like "Boot Device Not Found 3F0" error in HP and "No Bootable Device Found" in Dell are mostly found on Windows. If your computer is experiencing the "boot device not found" error that prevents your PC from booting up, you can simply test the hard drive using the built-in function of Hardware Diagnostics on your computer.
However, if the PC is just stuck on this error and Windows 10 won't boot anymore, you need to read on and learn how to fix it.
Important to know how a Windows computer boots up
Before having a basic idea about "Boot Device Not Found", it's necessary to see how a computer gets started. So that you can better understand and fix the "Boot Device Not Found 3F0" error.
A computer is universally started through several stages: (Power the computer and Computer on are not counted as key stages)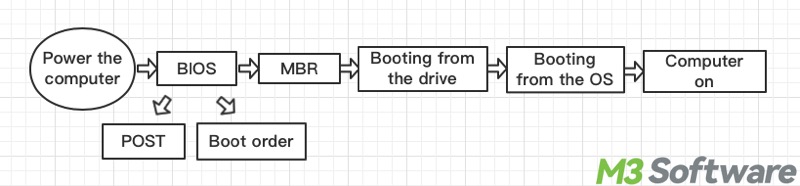
Stage 1: Entering BIOS to check Basic I/O information
When the computer is powered on, the first thing it does is to read the ROM chip, which dwells the Basic Input/Output System (BIOS). BIOS then would have a Power-on Self-Test (POST) to check if the hardware can meet the minimum conditions to enable its running. Then, BIOS hands over the control to the next initiator.
However, before that, BIOS needs to know which drive among the boot devices that BIOS has detected is the next initiator's home, and which means BIOS has to make an order to hand over the control, and of course, the higher rank drive gets the priority. That is the so-called Boot Order.
Stage 2: Check and access the Bootloader in the target boot device
Having handed over the control to a specific drive, the computer will read the first sector of this drive, which is most of the time the first 512 bytes of the drive. The first 512 bytes has its term, "Master Boot Record" (MBR), which clearly records the whole partitions of the drive to help lead the system to the next stage.
Stage 3: Locate the system partition in the target Boot Device
After the computer has read the MBR of the drive, it goes for a specific partition which stores the data of the OS in the drive and hands over the control to that partition.
Stage 4: Booting from the OS
Once the computer successfully reads the partition information of the external hard drive, it will go further by calling related programs to recognize the file system of each partition on the external hard drive. A recognized file system will let the computer know how and where your data is stored on the external hard drive so that it can mount this external hard drive for use.
As the OS lives inside that partition, thus, when the computer hands over the control to the partition, the OS takes over the first chair. Then, the kernel of the OS would be first loaded by the memory, and then all the dark places of the booting process are going to be one by one lit by the OS, and finally, you will have found that your screen is on.
What does "Boot Device Not Found" mean?
Although there is a difference in error messages of different brands of computers, as far as what we have organized from the feedback of our users who support different brands, like HP, Dell, Lenovo, and so on, the "Boot Device Not Found" means any one or more stages of the whole booting processes are held back, and because of that the computer can't recognize the hard drive to start the operating system.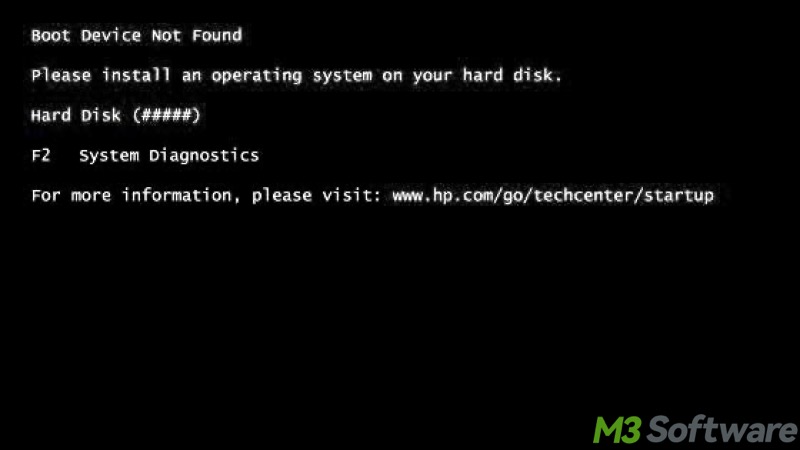
You can share this post by clicking the buttons below:
Rescuing your lost data before fixing the "Boot Device Not Found" error
The "Boot Device Not Found" error also means that you have lost access to all your precious data on this Windows PC, more specifically, on your boot/startup disk, as the boot/startup disk may become damaged, unrecognizable, or corrupted.
Therefore, rescuing your lost data should be the first priority before fixing the "Boot Device Not Found" error. In this case, a reliable and professional data recovery software is an ideal choice, and this is where iBoysoft Data Recovery for Windows comes into play.
iBoysoft Data Recovery for Windows is a professional and easy-to-use tool that can help you recover lost files from formatted, inaccessible, RAW, corrupted, deleted, or lost partitions, etc. Most importantly, recovering data from a Windows PC that cannot boot is also what this tool excels in.
Unlike data recovery in normal conditions, recovering data from a computer that cannot boot requires creating an iBoysoft Data Recovery boot disk, here's how:
- Find a healthy Windows computer and download iboysoftdaterecovery.zip file.
- Extract the zip file to get a disc image file: iboysoftdatarecovery.iso
- Download the burning tool: Rufus from: https://rufus.ie/downloads/.
- Launch Rufus and insert an empty USB drive into your healthy computer. Otherwise, you will lose all data stored in a USB drive while creating a bootable media.
- Select the USB drive in Rufus.
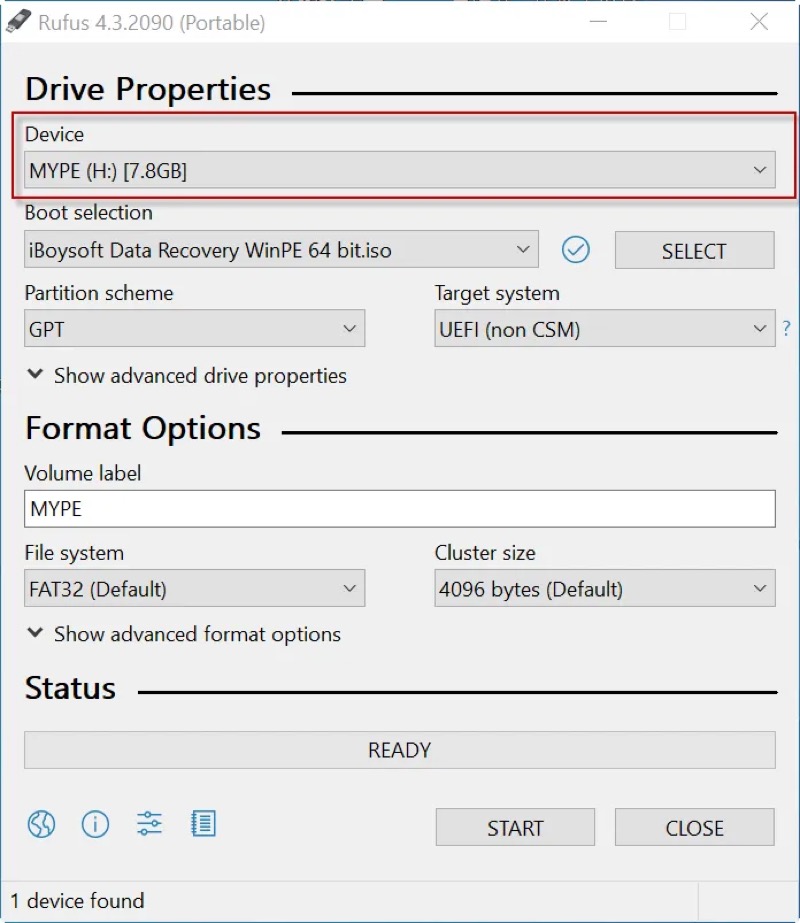
- Choose iboysoftdatarecovery.iso and tap on Select.
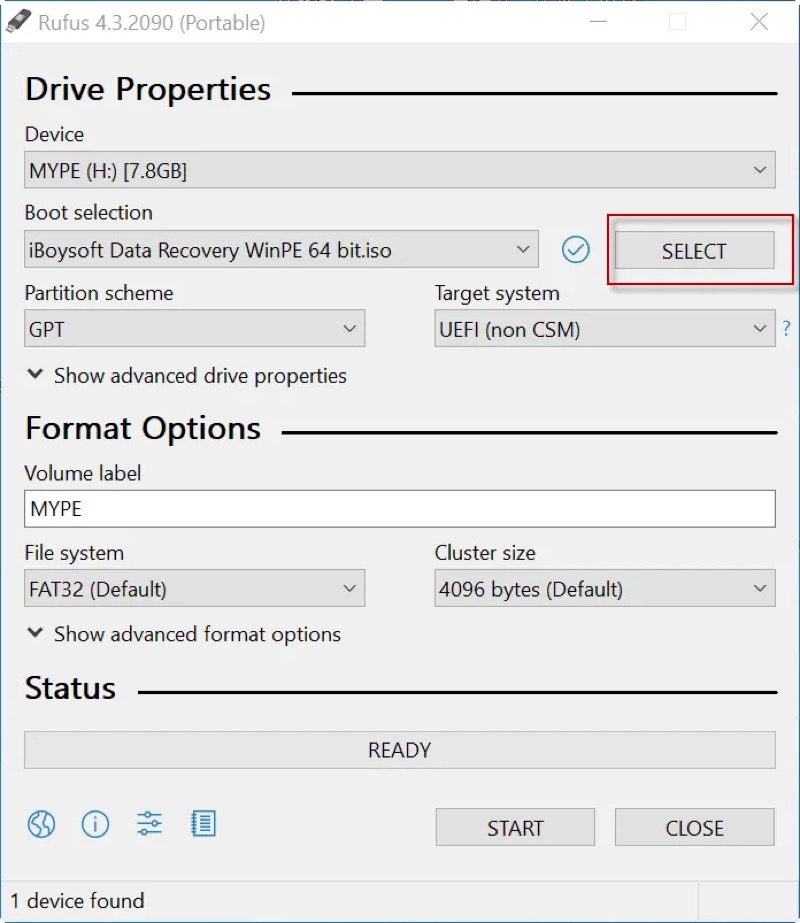
- Choose the MBR partition scheme.
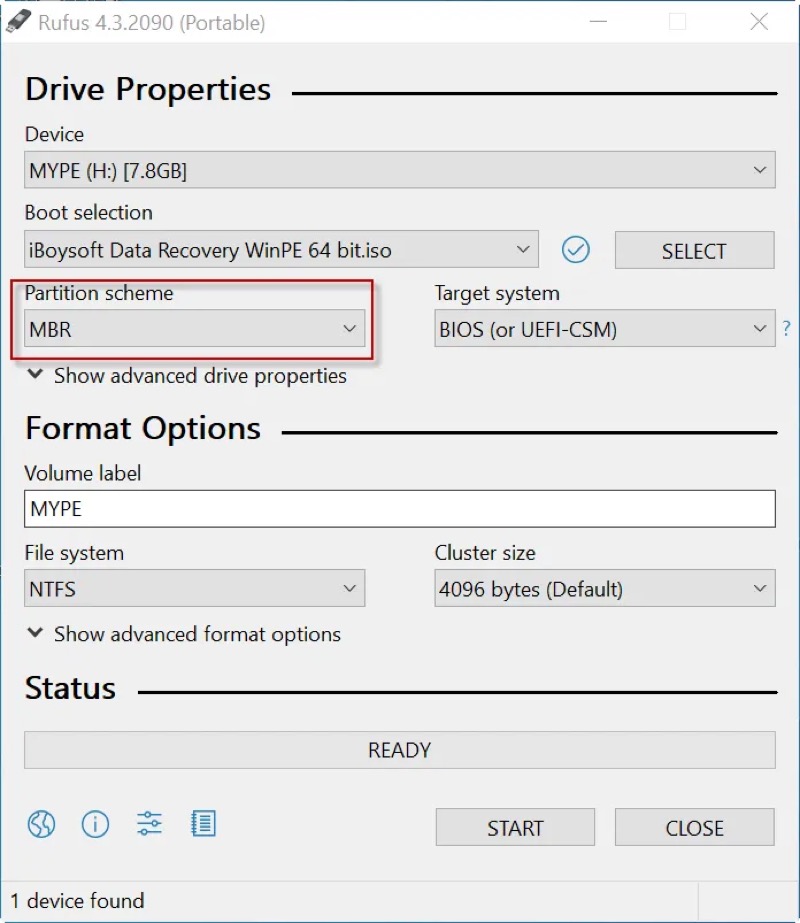
- Choose BIOS as the target system.

- Click the "START" button to start making a bootable drive.
Now you can recover data from a computer that cannot boot using iBoysoft Data Recovery Boot Disk:
- Set your computer to be booted from a USB drive.
- Insert the iBoysoft Data Recovery bootable USB drive into your computer.
- Boot your computer from iBoysoft Data Recovery bootable USB drive.
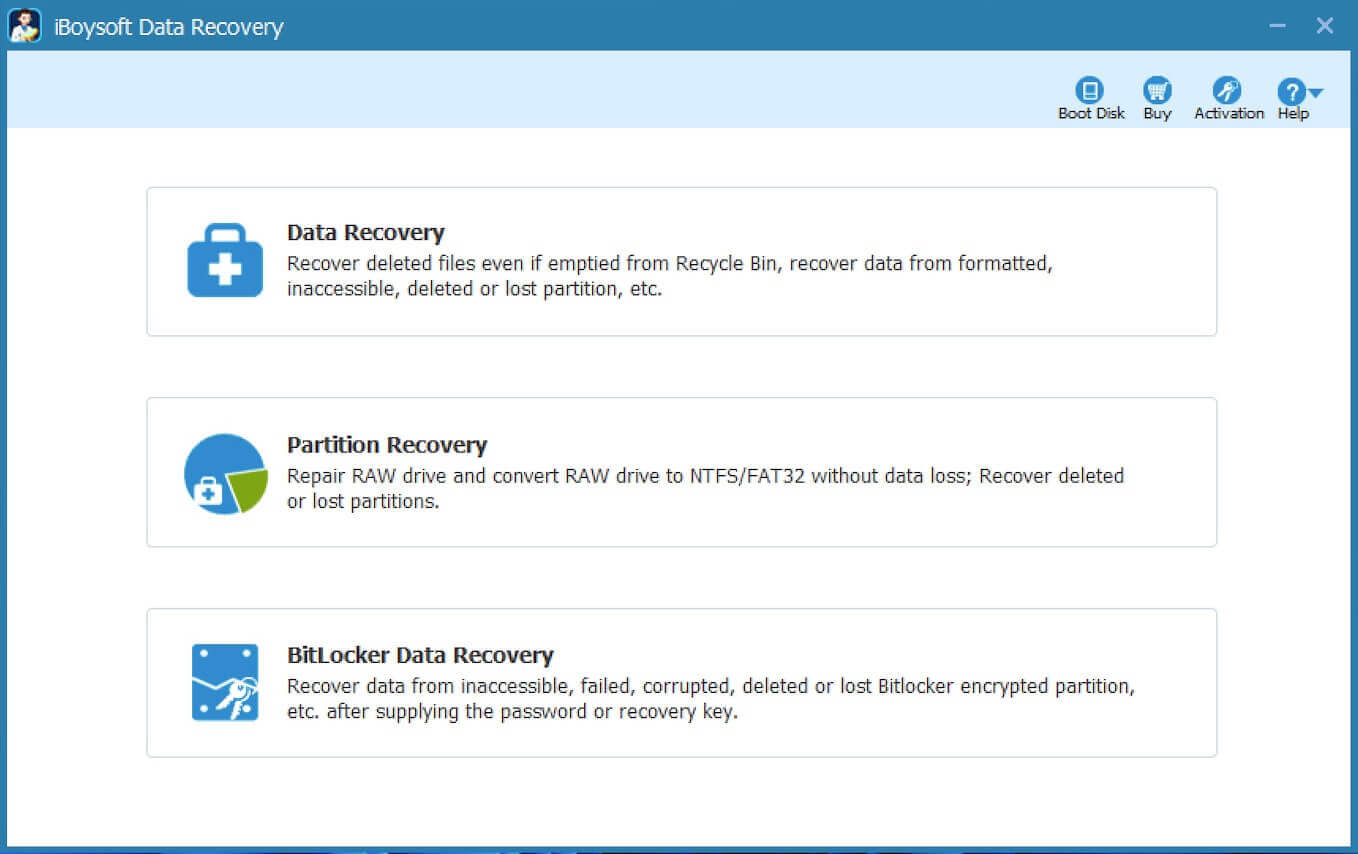
- After loading iBoysoft Data Recovery successfully, choose the recovery module according to your needs.
- Follow the wizard to scan the data from the computer that won't boot
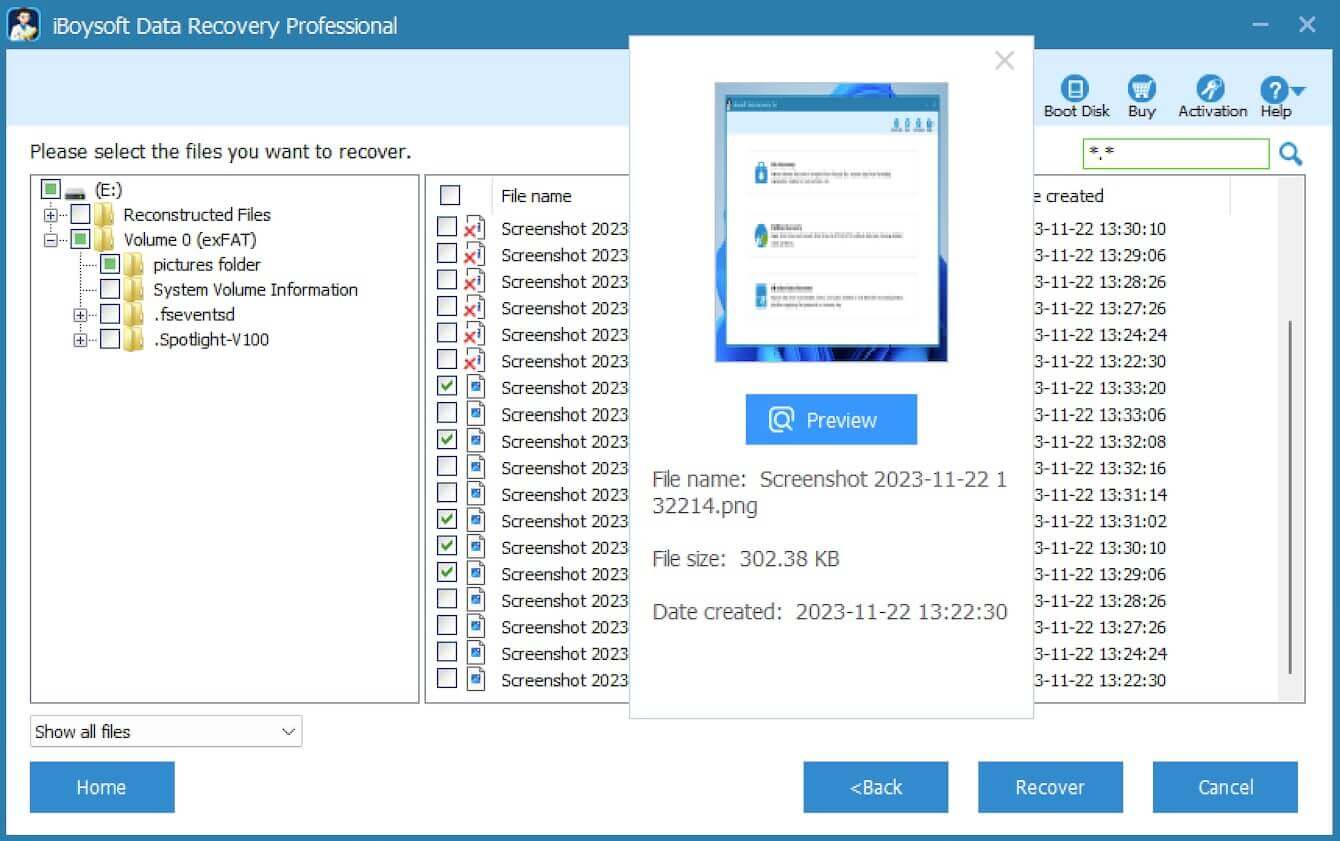
- After scanning, the files will be listed as below window. Select the files you want to recover and click Recover.
- Select the drive where the recovered files are to be saved.
- Select one folder from the drive in which you want to save the recovered files.
- Click Save to start the recovery.
You can share this wonderful data recovery tool with your friends!
What causes "Boot Device Not Found" and how to fix it?
Four reasons could explain why you encounter the “Boot Device Not Found” error on Windows 10/8/7.
BIOS can't detect the startup drive
Case 1: The drive has a poor connection with the motherboard
This happens when you carelessly replace your old HDD with a new SSD or make the part where the drive has quaked violently.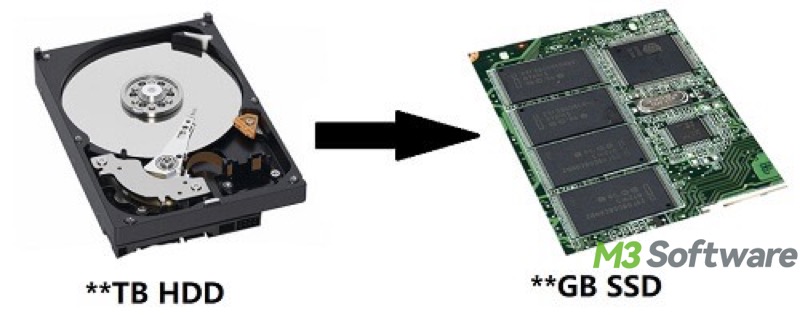
Solution: Extract the data line and power wire of your boot device and insert them to the motherboard again.
Case 2: Interface compatibility
This problem sometimes happens like when you forcibly connect a drive of M.2 NVMe(PCle) SSD to an M.2 SATA SSD interface in the motherboard, or plug the Inter M.2 NVME SSD connector into the ASUS Z97-A motherboard interface, whether they are connected seamlessly or not, your computer will not recognize the boot device, and what's worse is damaging the hardware.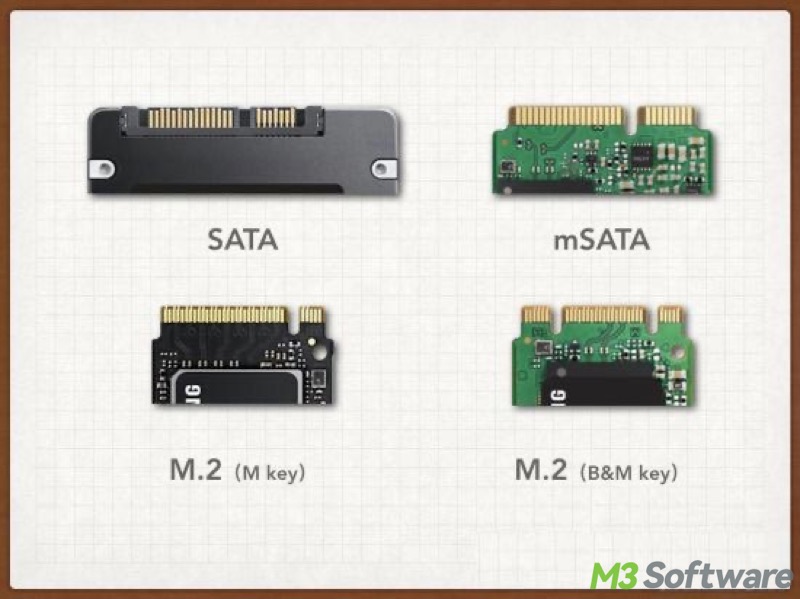
Solution: Try different interfaces on your motherboard. If that doesn't work, replace the drive.
BIOS/UEFI sets an incorrect boot order
The computer will get started according to the Boot Order. If the first prior boot device is no longer connected with the computer while you didn't give any change to the Boot Order, then the BIOS/UEFI can't find the device to boot.
This often happens when people replace an HDD with a new SSD or start a computer with a non-booting USB Flash Drive or non-booting external hard drive when they have set the "USB Flash Drive" or the "external hard drive" as the first prior Boot Order.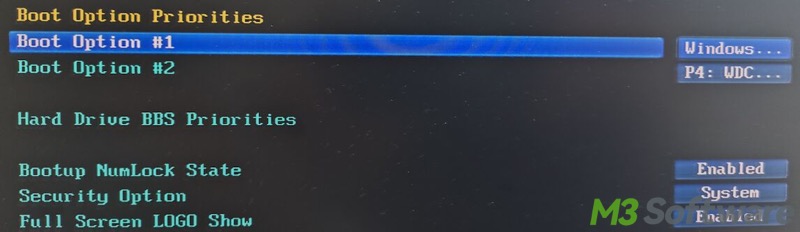
Solution: Correct the boot order in the BIOS/UEFI interface depending on which drive you are using to boot your computer now.
The startup disk is damaged, unrecognizable, or corrupted
The two stages of stage 2 and stage 3 are bridged through the MBR which is a necessary part of the startup disk. That's to say, anything that makes the MBR damaged, lost, wrong, or unrecognized will ruin both of the two stages at a time and thus lead to "boot device not found". There are basically 3 possibilities to reach the dilemma.
Possibility 1: The drive is without any operating system
This happens when you replace the HDD in your PC with a new hard drive on the motherboard and the new drive is uninitialized.
Solution: Perform a clean install of Windows OS
Performing a clean install of Windows OS typically refers to the process of downloading a Windows installation media, namely Windows ISO files, and letting your Windows PC boot from that installation media to install the Windows OS you want.
Possibility 2: The boot partition is deleted by mistake and the partition table is corrupted.
Solution: Use iBoysoft Data Recovery for Windows, to recover your drive data and then reinstall the operation system.
Possibility 3: The drive is physically damaged
This happens when the drive falls severely on the ground, the goldfinger is oxidized or the drive is normally and physically aged, making the MBR a bad sector and finally making the boot procedure unable to get started.
Solution: The bad sector of MBR by physical damage is uncurbable for the time being, so you have to turn to another drive.
Boot Mode error
There are basically two kinds of Boot Modes: Legacy and UEFI, and these two Boot Mode are incompatible with each other. Windows 7 supports Legacy while Windows 8/10 supports UEFI.
When you upgrade Windows 7 to Windows 8/10, then choose the UEFI Boot Mode in the BIOS interface. However, in this situation, before you reverse the Windows, you need an extra step, changing the partition table of the drive from MBR to GPT, to make sure that the disk is at its best value.
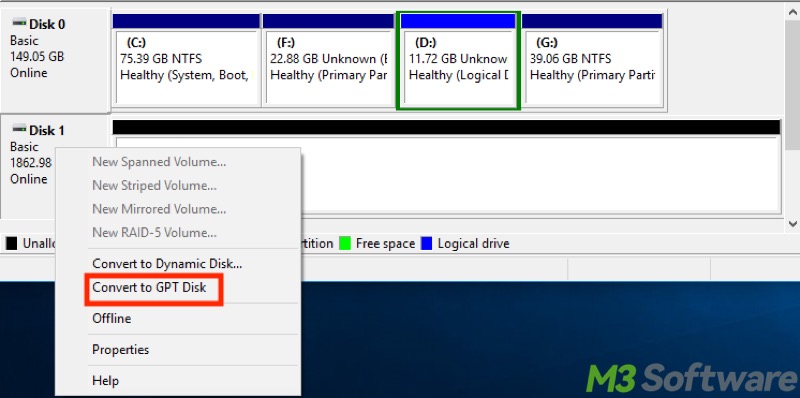
Here's how to change the partition table from MBR to GPT:
- Right-click on the Start menu or press Windows+X keys to choose Disk Management.
- Firstly, check if there is any partition in the disk. If it is, then the option Convert to GPT Disk will grey out, and you need to delete all the existing partitions (volumes).
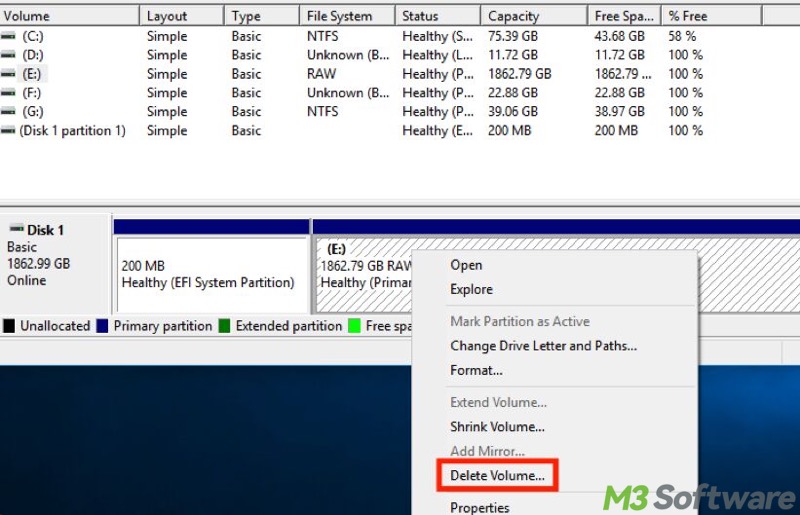
- Secondly, choose Convert to GPT Disk.
When you reverse Windows 8/10 to Windows 7, then choose the Legacy Boot Mode in the BIOS interface and convert your drive from GPT to MBR for the best disk function.
You can click the following buttons to share the post