
Written by
Wilsey YoungSummary: This post elaborates on how to force delete a folder in Windows 10/11 through different tools or utilities. iBoysoft DiskGeeker for Windows works great in permanently deleting and shredding folders or files, ensuring the data cannot be recovered. -m3datarecovery.com
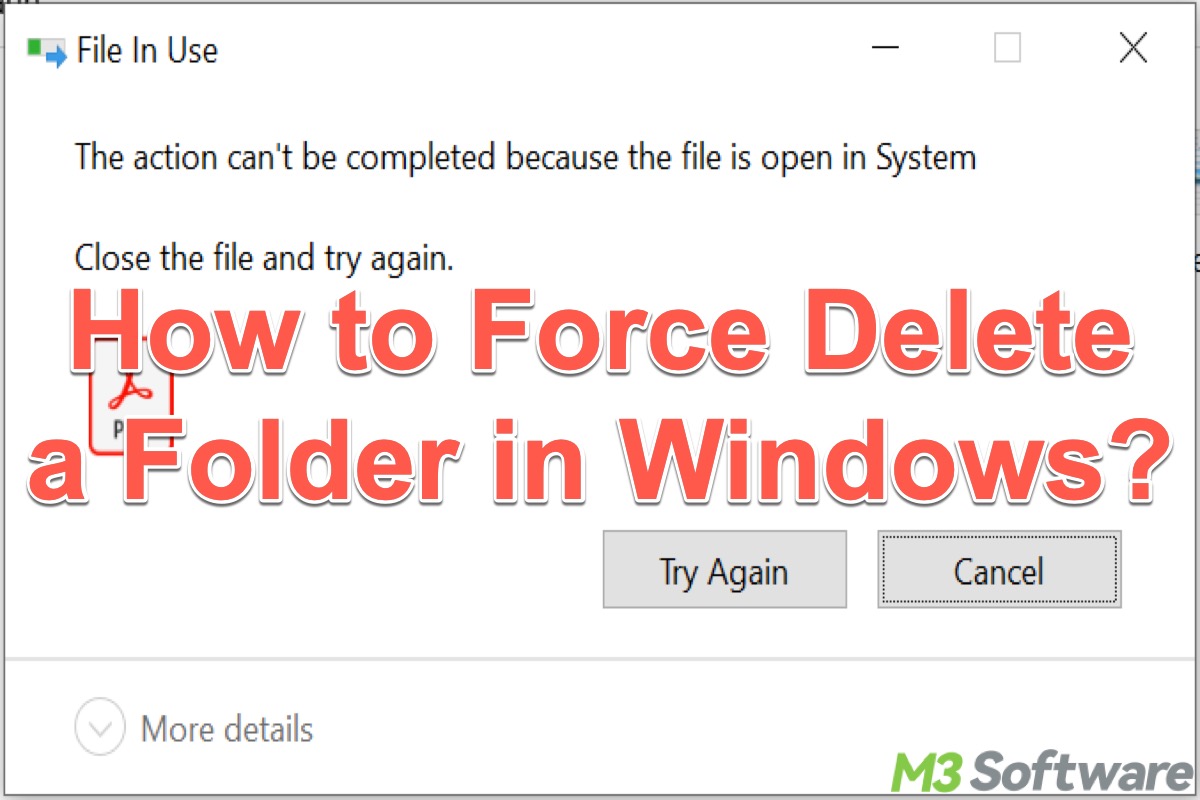
Sometimes certain folders or files on your Windows PC can't be deleted using the usual ways, like right-clicking on them and selecting "Delete", and you'll be prompted with a message that tells you the action can't be completed, in which the reasons may vary. Many Windows users wonder if there are quick ways to forcefully delete a folder in Windows to free up disk space.
This post primarily shows how to force delete a folder in Windows 10/11 using different tools or utilities, such as Command Prompt, Safe Mode, WinRAR, and more.
You can share this post by tapping on the buttons below
How to force delete a folder in Windows 10/11?
Here are some solutions you can rely on when you find a folder or file undeletable in usual methods in Windows 10/11 or other Windows versions.
Force delete a folder in Windows 10/11 via iBoysoft DiskGeeker for Windows
iBoysoft DiskGeeker for Windows is a professional and easy-to-operate disk management tool that can help you shred selected folders or files, making the folders or files completely unrecoverable. As a side note, shredding a folder or file using this tool won't destroy any other folders or files on the storage devices.
Here's how to force delete a folder in Windows 10/11 through iBoysoft DiskGeeker for Windows.
- Download, install, and launch iBoysoft DiskGeeker for Windows.
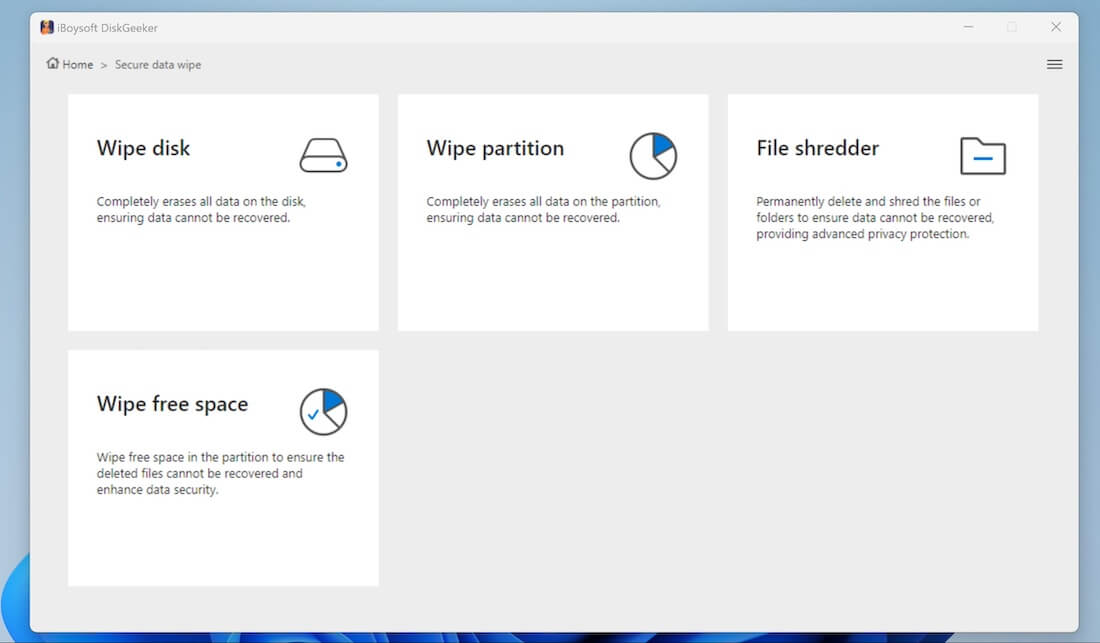
- Choose "File shredder" feature from the "Secure data wipe" module in the main interface.
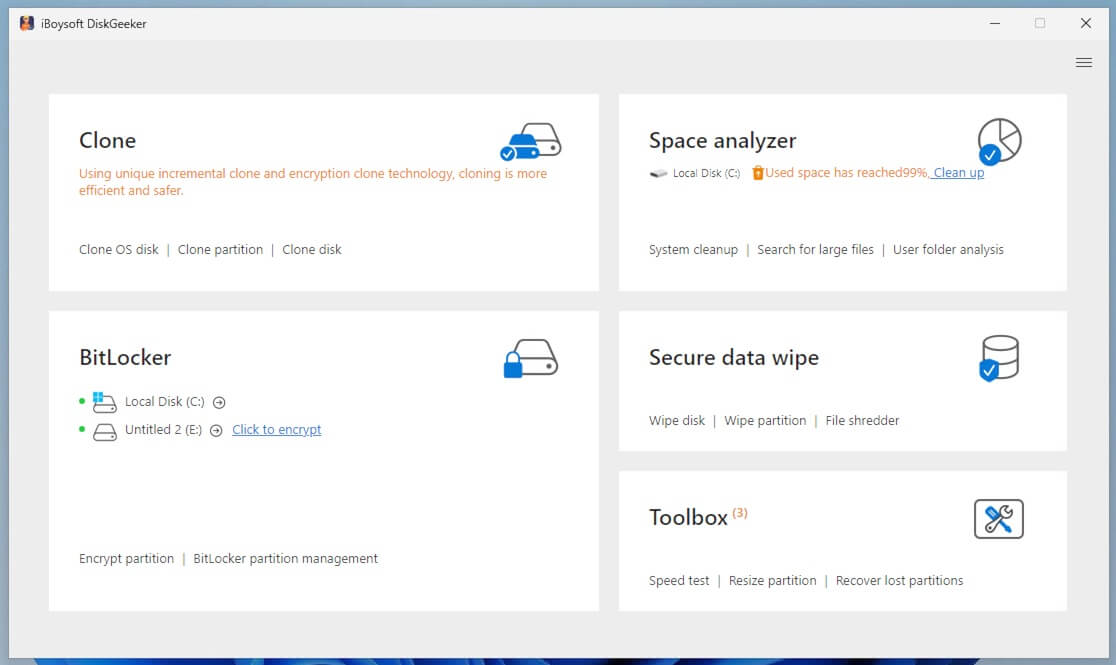
- Alternatively, tap on the "Secure data wipe" module and choose "File shredder."
- Click the add button to add a folder or file you want to force delete.
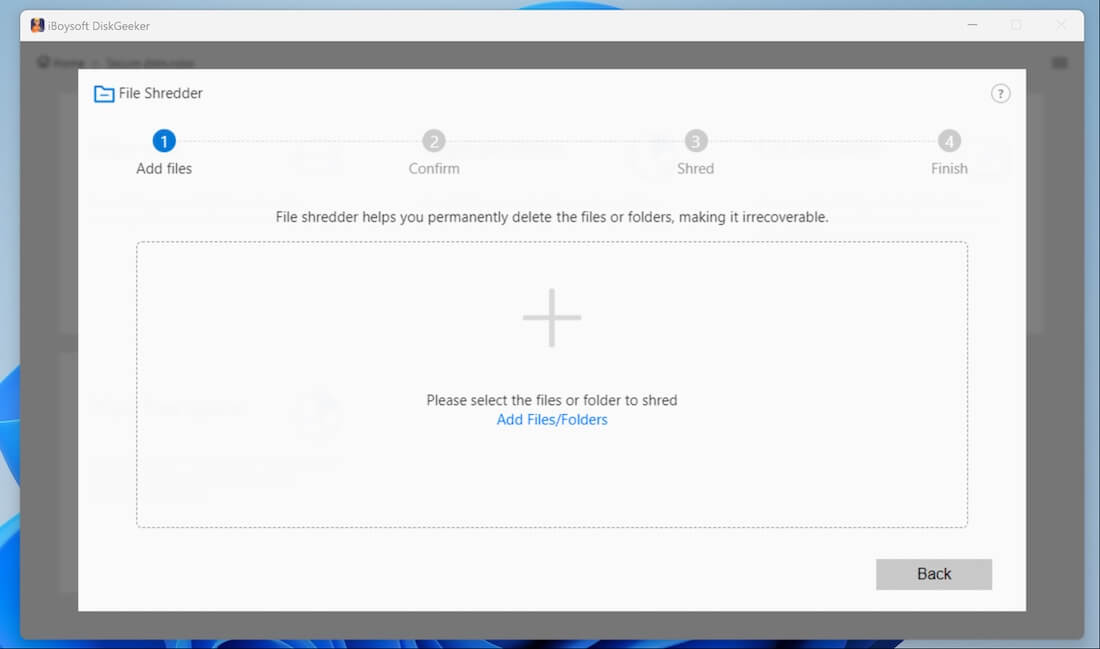
- Select the folder or file and click the Yes button to add it.
- Check the "Clear indexes" option if you want the properties of the file to be deleted, such as location, name, and other metadata.
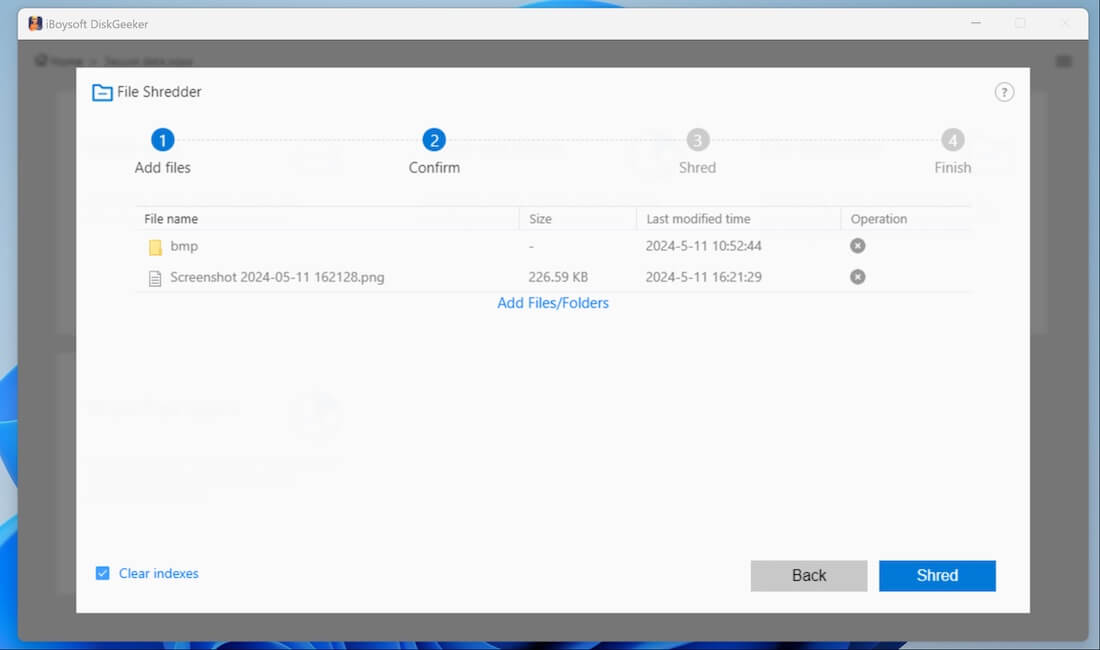
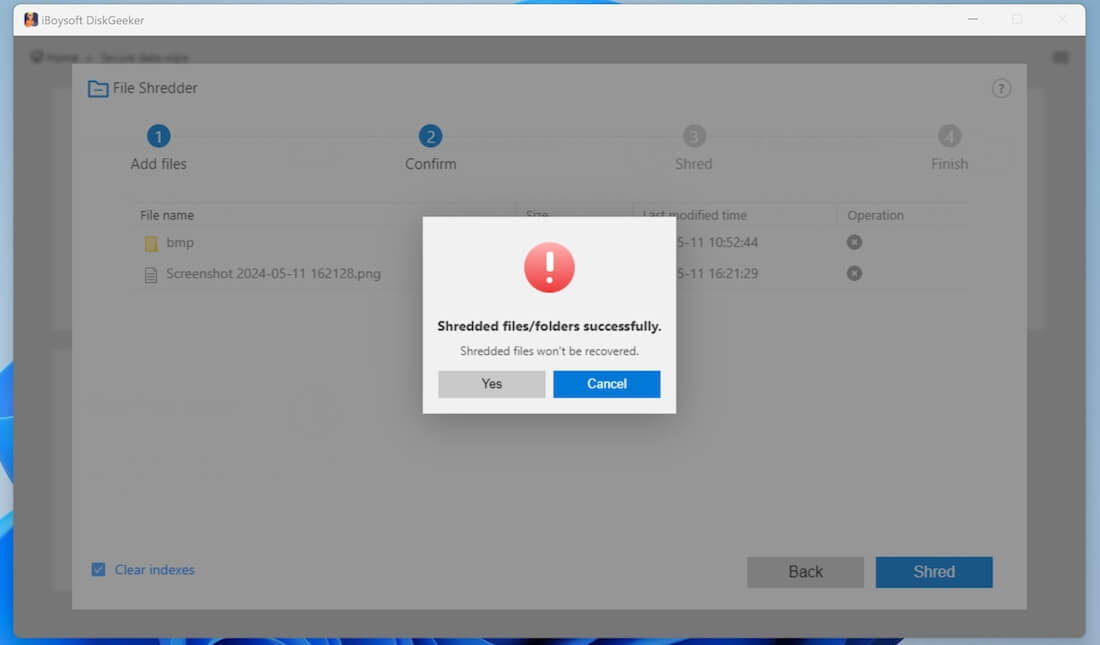
- Click the "Shred" button and tap on the"Yes" button when the confirmation window pops up.
Force delete a folder in Windows 10/11 using CMD
Command Prompt is a command-line interface on Windows that allows you to execute text-based commands to perform various tasks. Here's how to force delete a folder in Windows 10/11 via Command Prompt:
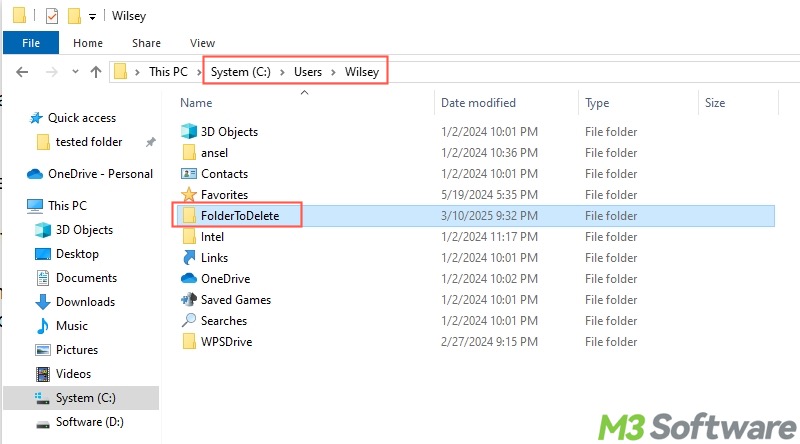
- Locate the unwanted folder in the File Explorer and check its path.
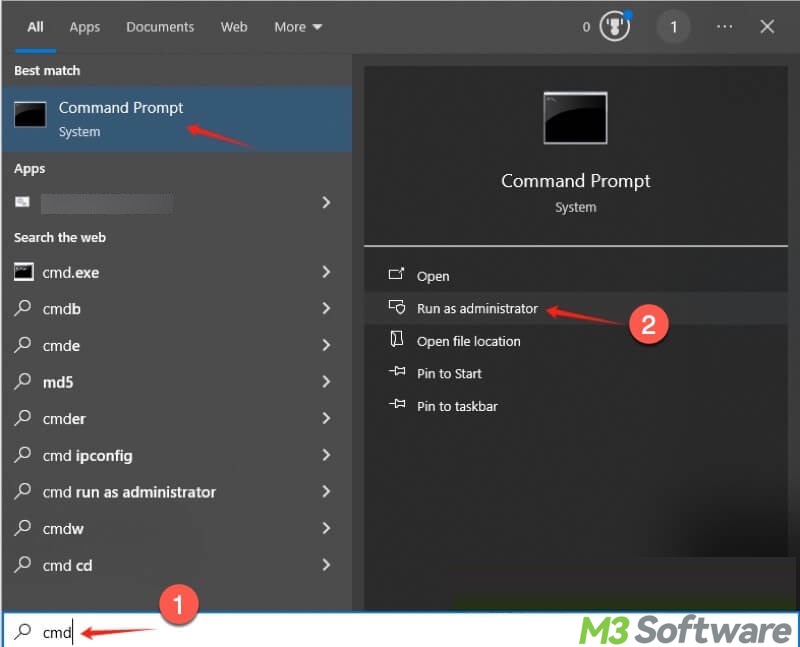
- Press the Windows+S keys to open the Windows search box. Alternatively, tap on the magnifier icon or the search bar at the bottom left.
- Type cmd in the Windows search box and select "Run as administrator."
- Input the following command: rmdir /s /q FOLDER PATH
- Replace FOLDER PATH with the actual path of the folder you want to force delete in the storage device, and hit the Enter key on your keyboard. See example below:
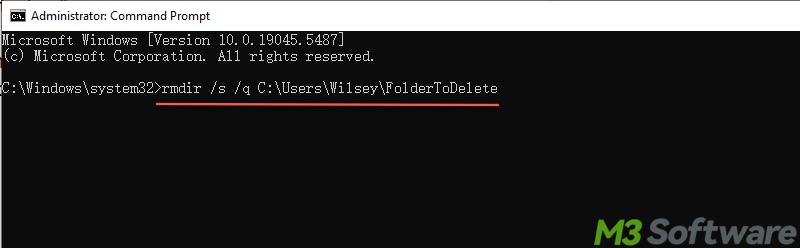
Note: This command is used exclusively for deleting all files and subdirectories within the specified directory (folder), so it cannot be applied if you want to force delete one or more files.
You can share these methods with your friends!
Force delete a folder in Windows 10/11 via WinRAR
The file compression app, WinRAR, contains the feature that can help force delete a folder in Windows 10/11. Here's how to force delete a folder in Windows 10/11 via WinRAR:
- Ensure the WinRAR is installed on your Windows PC.
- Locate the target folder and right-click on it to choose "Add to archive..."
- When the window for adjusting the archive parameters pops up, tick "Delete files after archiving"
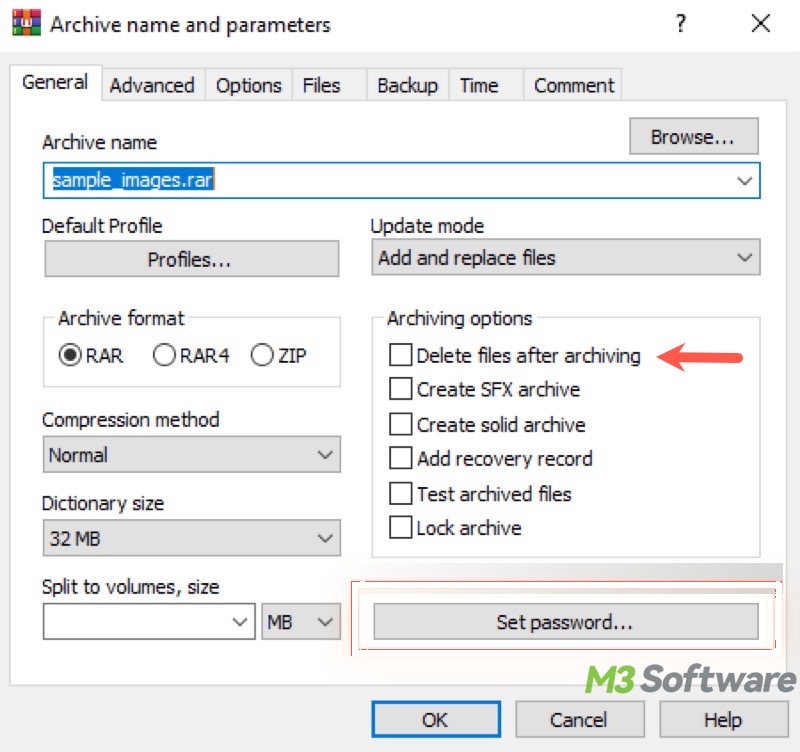
- Tap on the OK button to let WinRAR create an archive file and delete the original folder.
- Delete the archive file created just now.
Force delete a folder in Windows 10/11 by changing ownership
You might fail to delete a folder or file in the usual way on Windows due to insufficient permissions, as this could happen if the folder or file is owned by the system or another user. Therefore, you can force delete a folder in Windows 10/11 by changing its ownership.
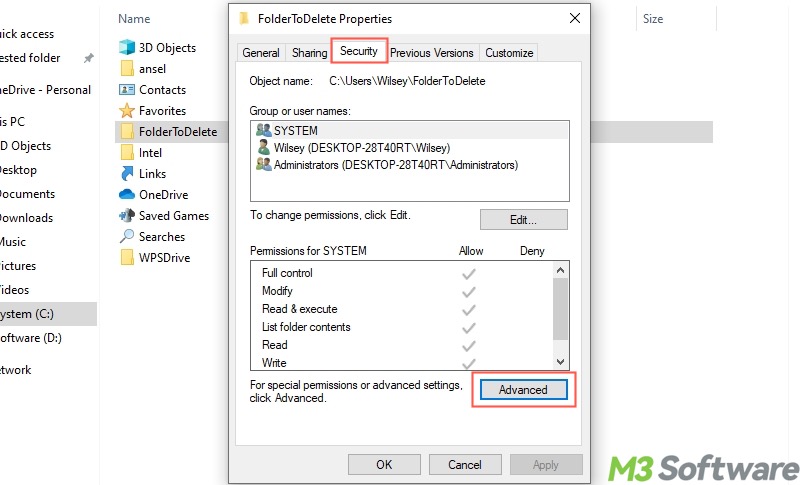
- Locate and right-click on the folder to choose Properties.
- Go to the Security tab and click the Advanced button to open the Advanced Security Settings window.
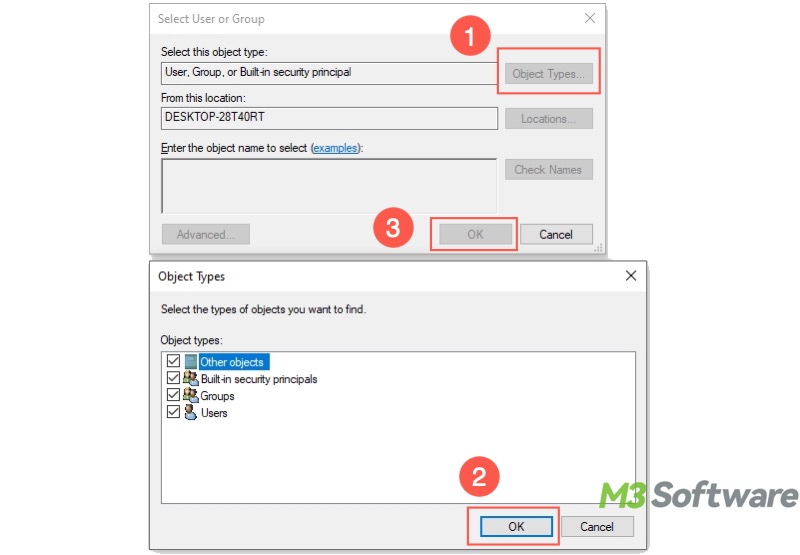
- Tap on the Change button next to the owner's name.
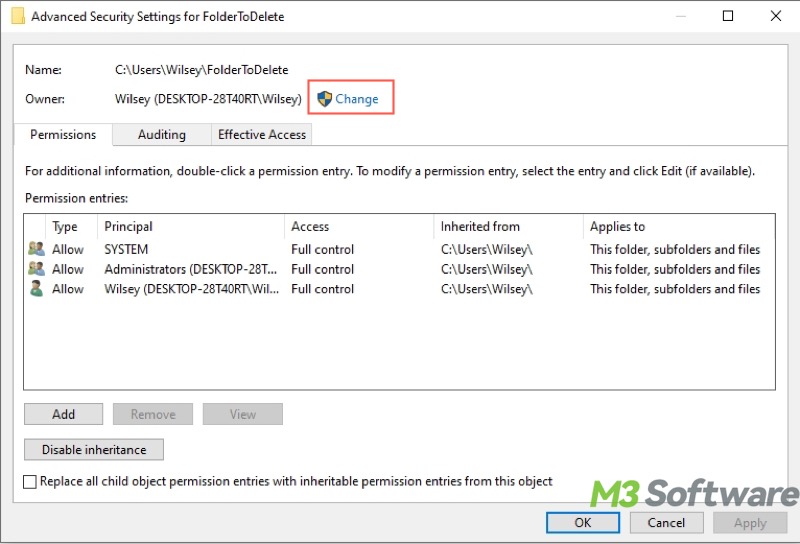
- Click the Object Types to choose the user account. Click the OK button to confirm.
- Go back to the Permissions tab in the folder's Advanced Security Settings window.
- Select the user or administrator's account to ensure the Full Control.
- Click the OK button to apply the change.
- You should be able to delete the unwanted folder.
Force delete a folder in Windows 10/11 via Safe Mode
One of the reasons that a folder or a file can't be deleted using the usual method on Windows is that the folder or file might be currently in use by an application or software. If you are not sure about which app or software is blocking you from deleting the folder or file, enabling the Safe Mode on Windows can help you out.
When Safe Mode is enabled on Windows, only essential system services and drivers are loaded, and third-party software doesn't run, making it easier to troubleshoot and diagnose issues.
Here's how to force delete a folder in Windows 10/11 via Safe Mode:
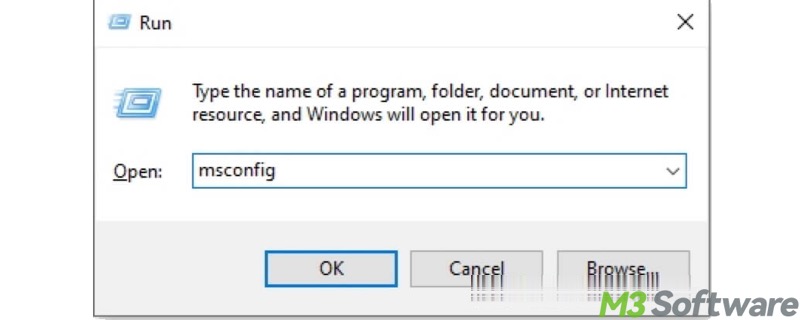
- Press the Windows+R keys to launch the Run dialog box.
- Type msconfig in the box and hit the Enter key on your keyboard.
- Go to the Boot tab, tick "Safe boot" and "Minimal." Minimal stands for regular safe mode.
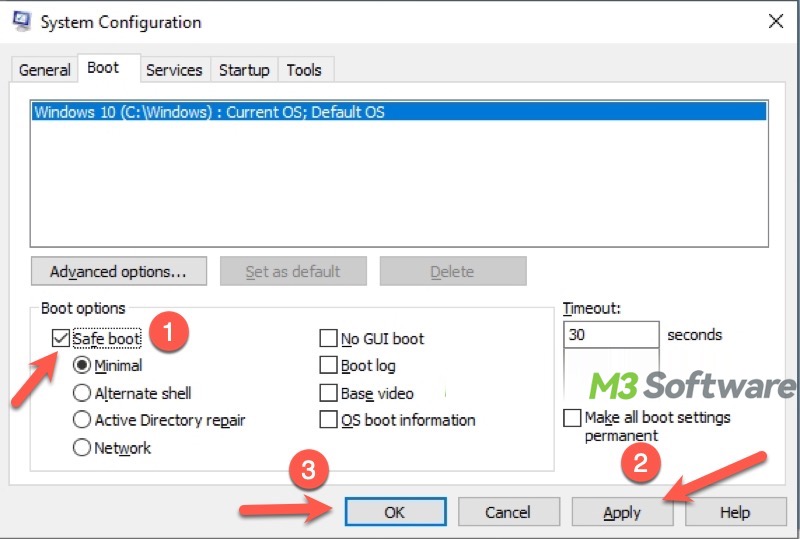
- Click Apply and OK.
- Restart your PC and the system will enter the Safe Mode automatically.
- Delete the unwanted folder using the usual method under Safe Mode.
- Exit the Safe Mode by opening the System Configuration window, unchecking Safe Mode, and restarting the PC.
Conclusion
Make sure the folders or files you want to delete are not the key data essential for the Windows OS or other important program to boot or function properly. Therefore, we suggest regularly backing up important files in Windows to prevent possible data loss.
Do you like this post? You can share it with your friends!