
Written by
Wilsey YoungSummary: This post tells you how to back up files on Windows 10 using different ways. Data backup on Windows 10 can be easily completed via iBoysoft DiskGeeker for Windows. -From m3datarecovrey.com
Backing up files on Windows is crucial in safeguarding your data from hardware failure, accidental data loss, or malicious attacks from viruses or malware. Windows 10 provides multiple built-in tools and options that help you back up your files effectively.
iBoysoft DiskGeeker for Windows, a professional and easy-to-operate disk management tool, can help you complete the partition or disk backup effortlessly, you can keep reading to learn how to clone a partition or disk on Windows 10 via iBoysoft DiskGeeker for Windows.
This guide mainly discusses how to back up files on Windows 10 by different approaches. The following methods may require some disk space on your PC, so it's necessary for you to free up disk space before backing up files on Windows!
You can click the buttons below to share this post!
Backing up files on Windows via iBoysoft DiskGeeker for Windows
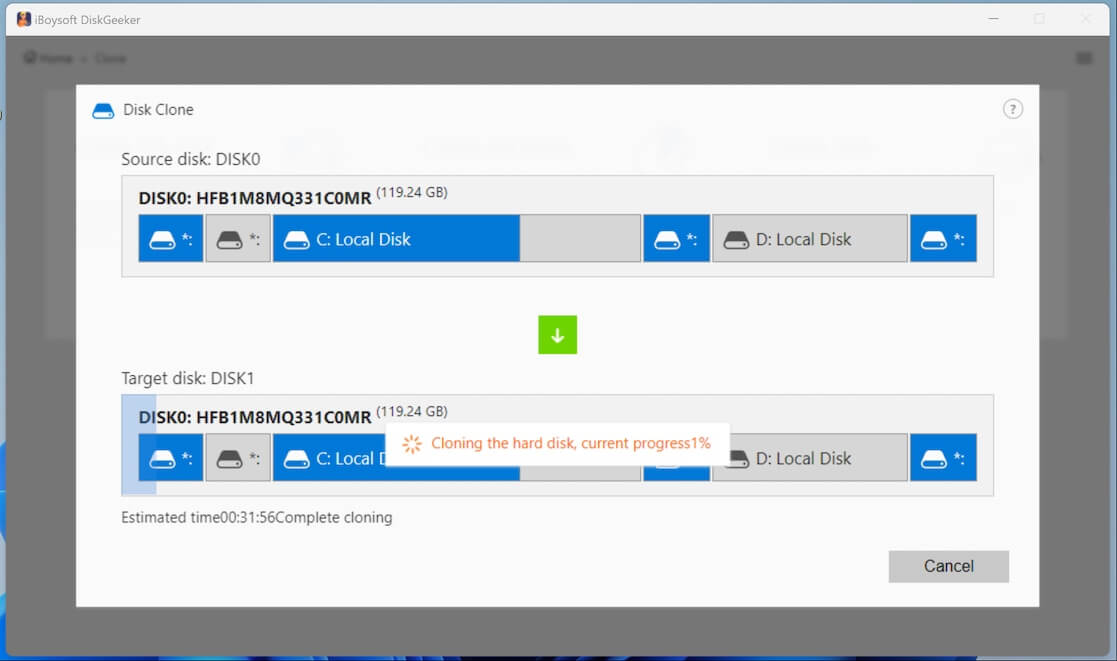
iBoysoft DiskGeeker for Windows can assist you in making an exact copy of a partition or disk onto a destination partition or disk. A clone feature provided by this tool is to create an uncompressed and identical replica of the partition or drive you select, whose processes are more convenient and stable than that of disk imaging.
You can download iBoysoft DiskGeeker for Windows and follow the tutorial below to back up your files on Windows 10.
- Download, install, and launch iBoysoft DiskGeeker for Windows.
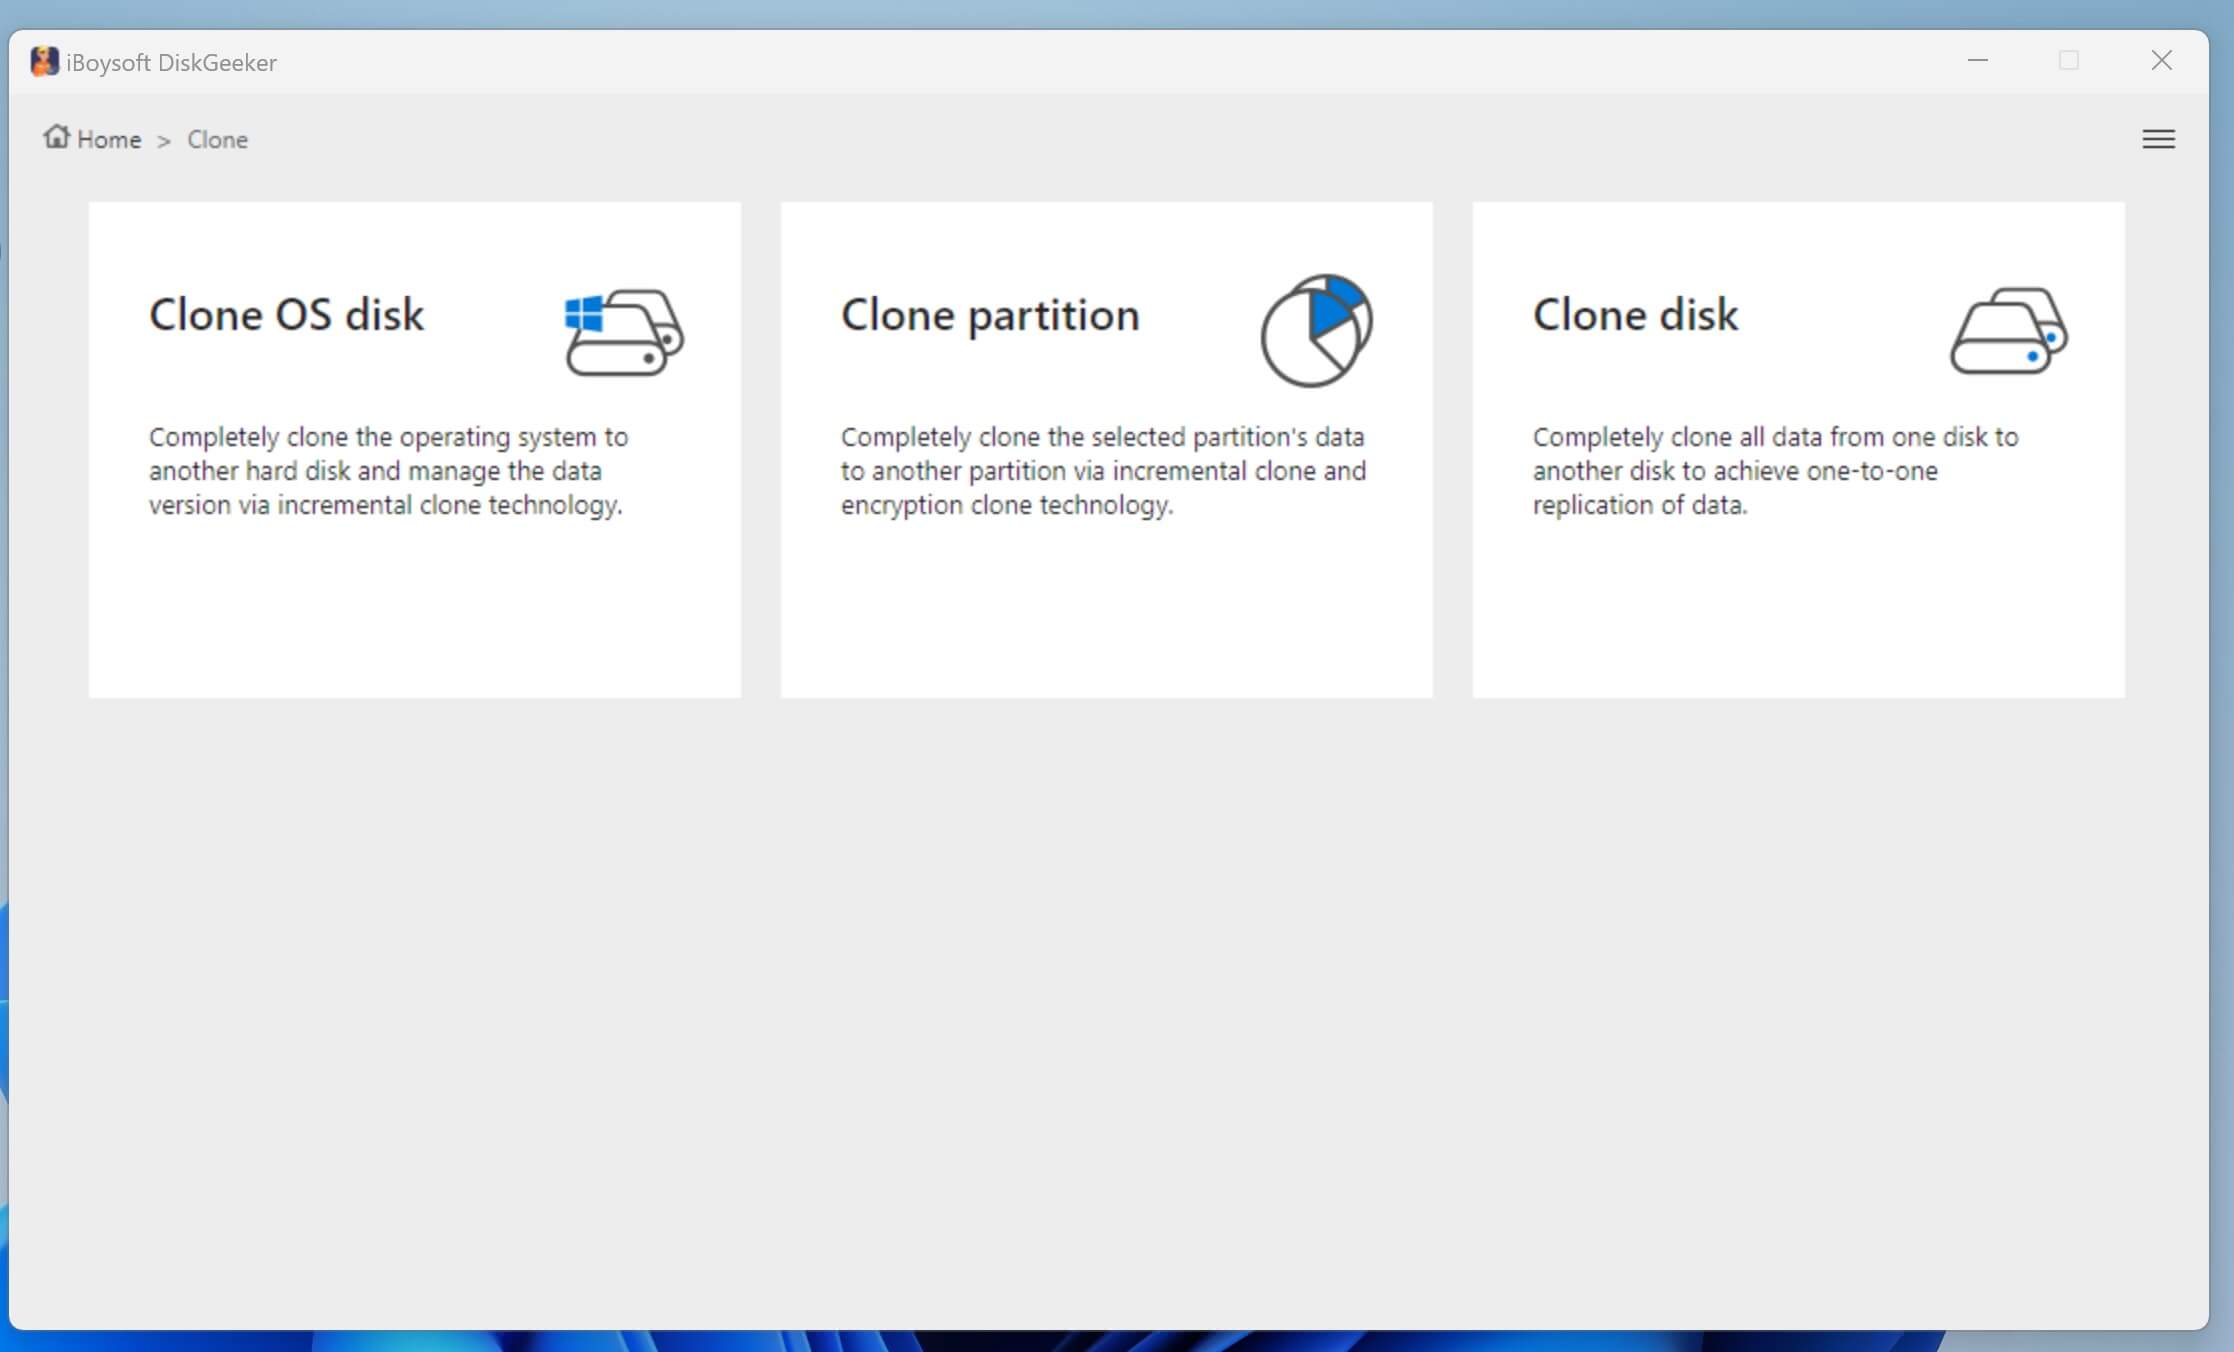
- Click “Clone” in the main interface and select the “Clone disk” feature.
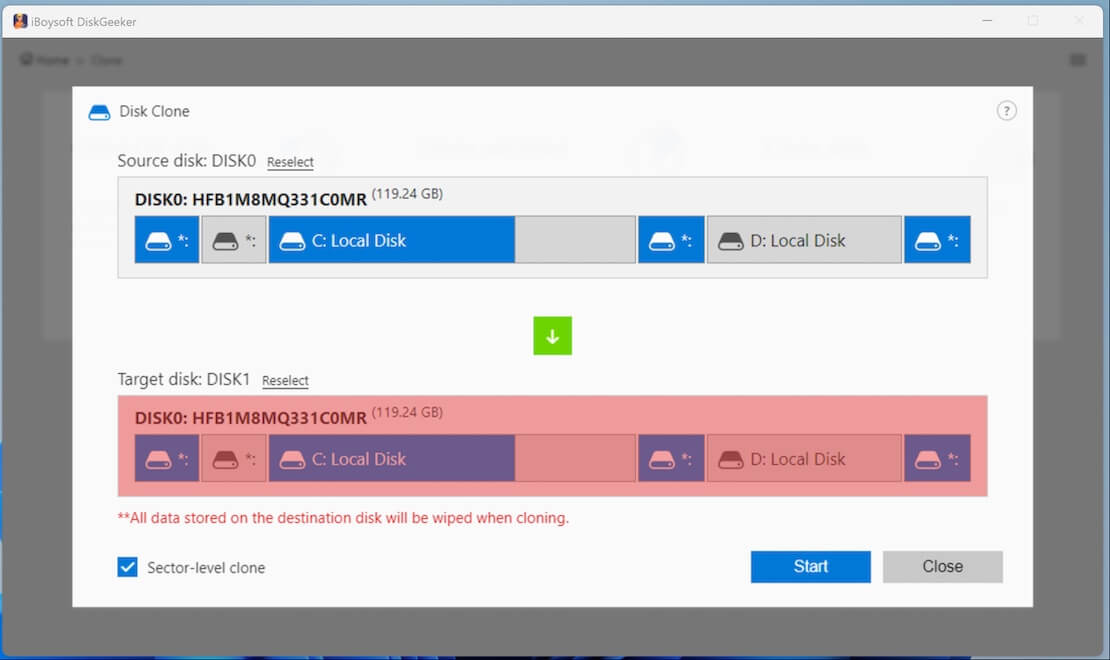
- Click the “Source disk” to choose the disk you intend to back up.
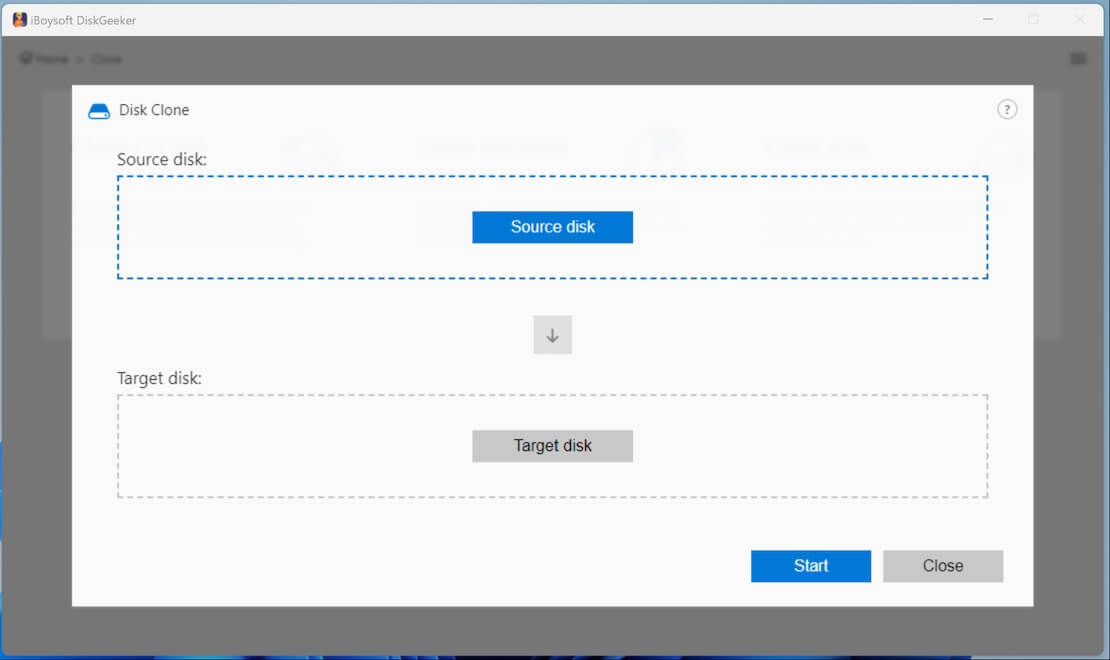
- Tap on the “Target disk” to select where to store the backup files. Tick the checkbox next to “Sector-level Clone” if you need a 1:1 copy.
- Click “Start” and “Confirm."
- How long the disk cloning takes depends on the amount of data and disk speed.
Backing up files on Windows 10 via File History
File History is a built-in feature in Windows that helps you back up and restore personal files. It regularly and automatically scans and saves copies of files stored in folders like Documents, Pictures, Music, Videos, Desktop, etc. This allows you to easily restore previous versions of files in case they are lost, corrupted, or accidentally modified.
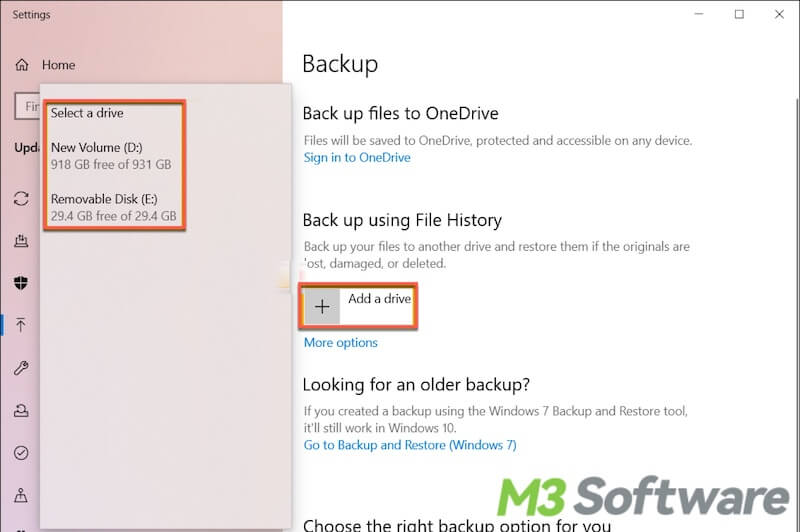
- Connect a storage drive to your PC (an external hard drive is recommended.)
- Press the “Windows+i” keys to open “Settings” and Navigate to “Update & Security > Backup > Add a drive.”
- Select the external hard drive from the list, then click “More options” to customize the data backup.
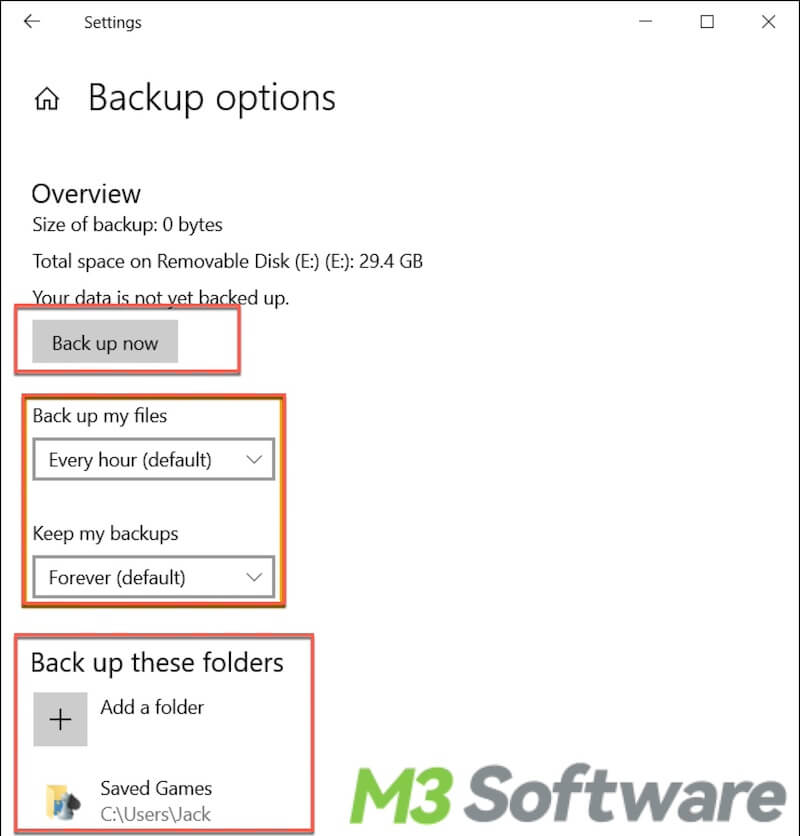
- You can decide how often you want the system to back up your files and how long it keeps your backups.
- Under the “Back up these folders” section, you can add new folders to be backed up by the system, or click the selected folder and choose “Remove.”
- Click “Back up now” to let the backup begin.
To restore data from the File History backup:
Once the File History backup is enabled, the system starts to back up the files according to your settings in the “Backup options.” Whenever you want to restore the files, you can follow the steps below to do it:
- Open “Settings > Update & Security > Backup > More options.”
- Scroll down and click “Restore files from a current backup.”
- Select the files you want and click the green recovery button at the bottom to restore.
You can share this post and tell your friends how to back up files on Windows 10
Backing up files on Windows 10 via Backup and Restore (Windows 7)
Backup and Restore (Windows 7) is a feature that allows you to create backups of your files and system images. This feature helps protect data by enabling you to back up files and create a complete image of the system, so files or the entire system can be easily restored by this feature.
Note: The feature was introduced with Windows 7 at the very beginning, but it is also available in Windows 10 and other Windows versions. Microsoft keeps the name unchanged for some reason.
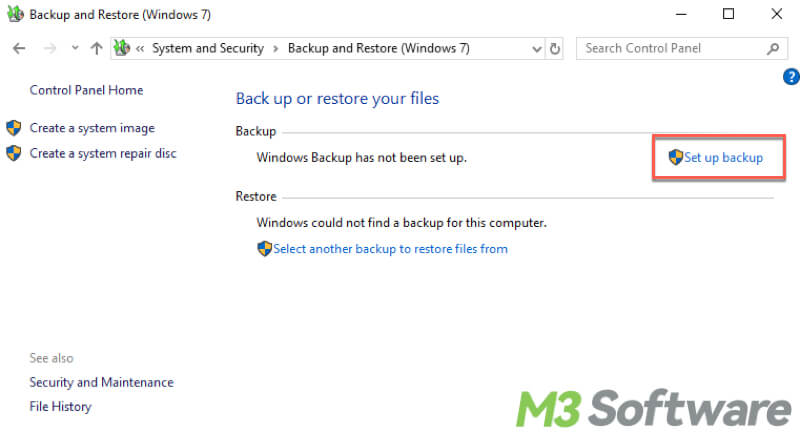
- Open “Settings > Update & Security > Backup > Go to Backup and Restore (Windows 7).”
- Click “Set up backup.”
- Select where you want to save your backup
- Choose what you want to back up
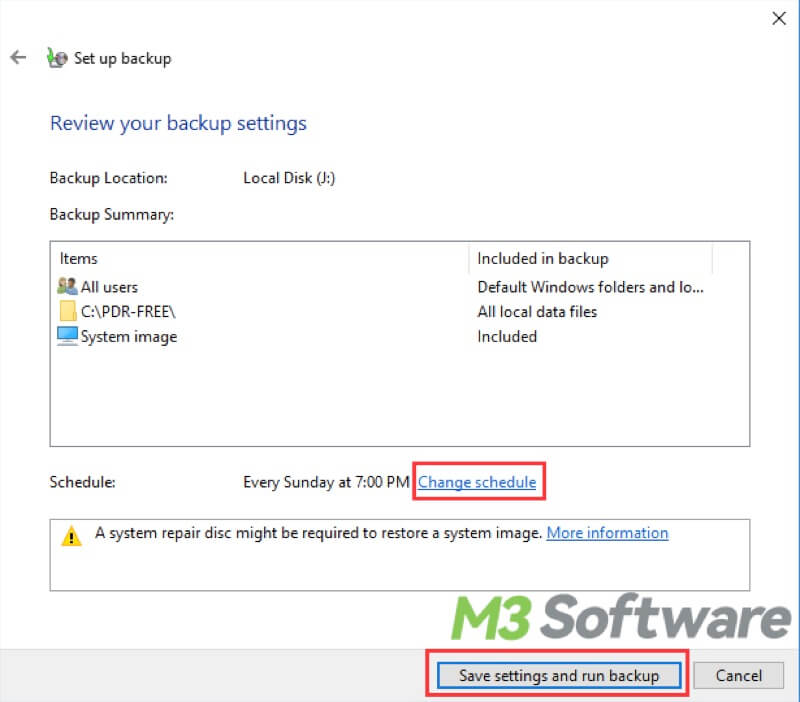
- Review your backup settings, change the schedule, and click “Save settings and run backup.”
To restore data from the “Backup and Restore (Windows 7)”
- Open “Settings > Update & Security > Backup > Go to Backup and Restore (Windows 7).”
- Click “Restore my files” under the “Restore” section.
- Choose the files you want and the location to store the files and click the “Restore” button.
Create a system image on Windows 10
A system image can be used to restore your PC if your PC or hard drive ever stops working, so a system image is just a copy of the drives required for Windows to run. Here is how you can create a system image:
- Open “Settings > Update & Security > Backup > Go to Backup and Restore (Windows 7).”
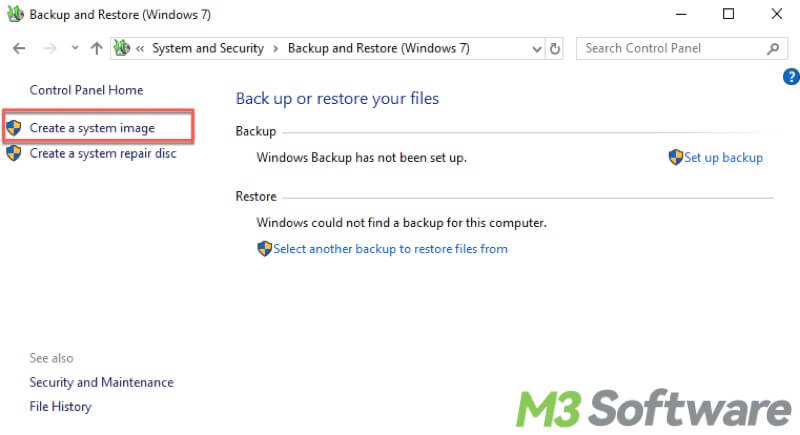
- Click “Create a system image” from the left.
- Select a hard disk where you want to save the backup.
- Choose the drive you want to include in the backup.
- Confirm your decision and click “Start backup.”
System Restore on Windows 10
Windows System Restore allows you to revert your PC's state, including system files, installed applications, Windows Registry, and system settings, to a previous point immediately. So strictly speaking, System Restore does not back up your files but creates System Restore points. By using a restore point, you can undo recent changes that may be causing issues without affecting personal files.
The steps below guide you through creating System Restore points:
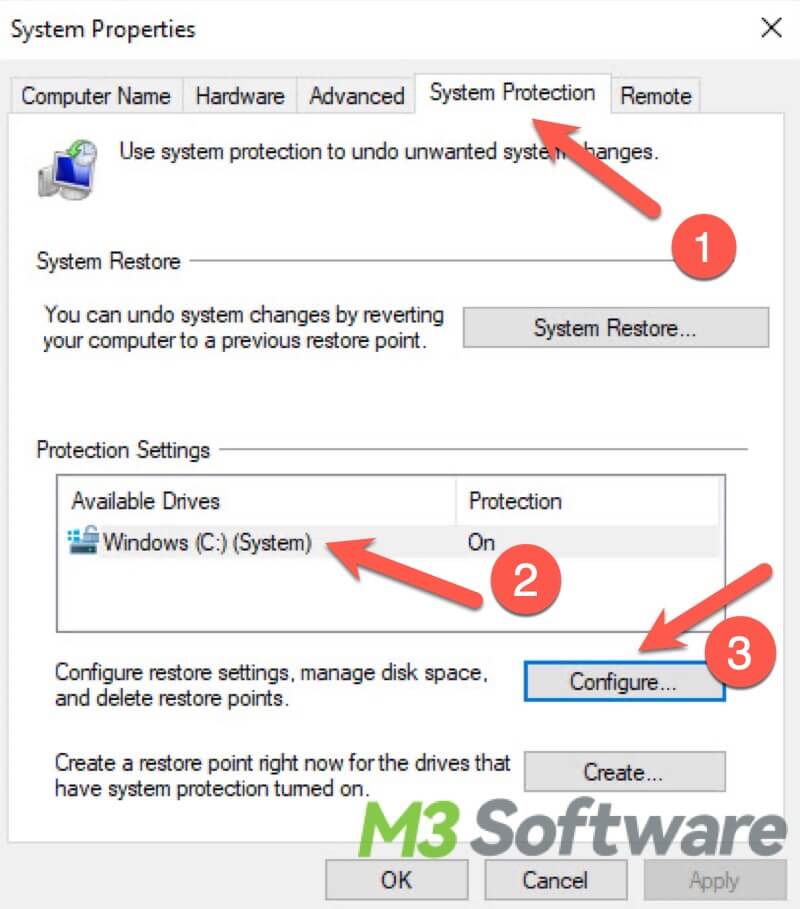
- Right-click the “This PC” icon on the desktop and choose “Properties.”
- Switch to the “System Protection” tab, select system drive(usually C drive), and click “Configure...”
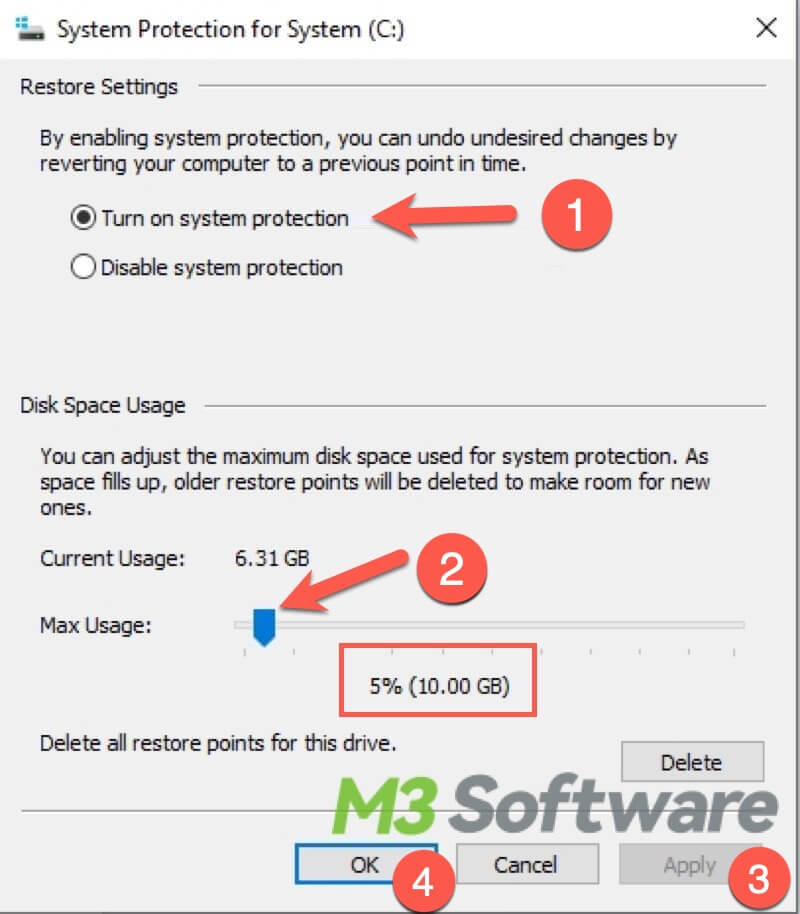
- Click “Turn on system protection.”
- Under the “Disk Space Usage” section, move the slider to adjust the maximum disk space used for system protection.
- Click “Apply” and “OK” to confirm, and the System Restore feature is activated.
To revert your PC to a previous restore point:
- Type “create a restore point” in the Windows search bar and click the result to open.
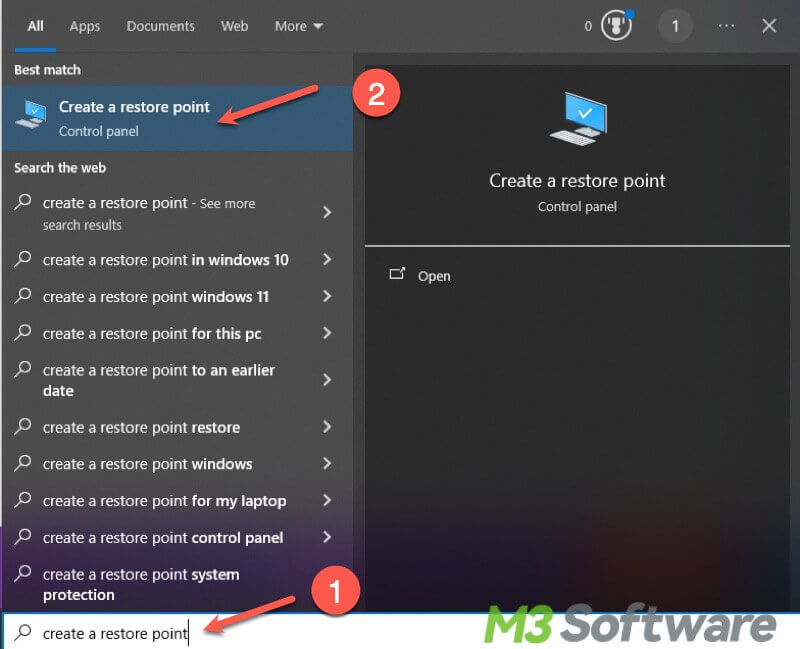
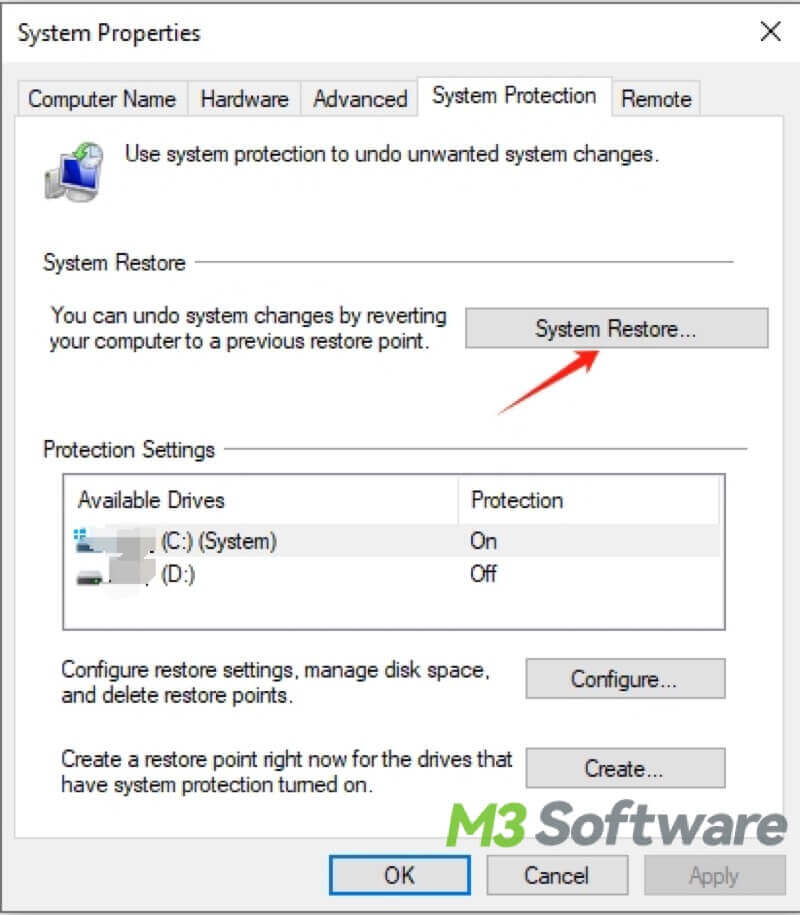
- Click “System Restore...” and click “Next.”
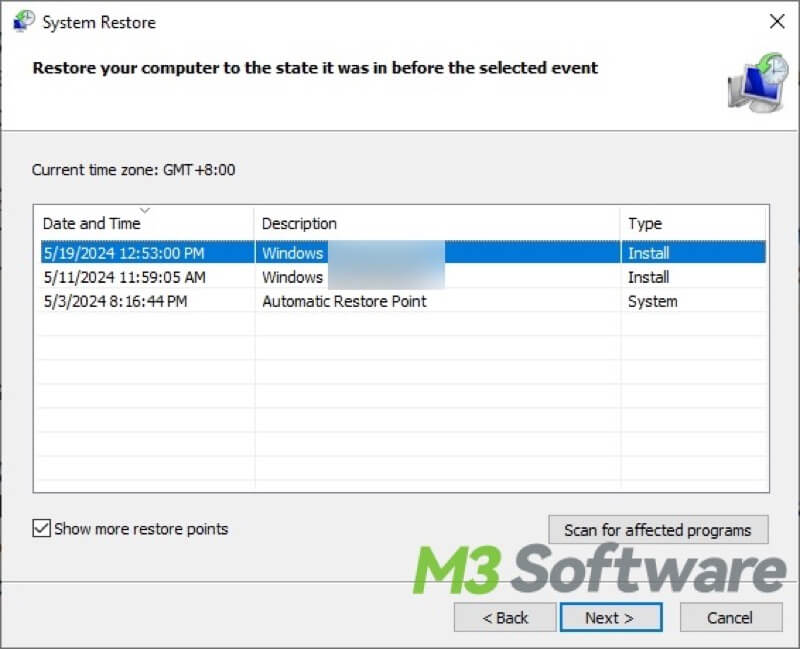
- Select a restore point, click “Next,” and follow the wizard to complete system restore.
System restore failed? You can refer to this article for solutions: System Restore Failed? 7 Ways to Fix it on Windows!
Conclusion:
This post revolves around how to back up files on Windows 10. Some common ways to back up files on Windows 10 are not mentioned in this post, such as using a USB flash drive, a cloud account, saving files to different locations, and more. The backup measures discussed in this article may take up some disk space on your PC, so you should ensure there's enough space available for file backup on Windows 10.
Like this post? You can click the buttons below to share!