
Written by
Yuri ZhangAs far as we all know, the priority comes before everything, this is when putting the urgency into the agenda matters. That's why we try to pin a window on top in Windows so we don't have to switch pages so often when you always have to check from them. Track more in m3datarecovery.
In Windows, there isn't a built-in shortcut key to pin a window on top of others for your information. Now let's dive into the foolproof methods of how to pin a window on top in Windows.
What is the point of pining a window on top in Windows
You can pin a reference document, such as a PDF manual or a tutorial, on top of your active application to easily glance at information without switching windows constantly. Monitoring tools or system utilities can be kept on top to keep an eye on system performance metrics or network activity while working on other tasks.
When working with multiple applications, pinning a critical window such as a chat client, task list, or calculator on top allows for quicker access and reduces the need to minimize/maximize windows. It can enhance productivity by maintaining visibility of important information without interrupting your current workflow.
Presenters can keep presentation notes or a timer window on top of the slideshow or demo application for seamless reference. Demonstrating software functionalities can be more effective when users can see both the demonstration window and the operational software simultaneously.
Streamers and gamers often use "always on top" to display chat messages, streaming stats, or game guides without obscuring the game or streaming software. This helps maintain viewer engagement while not obstructing critical gameplay elements.
Users with accessibility needs might find it easier to navigate between windows if they can keep necessary tools or assistive technology interfaces on top. Engineers, designers, or developers working with specialized software tools might pin debugging consoles, code editors, or design previews on top for continuous monitoring and adjustments.
Spread this in an omniscient perspective.
Pin a window on top with Task Manager (Windows 10 and later)
Windows 10 and newer versions have a feature in Task Manager that allows you to set a window to always stay on top:
- Right-click on the taskbar and select "Task Manager," or use the shortcut Ctrl + Shift + Esc.
- Under the "Processes" tab, find the application or window you want to keep on top.
- Right-click on the application's name or process, and select "Always on Top" from the context menu.
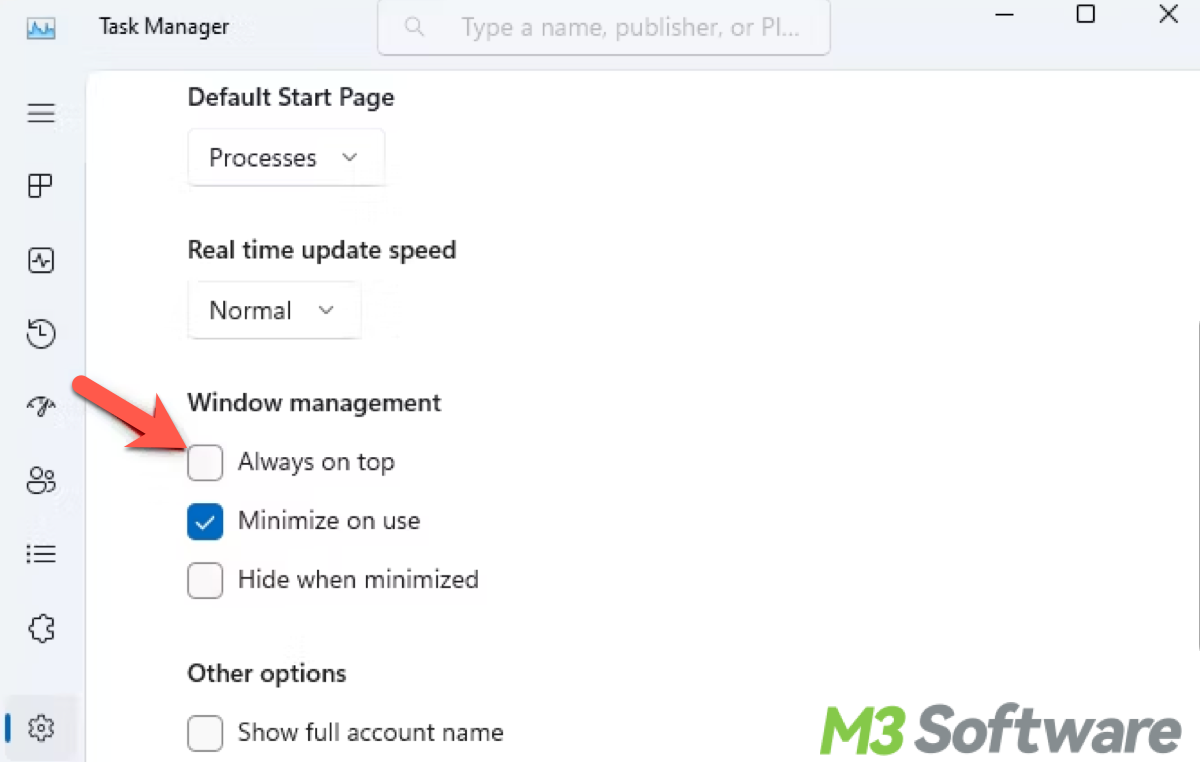
- If you don't see the "Always on Top" option, you may need to enable it in Task Manager settings. Click on "Options" in the Task Manager menu and check the box next to "Always on Top."
Note: This method is straightforward and built-in Windows, without third-party software, which might not be as intuitive as using dedicated tools.
Pin a window on top via third-party tools (easy)
These tools (Always On Top, DeskPins, TurboTop) typically offer a straightforward approach where you activate the window you want to keep on top and use a keyboard shortcut or click an icon to toggle the "always on top" feature. This method is very user-friendly and requires minimal setup.
- Always On Top: Once installed, you can use a keyboard shortcut (usually Ctrl + Space) to pin the active window on top.
- DeskPins: After installation, launch DeskPins, click on the system tray icon, and then click on the window you want to pin on top. A pin icon will appear on the title bar of the window.
- TurboTop: Install and run TurboTop, and then select the window you want to keep on top from the TurboTop system tray icon.
Note: Though simple to use quick to act via hotkeys or icons, and suitable for everyday use without needing deep technical knowledge, they have the potential for compatibility issues with future Windows updates with dependency on third-party software.
Pin a window to the front through PowerToys (easy)
Microsoft PowerToys includes a feature called "Always on Top" that can be used to pin windows.
- Go to "Microsoft PowerToys GitHub" website and download the latest release.
- Under the latest release, find the .exe file (for example, PowerToysSetup-0.##.#-x64.exe). Click on this file to download it.
- Once the download is complete. Double-click the PowerToysSetup-0.##.#-x64.exe file to run the installer.
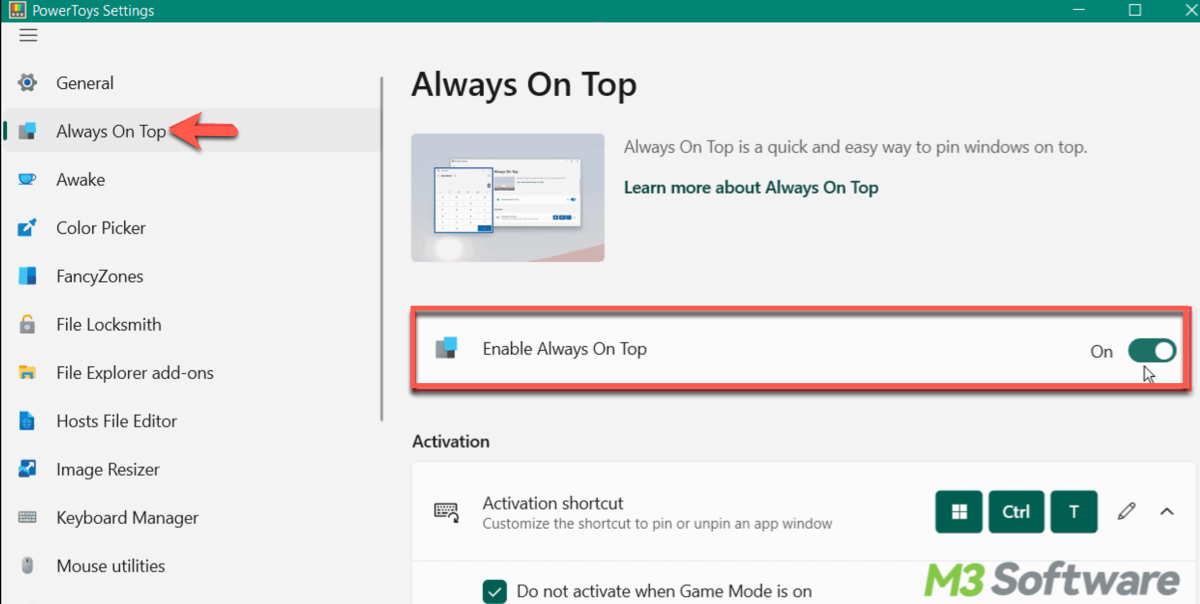
- Open PowerToys Settings and navigate to the "Always on Top" tab.
- Toggle the switch to enable the feature. You can also customize the keyboard shortcut (the default is Win + Ctrl + T).
Note: Despite its ease of use to set up and customize and the official Microsoft product offers ongoing support and updates, it requires installation and configuration of PowerToys, which might be more involved than standalone third-party tools.
Pin a window on top in Windows via AutoHotkey Script (moderately easy)
If you prefer a more customizable solution, you can use AutoHotkey, a free scripting language for Windows that allows users to automate tasks, create custom shortcuts, and enhance their workflow.
- Go to the AutoHotkey website and download the latest version of AutoHotkey.
- Open a text editor (e.g., Notepad).
- Copy and paste the following script into the text editor:^SPACE:: ; Ctrl+Space hotkey
WinSet, AlwaysOnTop, Toggle, A
return - Save the file with .ahk extension (e.g., PinOnTop.ahk).
- Double-click the saved script file to run it.
- Now, you can press Ctrl + Space to toggle the "always on top" state for the active window.
Note: It is highly customizable, suitable for users comfortable with basic scripting, no dependency on external software. However, the initial setup requires creating and understanding an AutoHotkey script, which might be intimidating for users unfamiliar with scripting.
Pin a window on top by WinExplorer or PowerMenu (less commonly used)
WinExplorer is a free utility that allows you to manage windows and includes a feature to pin windows on top:
- Go to the WinExplorer website and download the utility.
- Launch WinExplorer and right-click on the window you want to keep on top.
- Select "Keep on Top" from the context menu.
PowerMenu is another utility that adds extra menu options to the windows of all programs, including the ability to keep windows on top:
- Search for "PowerMenu download" and find a trusted source to download the utility.
- Once installed, right-click on the title bar of any window. You should see an additional option like "Always on Top".
- Select this option to pin the window on top of all others.
Note: These utilities provide advanced window management capabilities beyond basic "always on top," but cause the potential for compatibility issues, and may be more complex than simpler tools for basic "always on top" functionality.
Final thought
In essence, pinning a window on top in Windows enhances usability, multitasking efficiency, and user experience by allowing important information or tools to remain visible and easily accessible alongside other applications. It's beneficial when quick access to information or simultaneous monitoring of multiple applications is crucial for productivity or workflow management. And if you can toggle the "always on top" state off when not needed.
Share this post and comment down below to facilitate technical know-how!