Written by
Sherry SongOver time, files on your Windows can be fragmented, meaning that pieces of data are scattered across different parts of your drive or PC. However, this fragmentation will sow down data recovery, impacting overall system performance.
Are there any fixes? Maybe you have heard of Defragmentation on Windows, it rearranges these fragmented items, making Windows access files more efficiently.
There are some defragmentation methods on Windows in our guide, let's explore how to defrag on Windows 10.
Warning: SSDs(Solid State Drives) don't require traditional defragmentation. Because Windows will recognize an SSD and apply a different optimization process (TRIM) to maintain its health and efficiency. So we here talk about defrag on Windows(mostly about HDD.)

How to defrag on Windows?
Here we summarize 4 ways to do defragmentation on Windows 10. You can choose the one you prefer most:
Way 1: Defrag with Optimize Drives tool
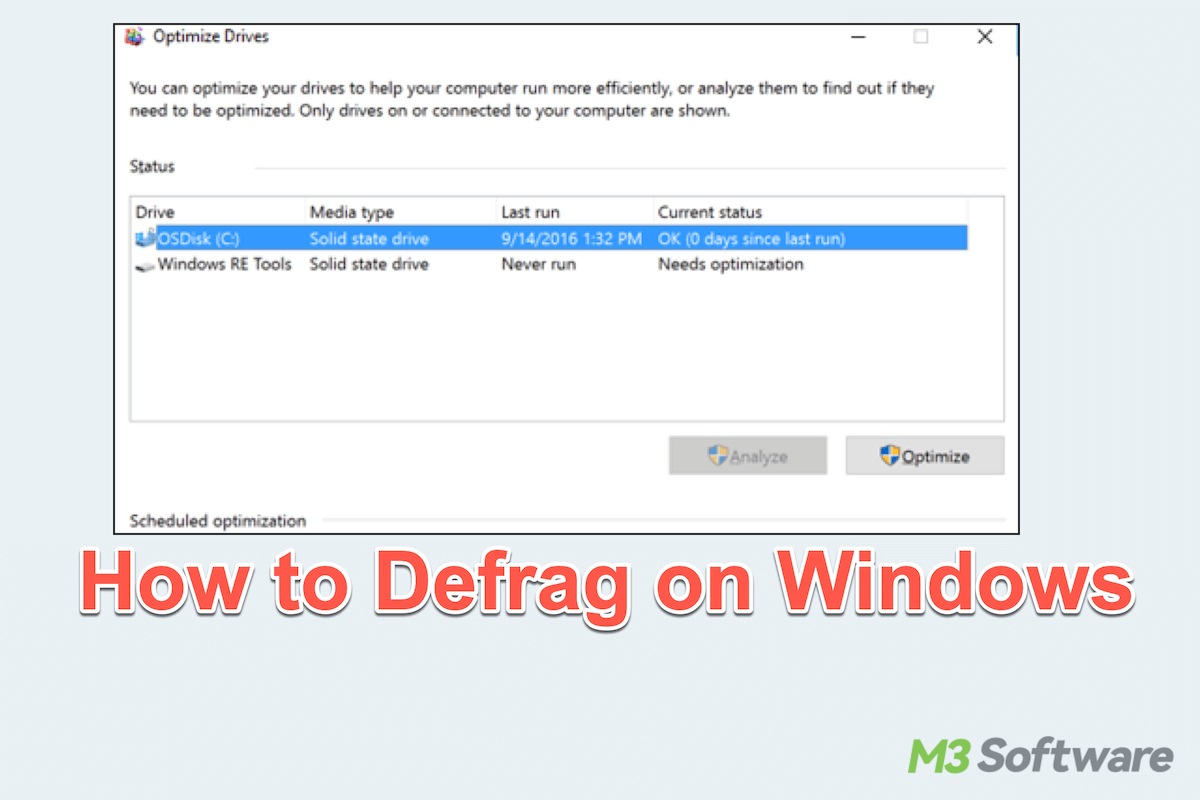
Windows includes a user-friendly, built-in defragmentation tool that is effective for most users. This tool is accessible through the system settings and can be used for both one-time and scheduled defragmentation.
- Open the Start menu, type “Defragment and Optimize Drives”, and select it from the list.
- In the “Optimize Drives” window, you'll see a list of available drives.
- Select the drive you want to defragment and click “Analyze” to check if it needs defragmentation. If it's over 10% fragmented, it may benefit from optimization.
- Click “Optimize” to start the defragmentation process.
For allowing disk defragment to run automatically, Windows can also handle this on a set schedule. Open Defragment and Optimize Drives > Change Settings > Tick Run on a schedule > Choose Daily/Weekly/Monthly > Choose the drive and click OK.
Note: Weekly scheduling is usually sufficient for general use, but you can increase the frequency if you frequently add and delete large files.
Way 2: Defrag with Command Prompt
For users comfortable with command-line operations, the Command Prompt offers a quick way to defragment Windows 10.
- Open the Start menu, type cmd, and select “Run as administrator”.
- Type “defrag C: ”then press the Enter key. (Replace C with the letter of the drive you want to defragment.)
Way 3: Defrag with PowerShell
PowerShell, another command-line interface in Windows, provides commands for defragmenting on Windows 10:
- Right-click the Start button and select “Windows PowerShell(Admin)”.
- Type the command “Optimize-Volume -DriveLetter C”. (Replace C with the drive letter of your drive.)
- Press the Enter key to start the process.
If you succeed in defragmenting on Windows 10, please share these ways with others. If not, continue trying the next.
Way 4: Defrag with Windows Task Scheduler
Using Task Scheduler, you can set up a customized defrag schedule that meets your specific needs. Let's do Windows 10 defragmentation:
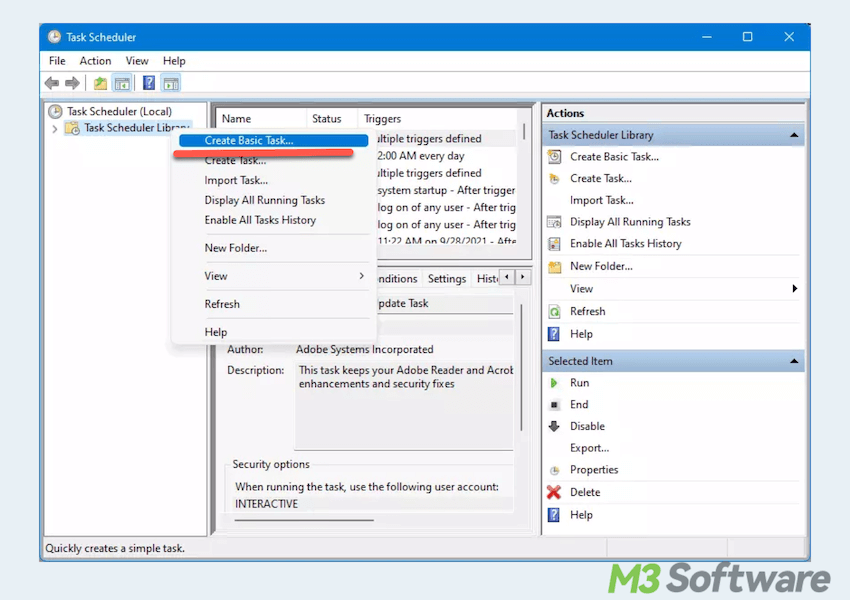
- Open the Start menu and search for “Task Scheduler” in the search box.
- In Task Scheduler, click “Task Scheduler Library” > “Create Basic Task”.

- Name the task and set a “Trigger”.
- Choose “Action” > “Start a program” > “Next”.
- Type “defrag C:” and click Finish.
Bonus: Tips for Defragmentation on Windows
For defragmenting on Windows, here are some tips you can follow:
- Check drive type: Defragmenting is only beneficial for HDDs (Hard Disk Drives). SSDs don't need traditional defragmentation.
- Backup your data: Always back up important files before defragmenting to avoid any risk of data loss.
- Avoid interrupting the process: Defragging can take a while, depending on drive size and level of fragmentation. Avoid interrupting the process for optimal results.
By using these methods, you can ensure your drives stay well-maintained and run smoothly.
You must know how to defrag on Windows 10, so why not share this post?
