
Written by
Wilsey YoungWindows Defender is Microsoft's built-in antivirus and anti-malware software for Windows operating systems. It provides real-time protection against viruses, malware, spyware, and other malicious software threats that may harm your computer or compromise your data.
Does Windows Defender automatically scan USB drives? This post mainly discusses this question and tells you how to enable Windows Defender to scan USB drives automatically via Windows Registry and Local Group Policy Editor on your PC. Files lost due to automatic scanning from Windows Defender can be easily recovered via iBoysoft Data Recovery for Windows.
Does Windows Defender automatically scan USB drives?
The answer to "Does Windows Defender automatically scan USB drives?" depends on the versions of the Windows operating system. Previous versions of Windows Defender had the capability to scan removable USB drives, but this feature has been removed from the main Defender settings without any official statement or explanation.
It is likely that this change was made due to concerns about potential data loss or corruption if a USB drive is disconnected before scanning is complete.
You can share this post with your friends
How to enable Windows Defender to scan USB drives automatically?
You can set a Local Group Policy or Windows Registry that allows you to manage whether or not Windows Defender scans removable drives automatically.
Local Group Policy Editor: Enable Windows Defender automatic USB drive scan
You can open Local Group Policy Editor and make Windows Defender scan USB drives automatically when it's inserted.
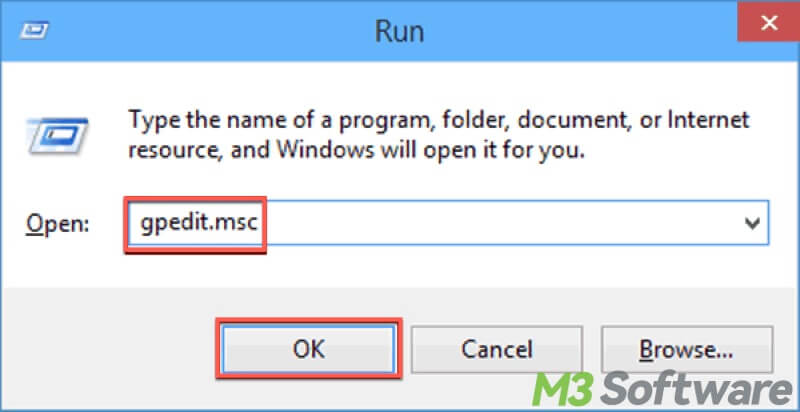
- Press the “Windows + R” keys to open the Run dialog box on your PC.
- Type “gpedit.msc” and click “OK” or hit the “Enter” key on your keyboard.
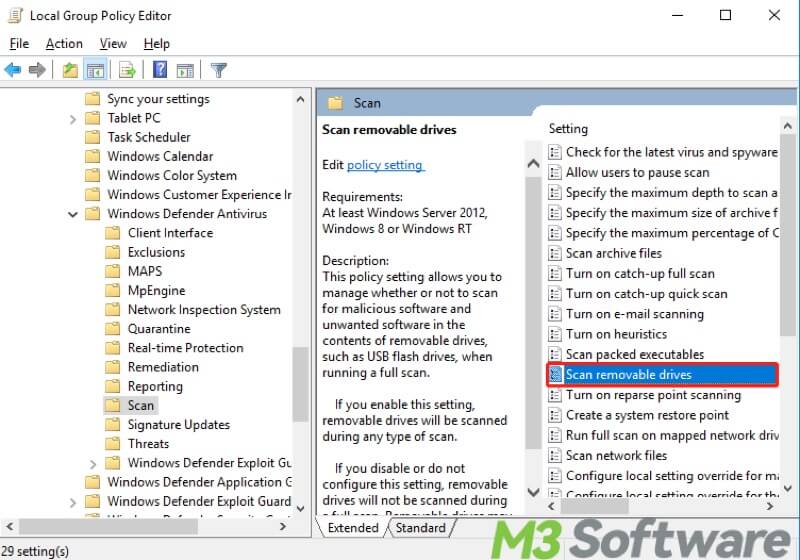
- Navigate to the Configuration directory>Administrative Templates>Windows Components>Windows Defender Antivirus>Scan. Click the Scan folder.
- Locate the “Scan removable drives” on the right and double-click on it.
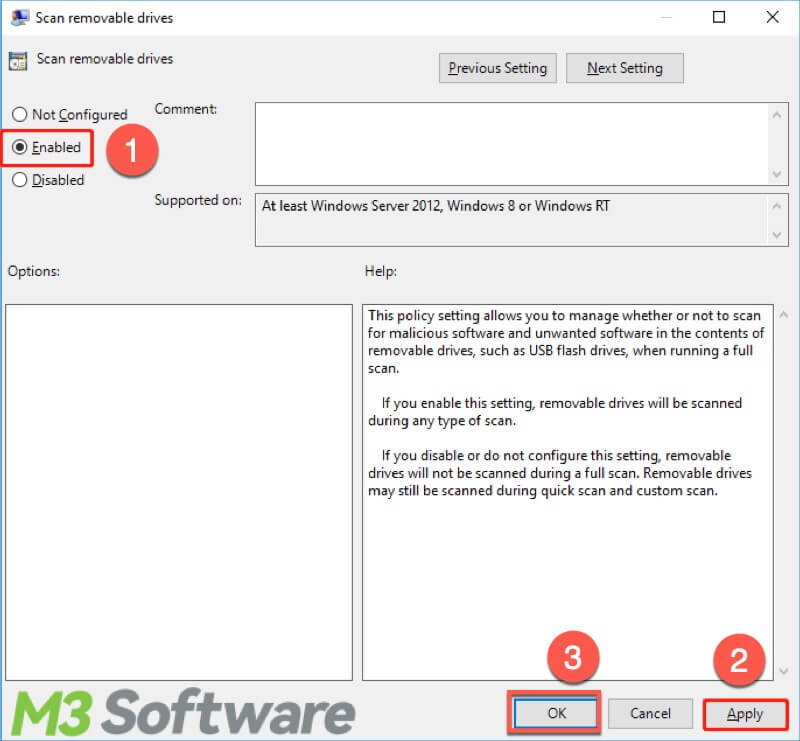
- A new window pops up. Click the “Enabled” option to make it active for your Windows computer. Click “Apply” and “OK” to confirm your decision.
Windows Registry: Enable Windows Defender automatic USB drive scan
Windows Registry serves as a repository for configuration information, user preferences, system settings, and other critical data needed by the operating system and applications to function properly. So Windows Defender automatic scanning can be enabled via Windows Registry.
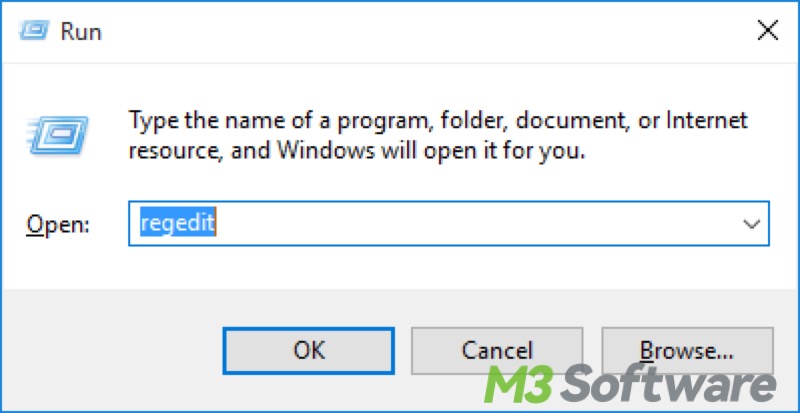
- Press the “Windows+R” keys to open the Run dialog box.
- Type “regedit” in the box and hit the “Enter” key on your keyboard.
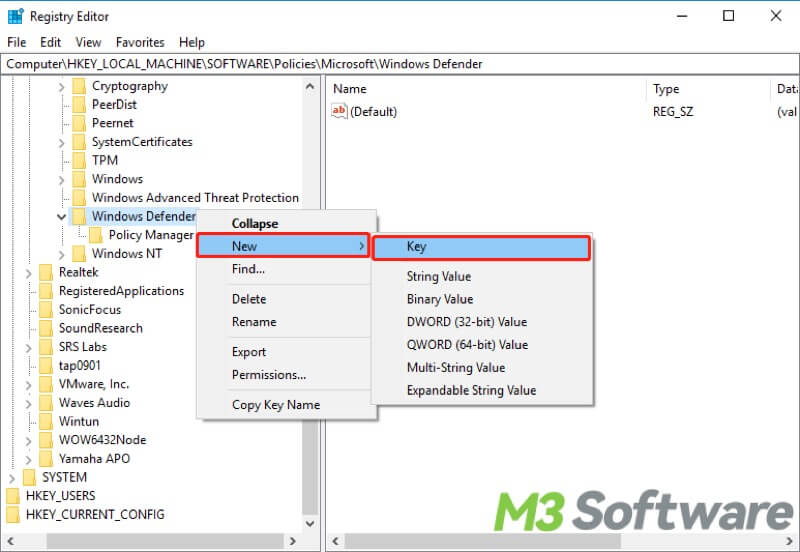
- Copy and paste the following path into the Address Bar and hit the Enter key on your keyboard: HKEY_LOCAL_MACHINE\SOFTWARE\Policies\Microsoft\Windows Defender
- Locate Windows Defender on the left side panel, right-click to select New>Key. Change the newly created Key's name to Scan.
- Select the new key, right-click the blank space in the right panel, and choose “DWORD (32-bit) Value”.
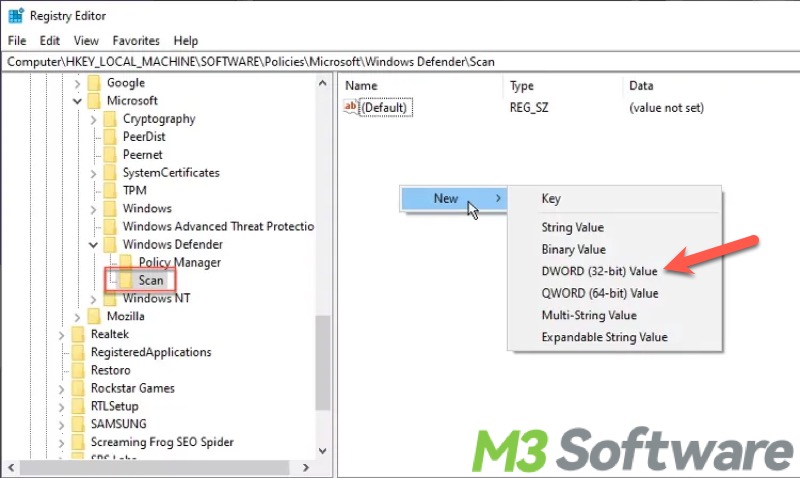
- Rename the DWORD to “DisableRemovableDriveScanning”. Please notice that there's no gap between each word.
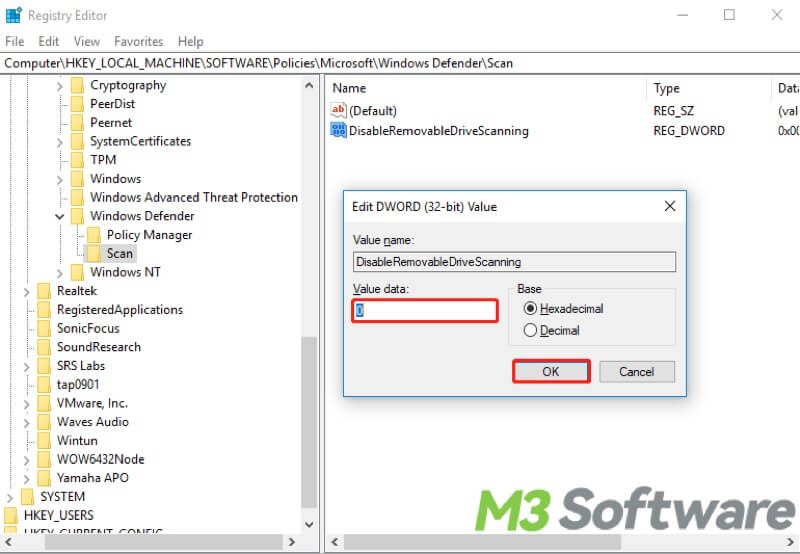
- Double-click the “DisableRemovableDriveScanning” and make sure the “Value Data” is 0. Then click “OK” to confirm.
How to recover data lost during Windows Defender Scanning
As this post mentioned above, files and data on the USB drive may get lost if a USB drive is disconnected before scanning is complete. In this case, it's recommended that you use iBoysoft Data Recovery for Windows to get the lost files back easily and quickly.
iBoysoft Data Recovery for Windows is a handy and professional data recovery tool that can help restore lost or deleted files from SSD, HDD, USB flash drives, or other storage devices. More than 1000+ types and formats of files are supported.
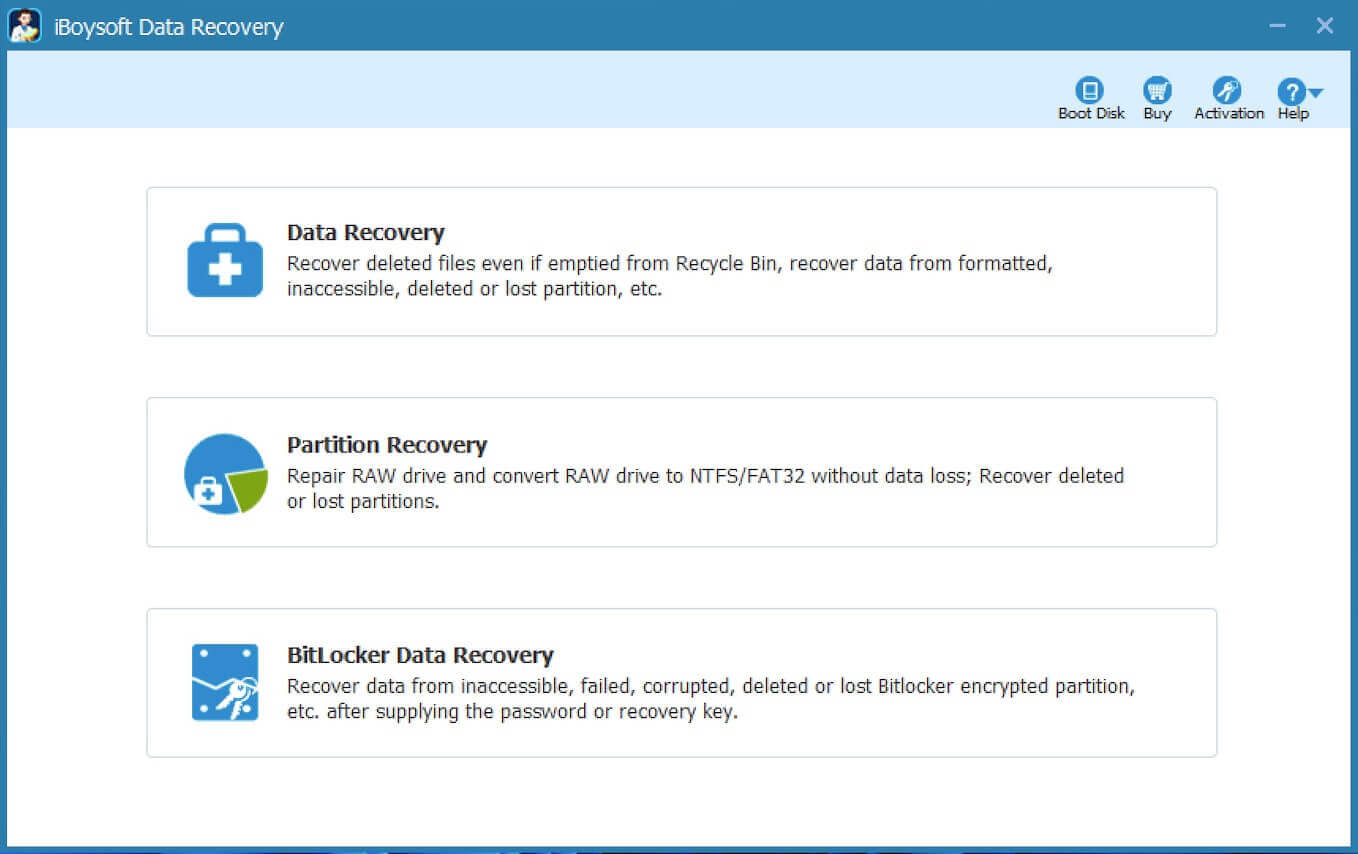
- Download, install, and launch iBoysoft Data Recovery for Windows.
- Select the “Data Recovery” module.
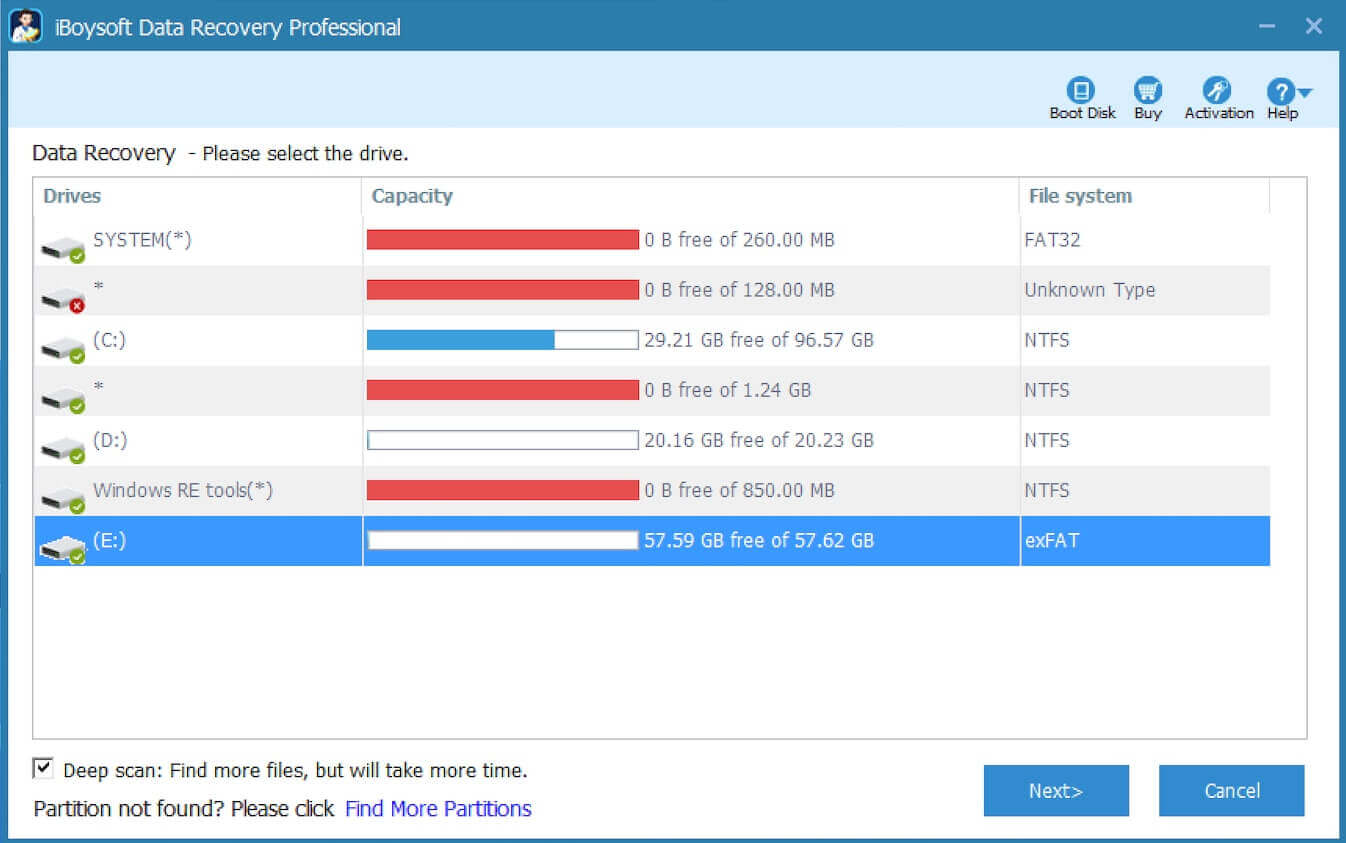
- Select the USB flash drive from which you want to restore the files and click "Next“ to start scanning.
- After the scanning is complete, you can preview the recoverable files.
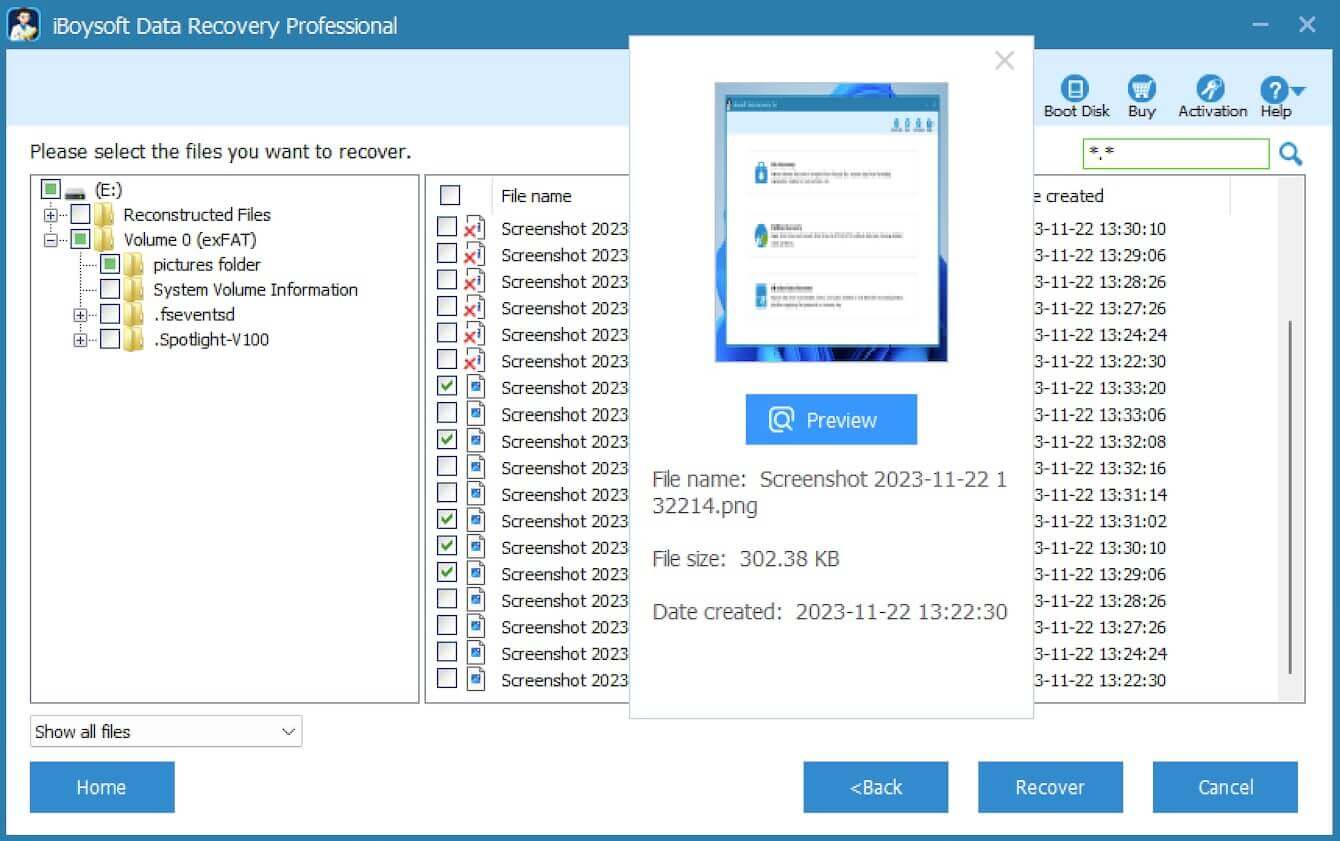
- Tick the files you want and click “Recover” to start the recovery.
Note: The recovered files should be saved to a different location to prevent further data loss caused by overwriting.
You can share this wonderful data recovery tool with your friends on social media